Redirects
Page redirects allow you to automatically send visitors from one URL to another, ensuring a smooth user experience when content is moved, renamed, or removed. They help prevent broken links, preserve search engine rankings, and guide users to the most relevant or updated version of your content.
CMS
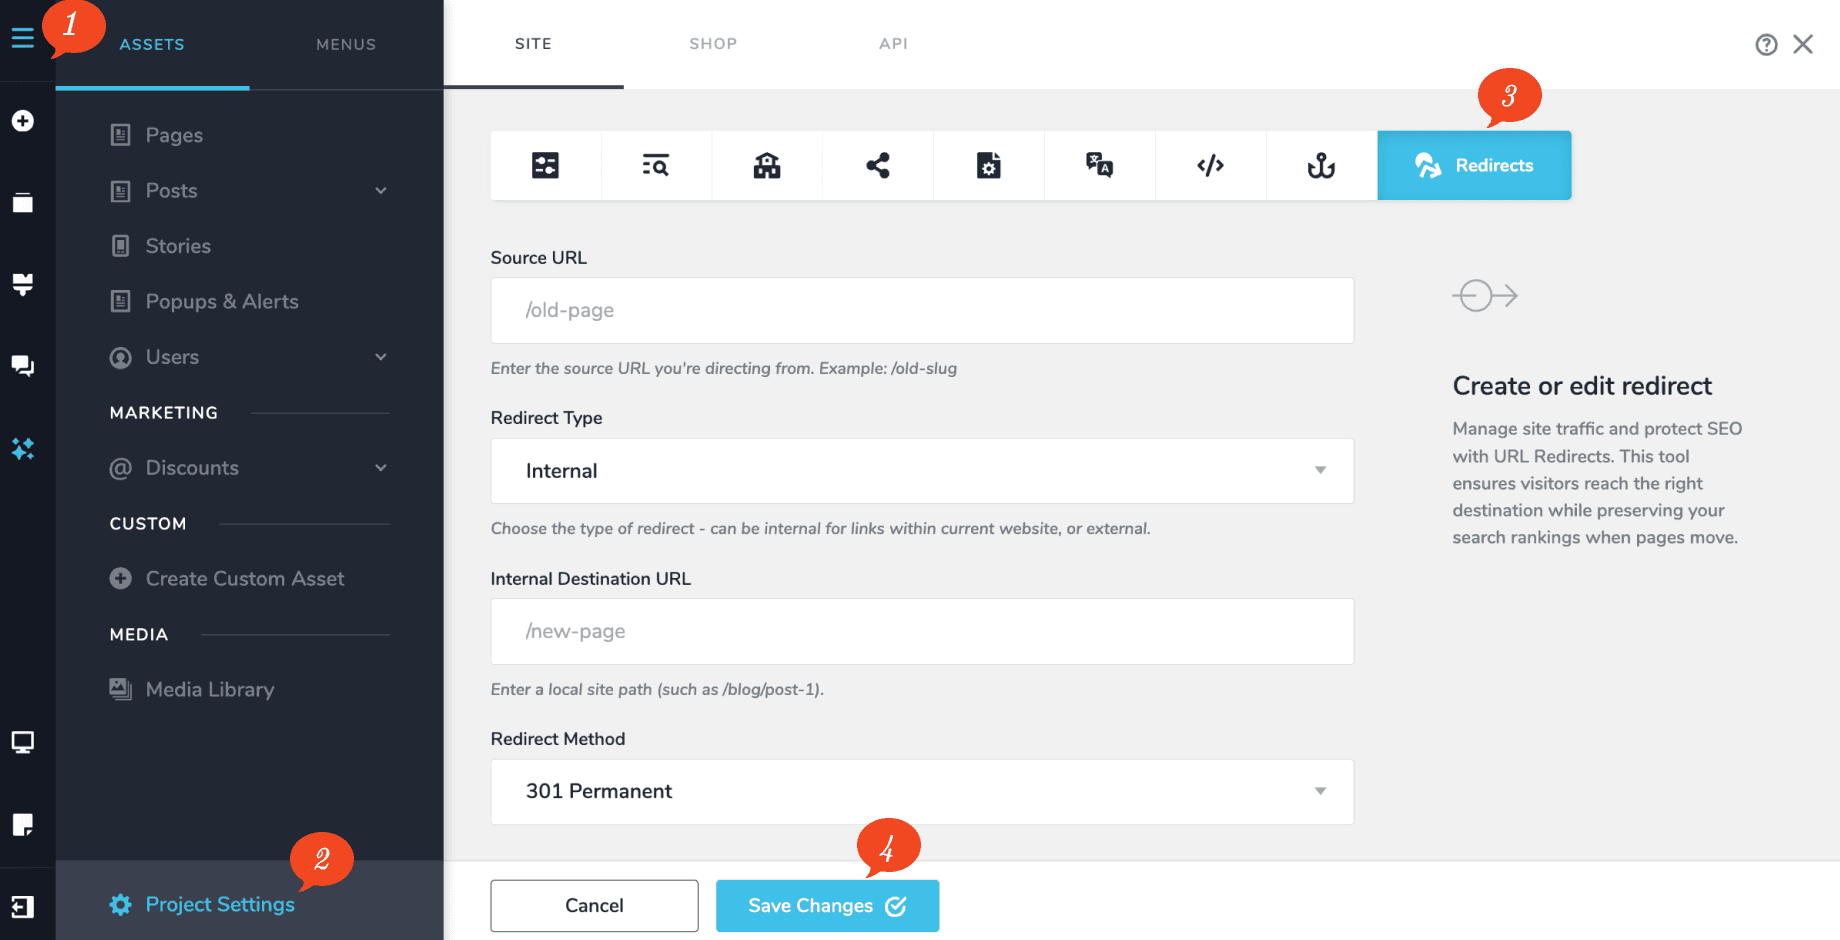
Start by clicking the CMS icon in the top-left corner of the interface.
Project Settings
Next, select Project Settings.
Redirects Tab
Then open the Redirects tab located at the top of the Settings panel. The Create or edit redirect form appears, with four fields to fill in.
| Field | What to enter |
|---|---|
| Source URL | The old address you are sending visitors away from, such as /old-slug. |
| Redirect Type | Internal for a destination on this website, External to send visitors to a different website. |
| Destination | Where visitors land instead. The field changes with the type you chose — see below. |
| Redirect Method | 301 Permanent tells search engines the page has moved for good, so your ranking follows it to the new address. |
Internal or external. The Redirect Type decides what the destination field asks for:
- Internal — a path on this website, written from the slash:
/blog/post-1 - External — the full address of the other website, including
https://
A real example of each. Your About page moves from /about to /new-about. Put /about in
Source URL, leave the type as Internal, put /new-about in the destination, and keep 301 Permanent.
Anyone following an old link or bookmark now arrives at the new page instead of an error.
For an external one, you might send /shop to a marketplace you sell on: source /shop, type
External, destination https://www.example.com/our-store.
An external redirect takes visitors off your website entirely. They leave your site and your navigation behind, so use it only when that is what you want.
Save Changes
Click Save Changes at the bottom. Nothing takes effect until you do. Add another redirect by filling in the form again.