How to build a page
Now that you are familiar with the builder interface, you can move on to creating a new page from scratch. Start by adding a new page in the CMS, then open it in the editor. From there, you can begin in two ways: build entirely from scratch by adding widgets and shaping your layout, or start from a prebuilt block.
Prebuilt blocks are ready-to-use sections that combine multiple widgets, layouts, and content elements into a complete page section. Instead of building each section from scratch, you can insert a prebuilt block and customize its content and design to fit your project. When you insert a block, it automatically adopts your project’s global colors and typography.
Page Creation & Management
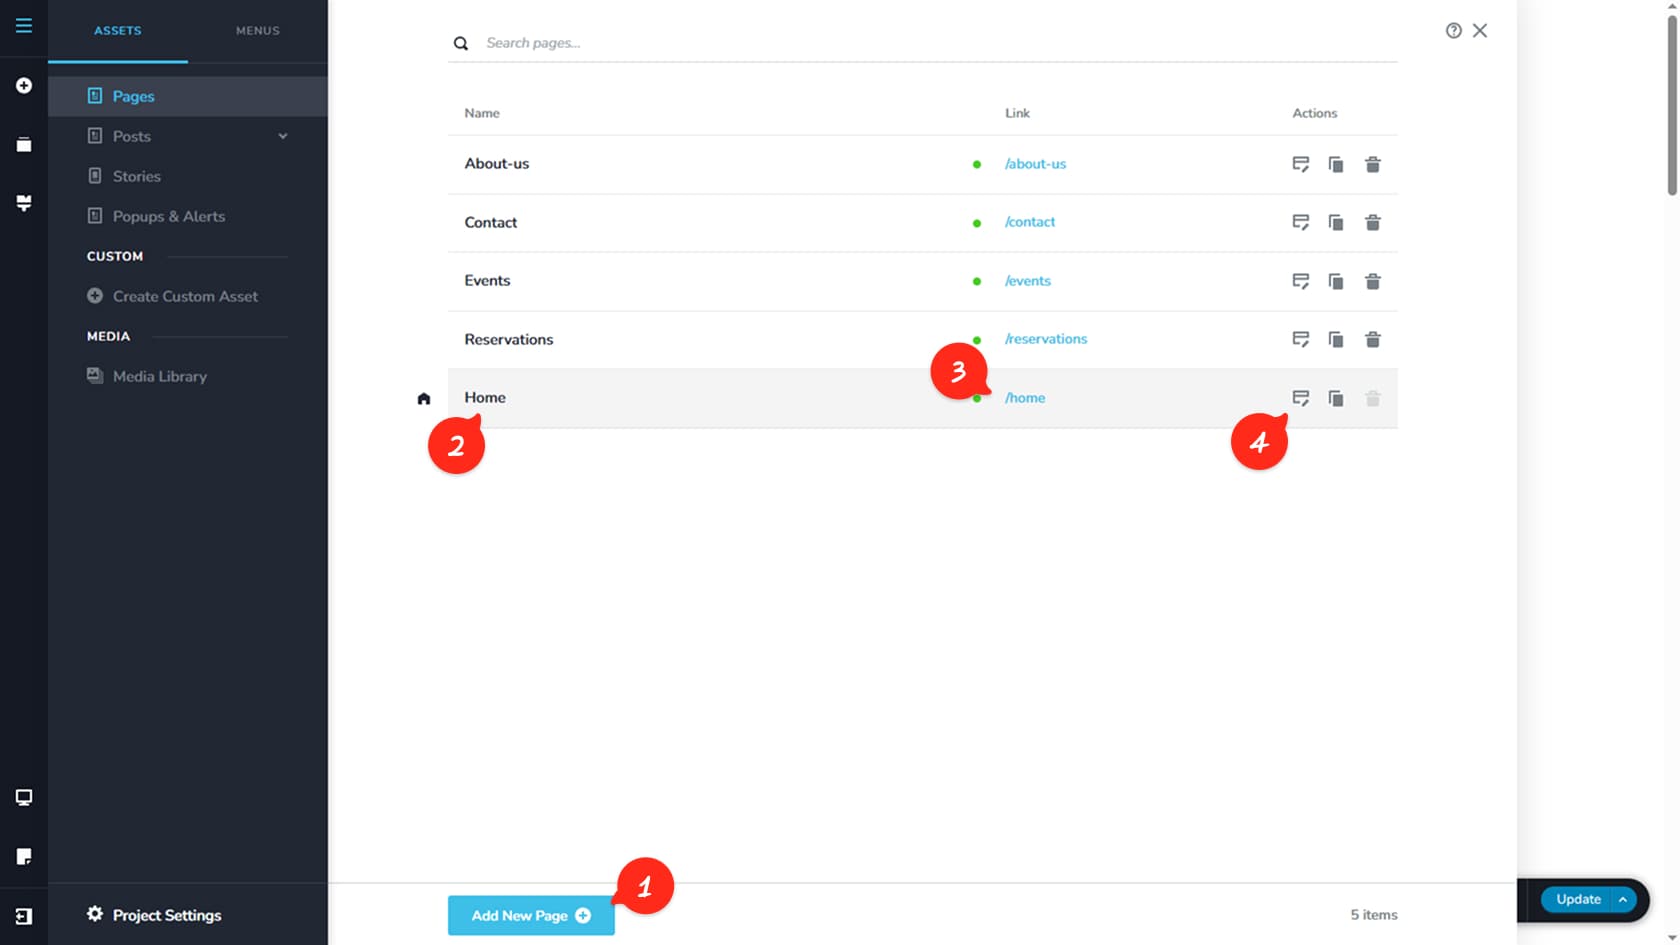
We can start the process by creating a page in the Pages assets panel.
Add New Page
Creates a new page and adds it to your page list.
Page Details
Opens the settings and details for a selected page.
Page Preview
Opens a preview of an already published page in a new browser tab.
Page Actions
Lets you open the page in the editor, duplicate it, or delete it. The homepage cannot be deleted until another page is set as the homepage first.
Page Details
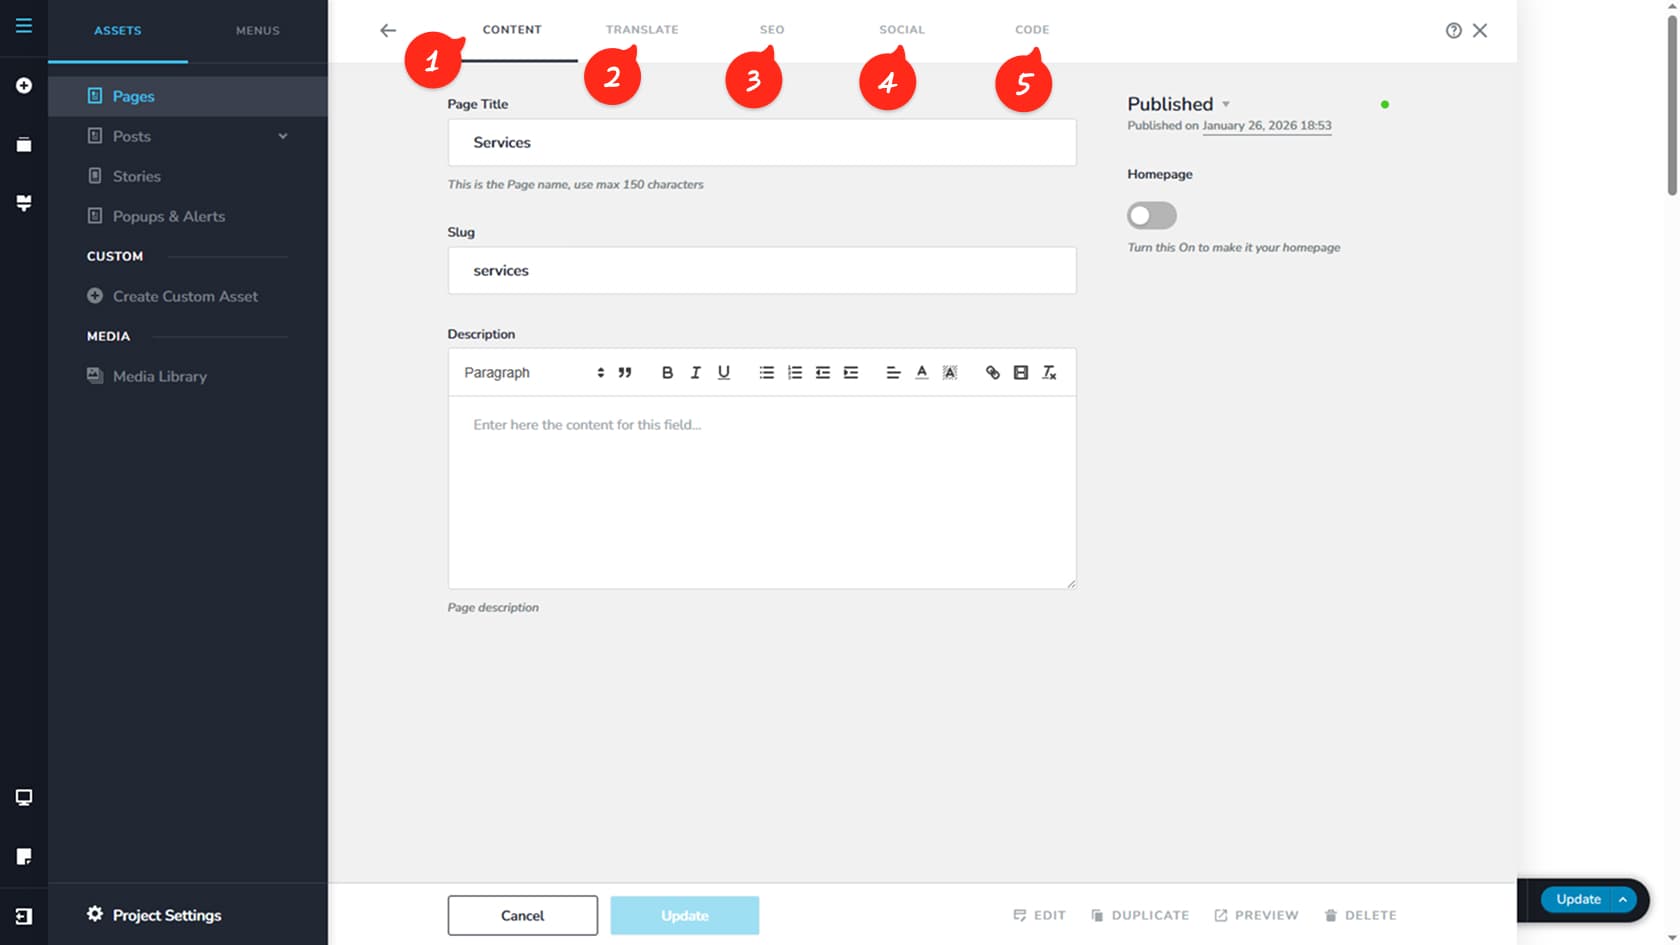
Page Content
This section lets you view and update key page settings, including the title, slug, and description. You can also control the page status by setting it to Published, Draft, or Password Protected, and choose whether it should be the project homepage. Only one homepage can be set at a time. From here, you can open the editor using the Edit button, as well as duplicate, preview, or delete the page.
Translate Page
This takes you to the Translate option in Project Settings, where you can configure a translation API using a Google Translate key. For step-by-step guidance, see Get a Google Translation API key.
SEO
Here you can configure page-level SEO settings such as the SEO title, description, and schema markup. You can also disable search engine visibility if needed. This option is enabled by default for new pages. A canonical URL can also be set to help prevent duplicate content issues during indexing.
Social
Use this tab to control how the page appears when shared on social media. You can edit the share title and description and upload a thumbnail image.
Custom Code
This section allows you to add page-specific custom CSS, along with code injection in the header and footer.
Blocks
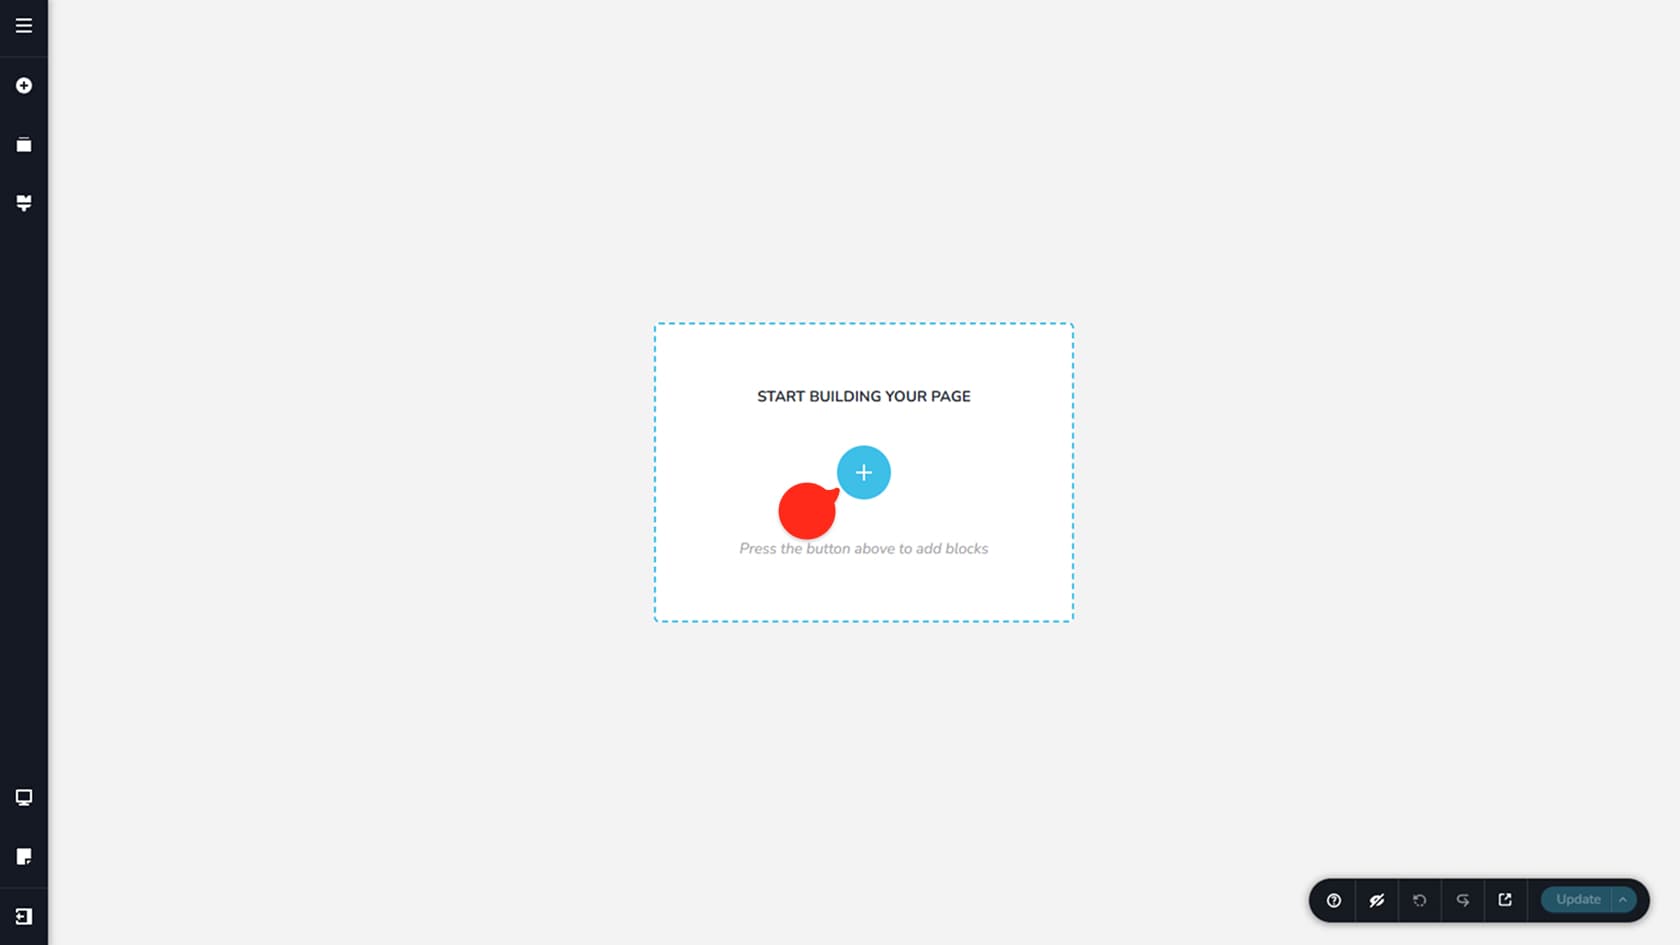
Once you start editing a fresh page, you will see the option to add a new block.
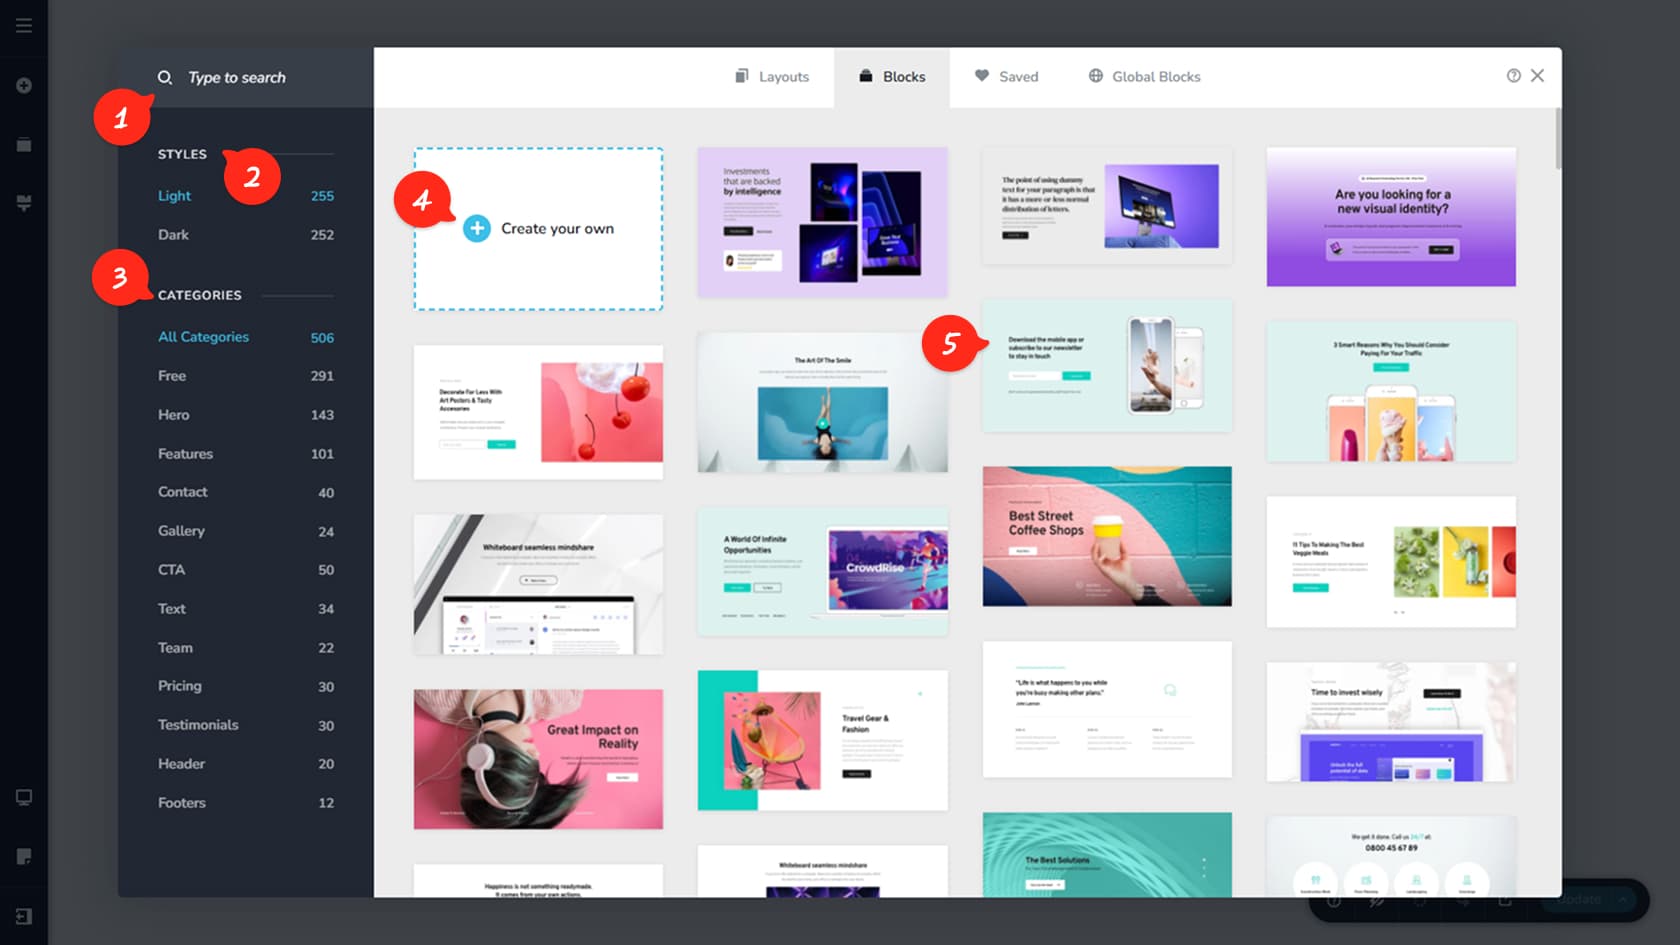
Search for a Block
The Blocks panel includes a search field, so you can quickly find a block that matches what you want to build.
Styles
Blocks are available in two default styles: light and dark. You can switch between them while browsing or searching.
Block Categories
Blocks are grouped into categories. Select a category to narrow down your options and find the right layout faster.
Create Your Own
If you prefer to start with a blank layout, choose “Create your own” to insert an empty block. From there, you can add widgets and build your design from scratch.
Import an Existing Block
To use a ready-made layout, click any block from the results and it will be added to your page automatically.
Any content you insert into the builder, such as blocks, may appear with different colors and typography because it automatically inherits your global settings.