How to use Membership Blocks and Users
The membership feature lets your customers reach content that ordinary visitors cannot see.
It is what you use to build a membership website or an online course — restricting content to paying members or to particular groups of people, without needing a separate course platform alongside your website.
This guide takes you from an empty page to a working members-only area.
Building it
Add a way to log in
Add a Login element to your project. Label it something people recognise, such as Login/Register.
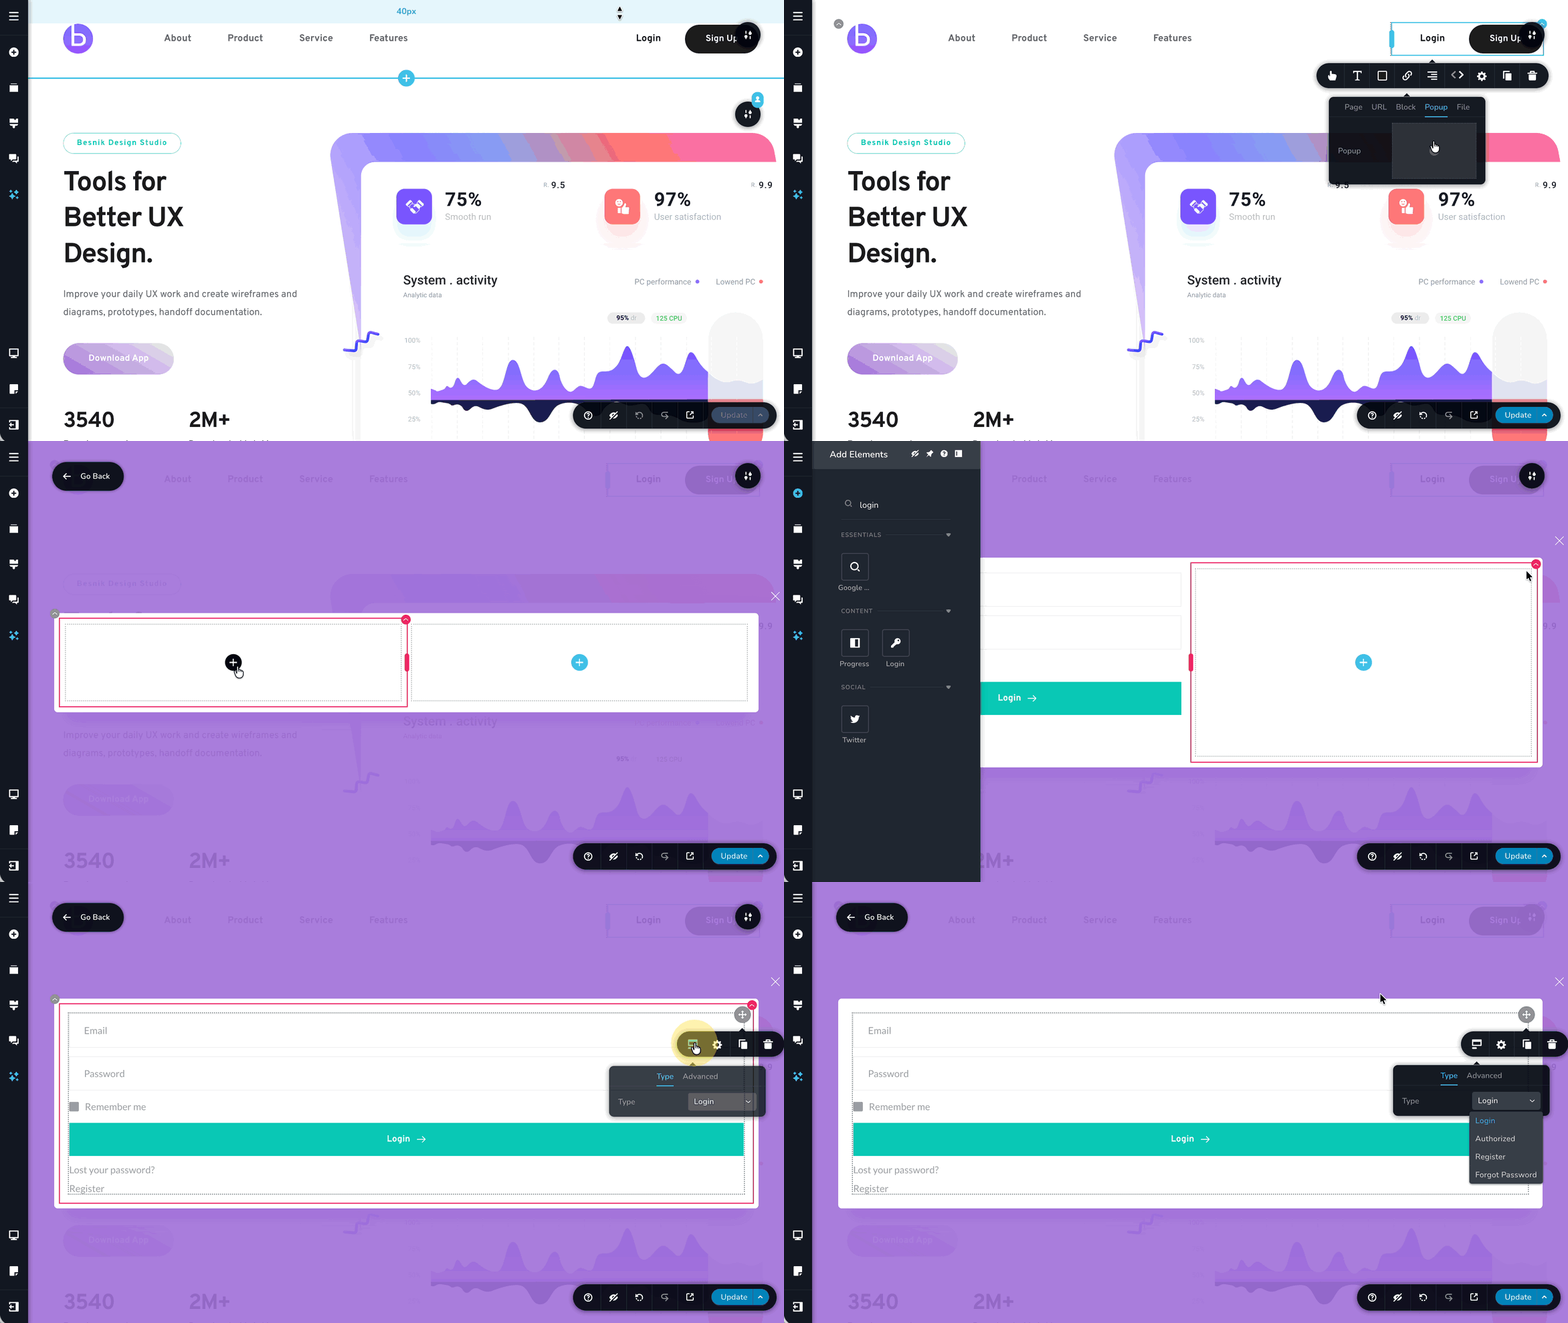
It can sit anywhere, but a popup works well — the sign-in box opens over the page instead of taking up room on it.
A tip that makes testing far easier: build a second header shown only to logged-in people. You can then tell at a glance whether you are viewing the site as a member or as a stranger.
For everything this element can do, see Login/Register.
Check who has registered
Open the CMS tab to see everyone who has registered on your project.
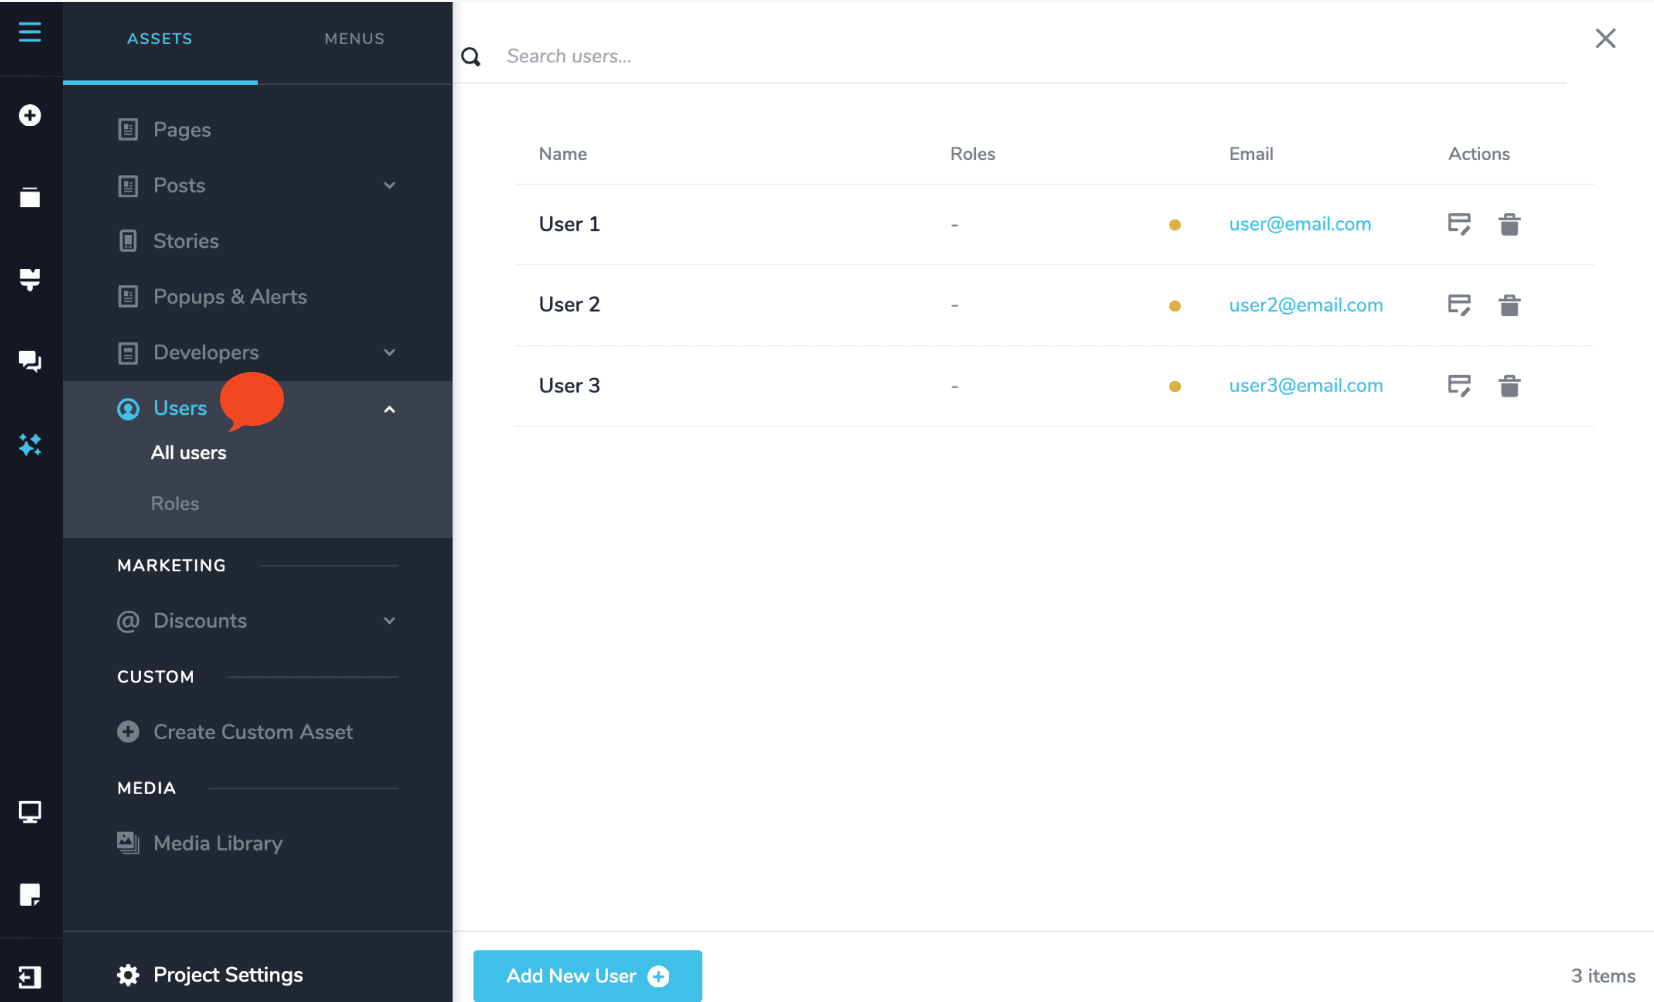
Anyone who signs up through your Login element appears here automatically.
Decide which blocks are members-only
Go through your page and decide which blocks should be available only to registered customers once they are logged in — ebook downloads, videos, a video playlist, a timetable.
Then give each of those blocks the condition: open its settings and set Display Conditions to logged-in customers.
This is the main idea behind the whole feature. Everything else on the page stays public; only the blocks you mark are held back.
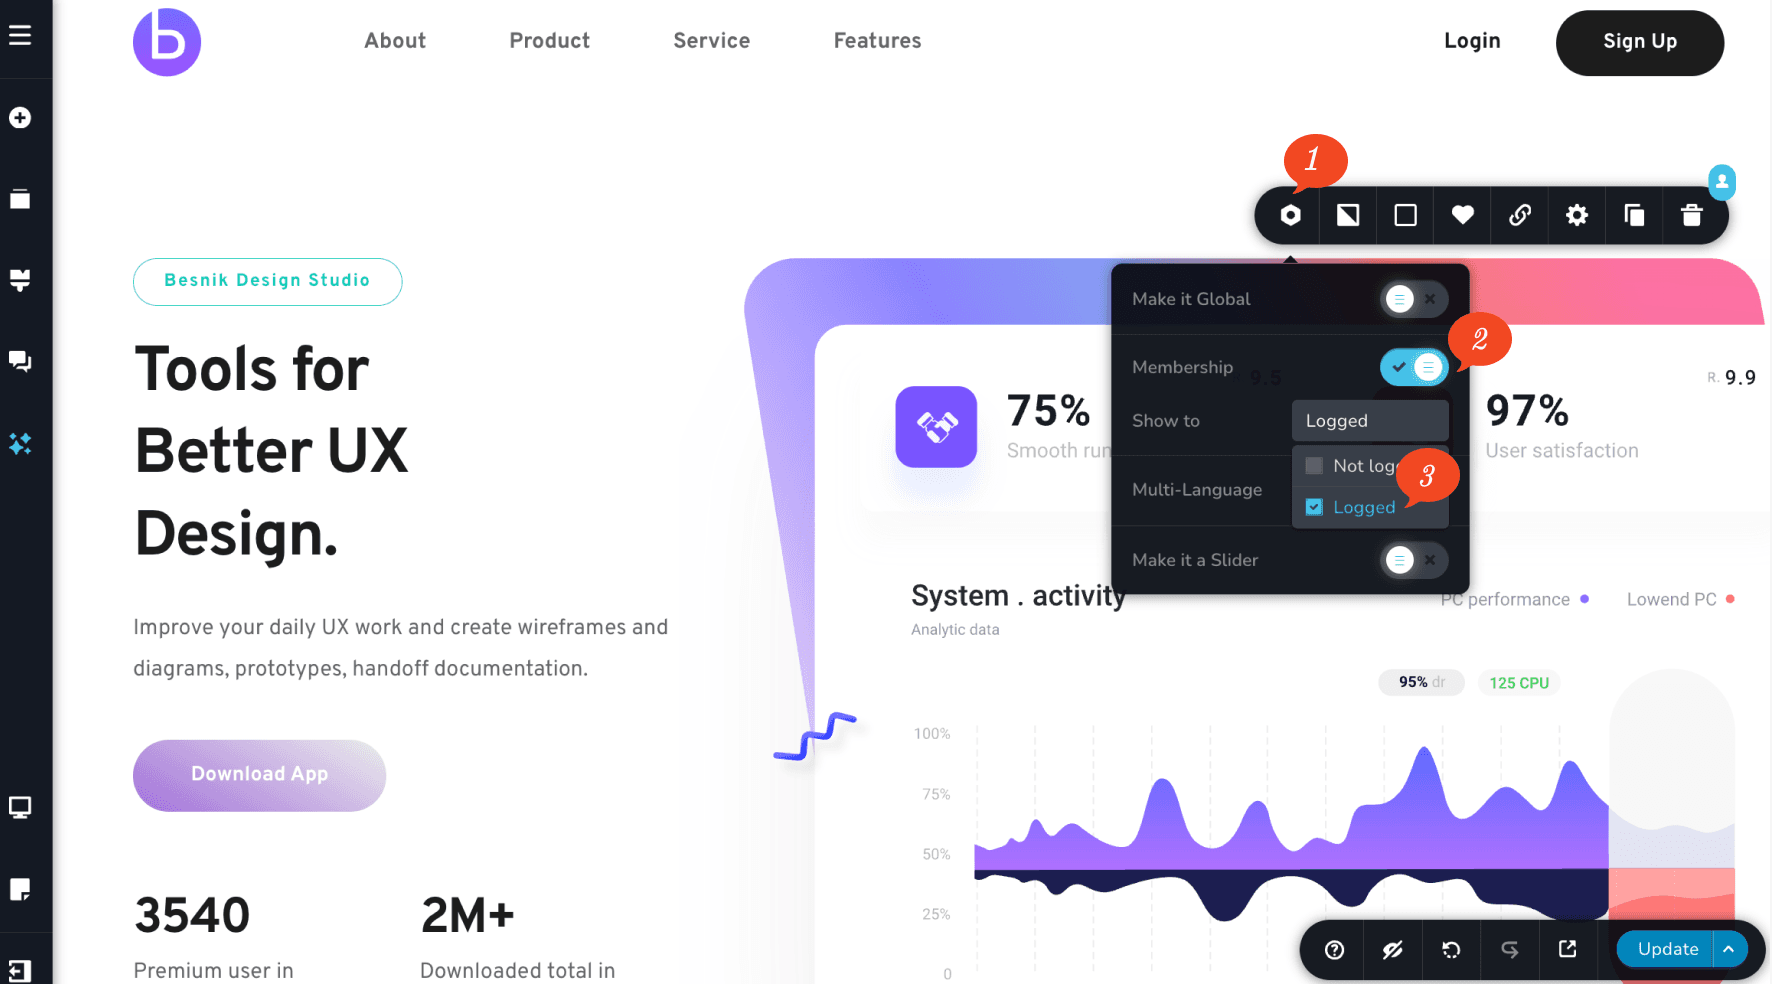
That single setting is what makes the block invisible to everyone else. See Membership blocks.
Add a user by hand
Most members add themselves, but you can create an account for someone: go to CMS › Add New User.
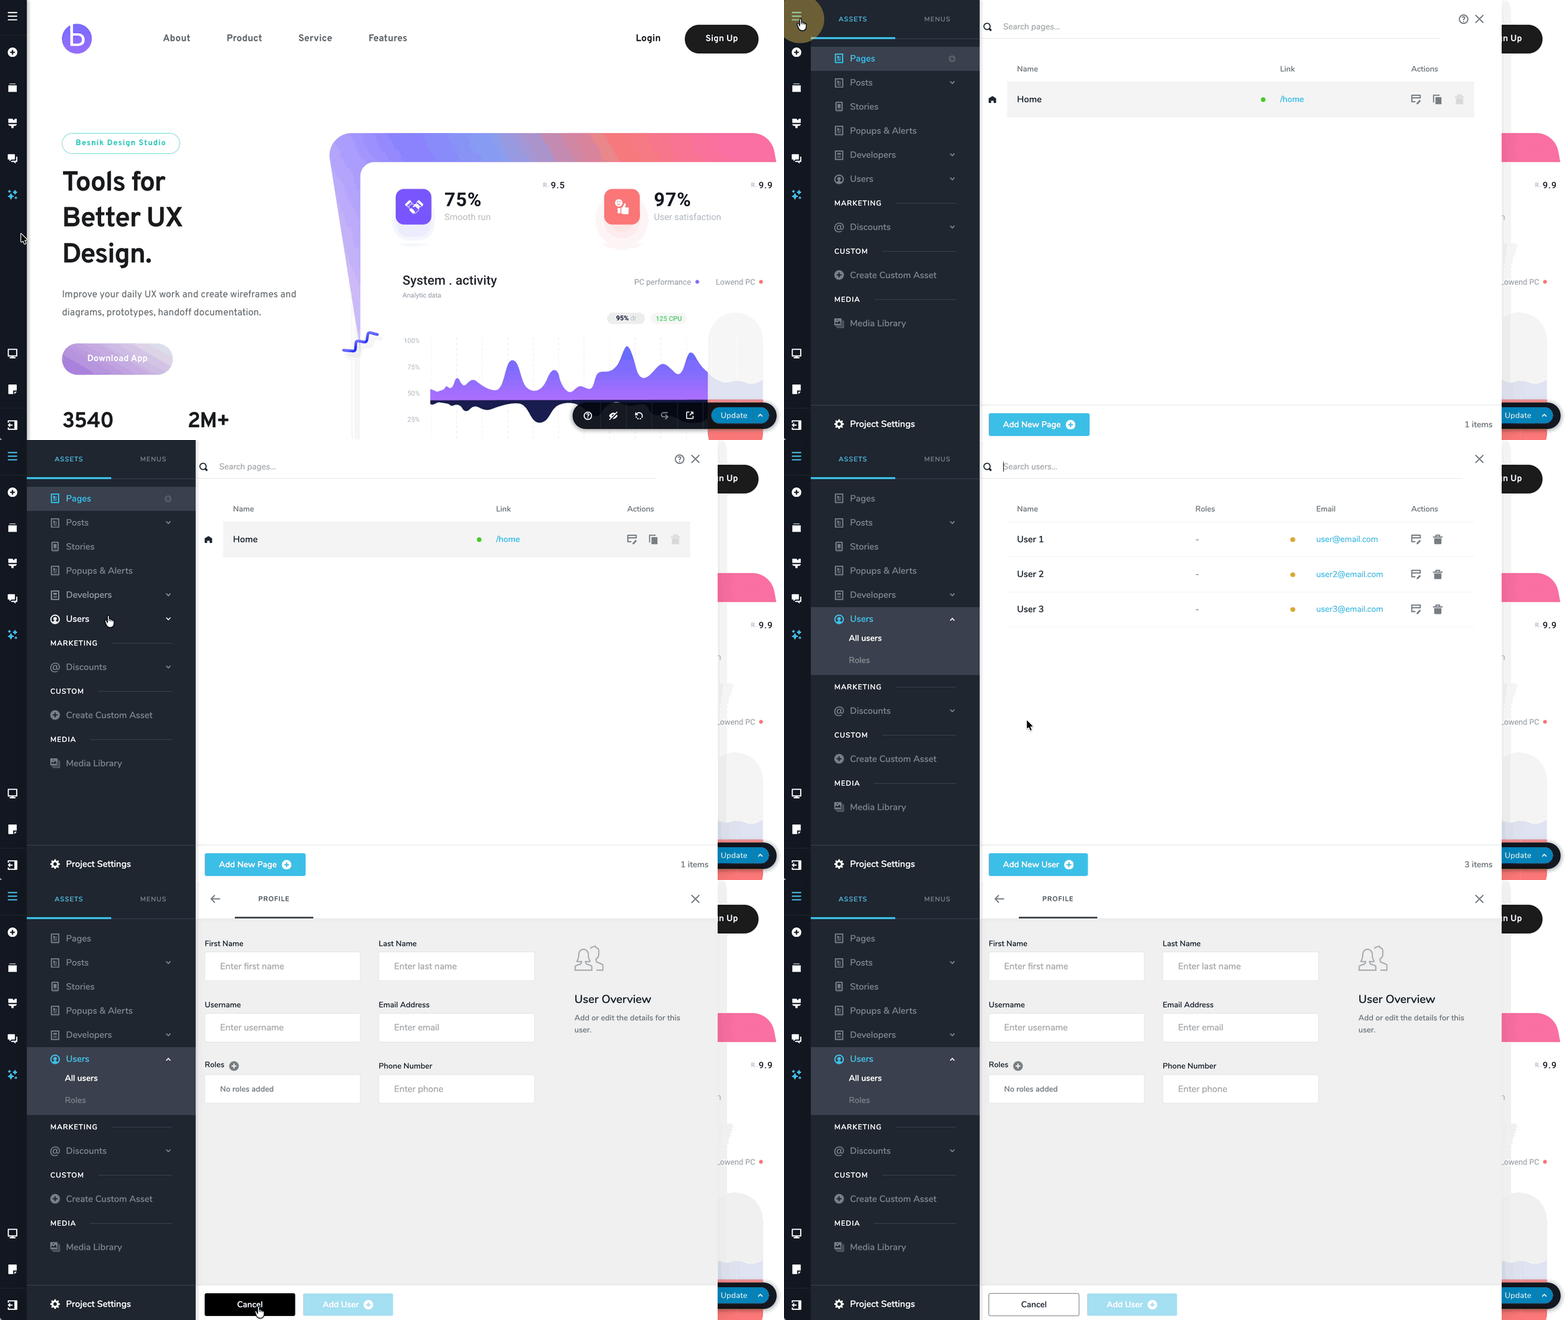
You cannot set the password yourself. For security, only the person can choose it.
They will receive an email once you add them. Ask them to click Forgot password in the Login/Register popup, follow the instructions to set a password, and then sign in.
Create roles for extra content
Create a role and assign it to particular customers when you want to give some of them extra content beyond what every member gets.
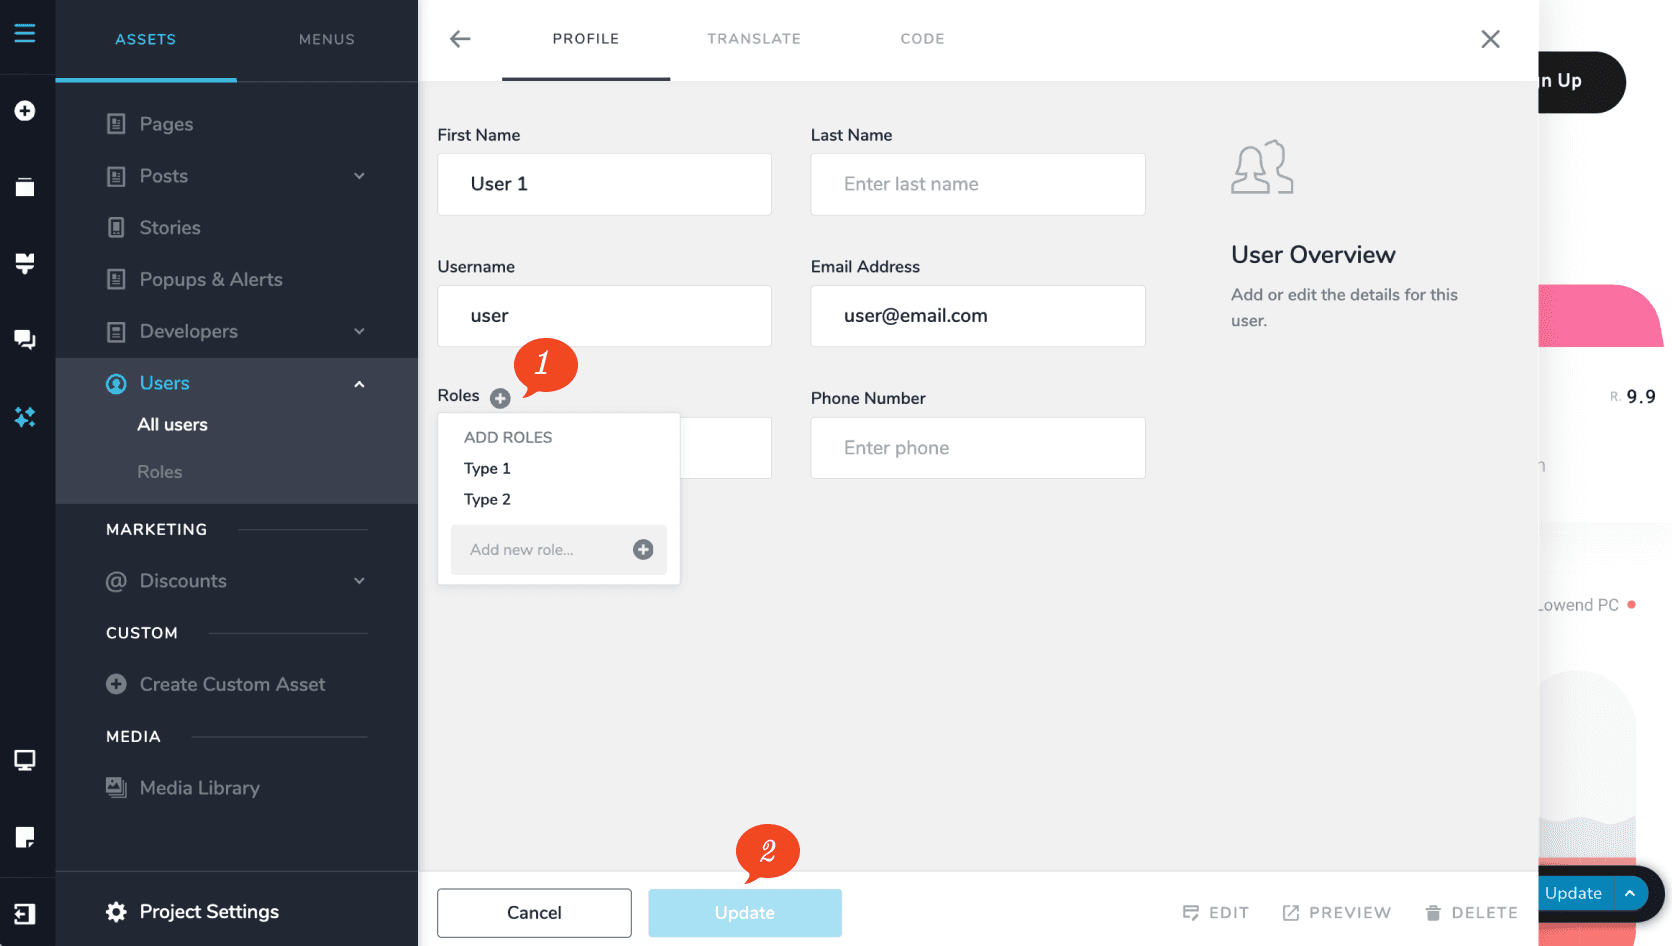
Roles let you separate your members rather than treating them as one crowd — a beginners group and an advanced group, or a basic tier and a premium one. Create the roles you need, for example Type 1 and Type 2.
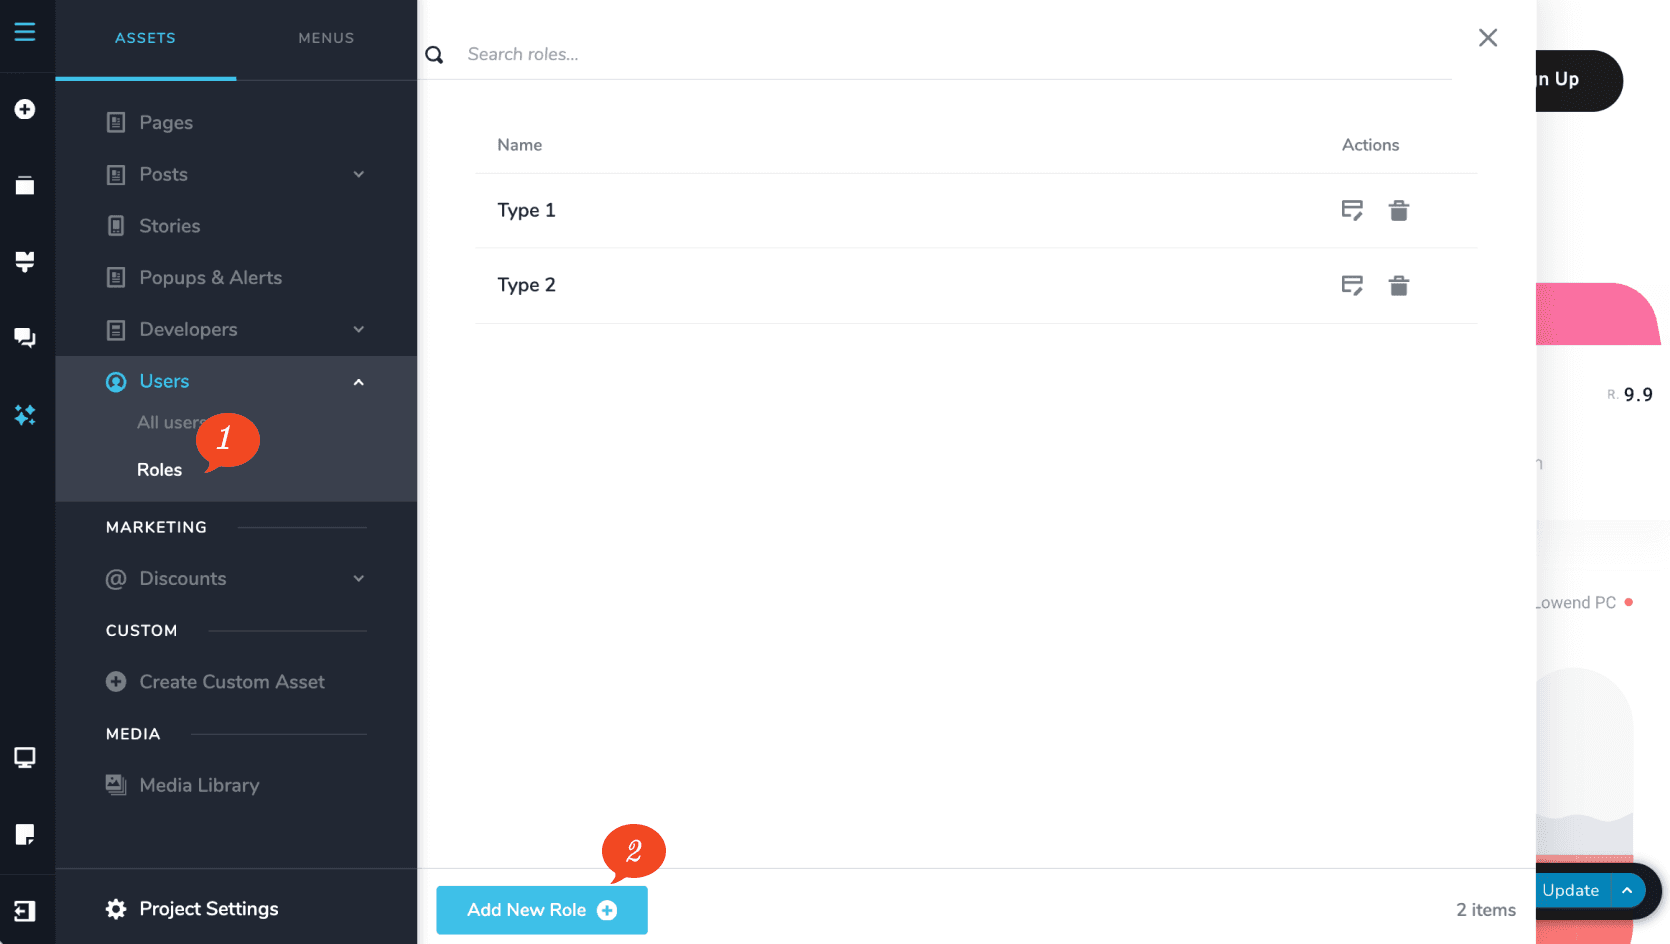
Existing members can be given a role at any time, so you do not have to decide this up front.
Then set a block’s Display Conditions to that role, so only those customers see it.
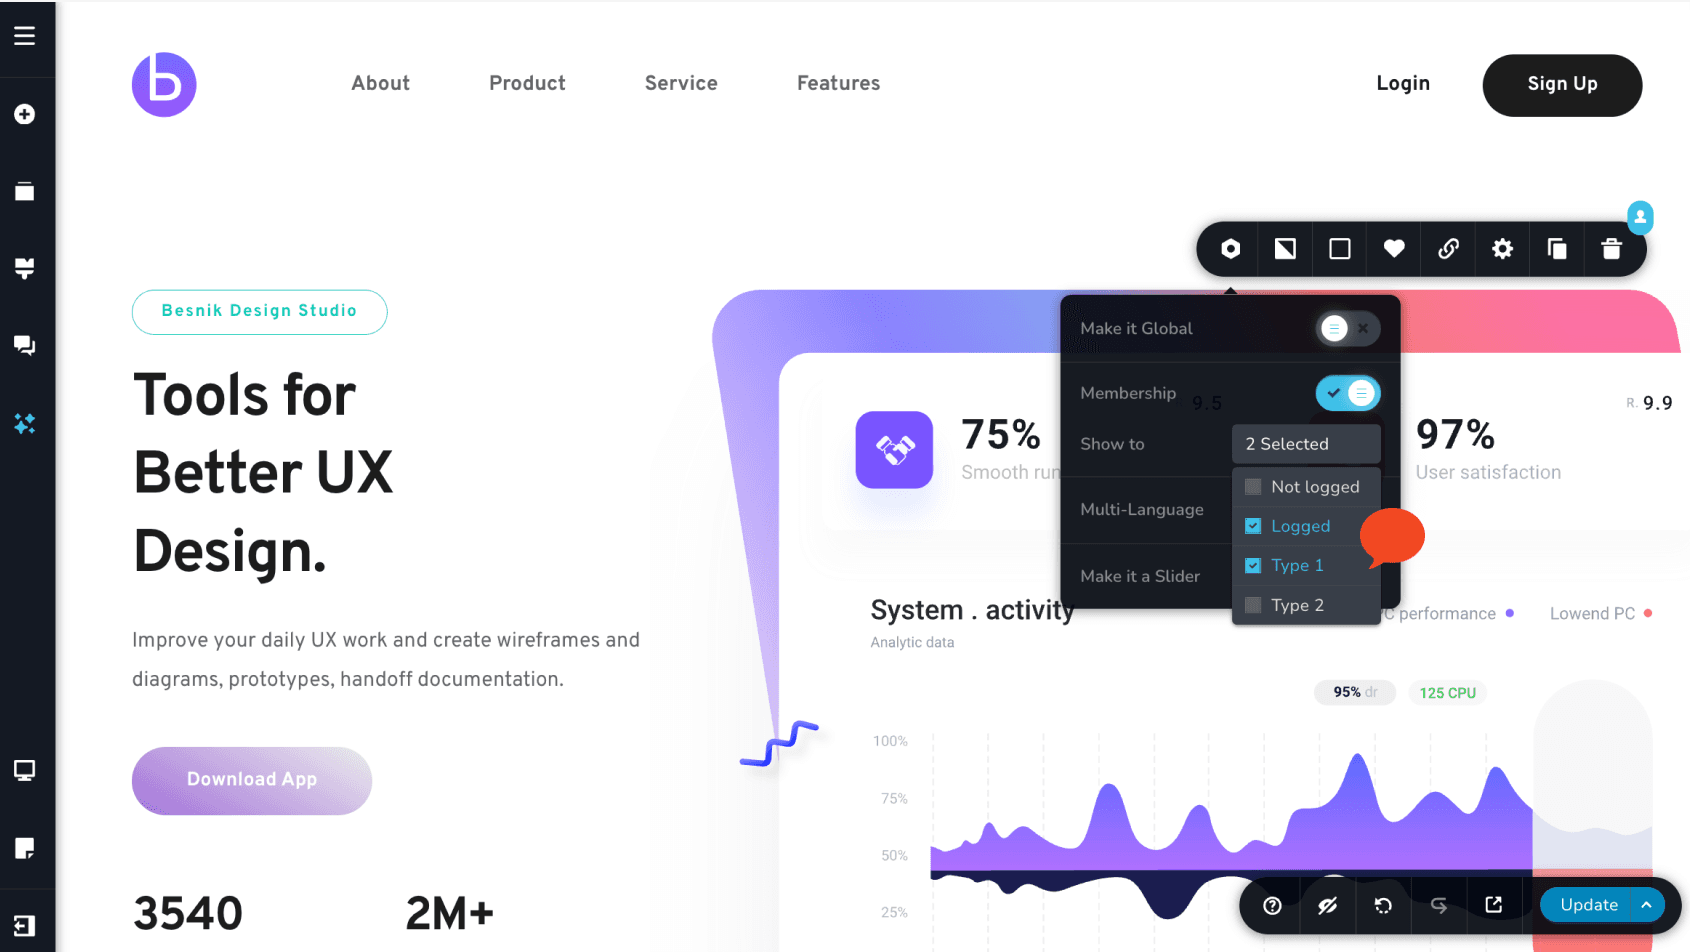
When restricting a block to a role, turn off Logged first, then add only the role you want. Leaving Logged switched on shows the block to every signed-in member, whichever role they hold — which is exactly what you were trying to avoid.
See Users & roles.
What you end up with
One website serving three kinds of visitor at once:
- Strangers see your public pages and an invitation to join
- Members see everything reserved for signed-in people
- A particular group sees material meant only for them
All on the same pages, with no duplicate versions to keep in step.
Before you launch it
Test as a real member, not as yourself. As the person building the site you can see everything. Sign in with a test account, or use View page as — see Membership blocks.
Check the sign-up path end to end. Register a fresh account, receive the email, reset the password, sign in, and confirm the members-only blocks appear. It is the one journey every paying customer takes.