How to create & link category (taxonomies) assets
A category asset is an asset whose job is to group other assets. Blog posts have Categories; your custom assets can have their own equivalent.
There is no special setting that makes an asset a category. You create it exactly like any other asset — what turns it into one is being referenced by another asset.
The example used throughout has three assets: Games, Developers and ITSolutions.
Part 1 — create the asset
Create a custom asset
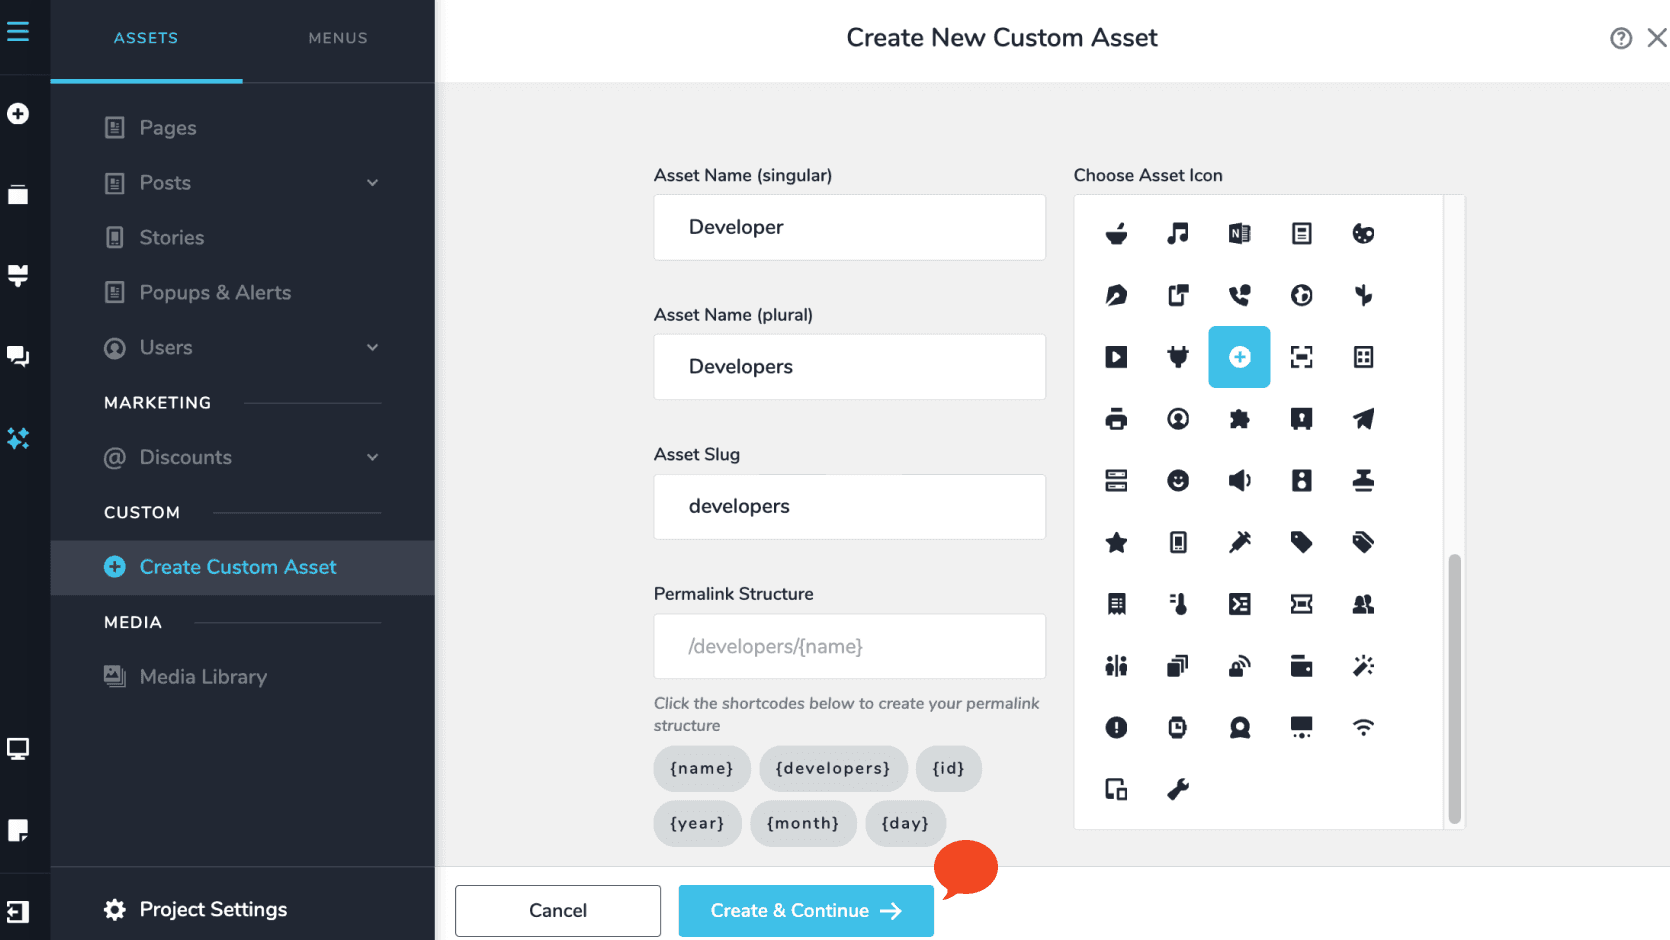
In the sidebar under CUSTOM, click Create Custom Asset and fill in the form:
| Field | In this example |
|---|---|
| Asset Name (singular) | Developer |
| Asset Name (plural) | Developers — this is the name shown in the sidebar |
| Asset Slug | developers — the folder your entries live in |
| Permalink Structure | /developers/{name} — click the shortcodes below the field to build it |
| Choose Asset Icon | Pick one. It appears beside the asset in the sidebar |
Click Create & Continue.
See Set up permalinks for SEO ranking for the permalink shortcodes, and How to create Advanced custom fields for the field types.
Add your entries
The new asset appears in the sidebar. Open it and click Add New Developer at the bottom to add entries.
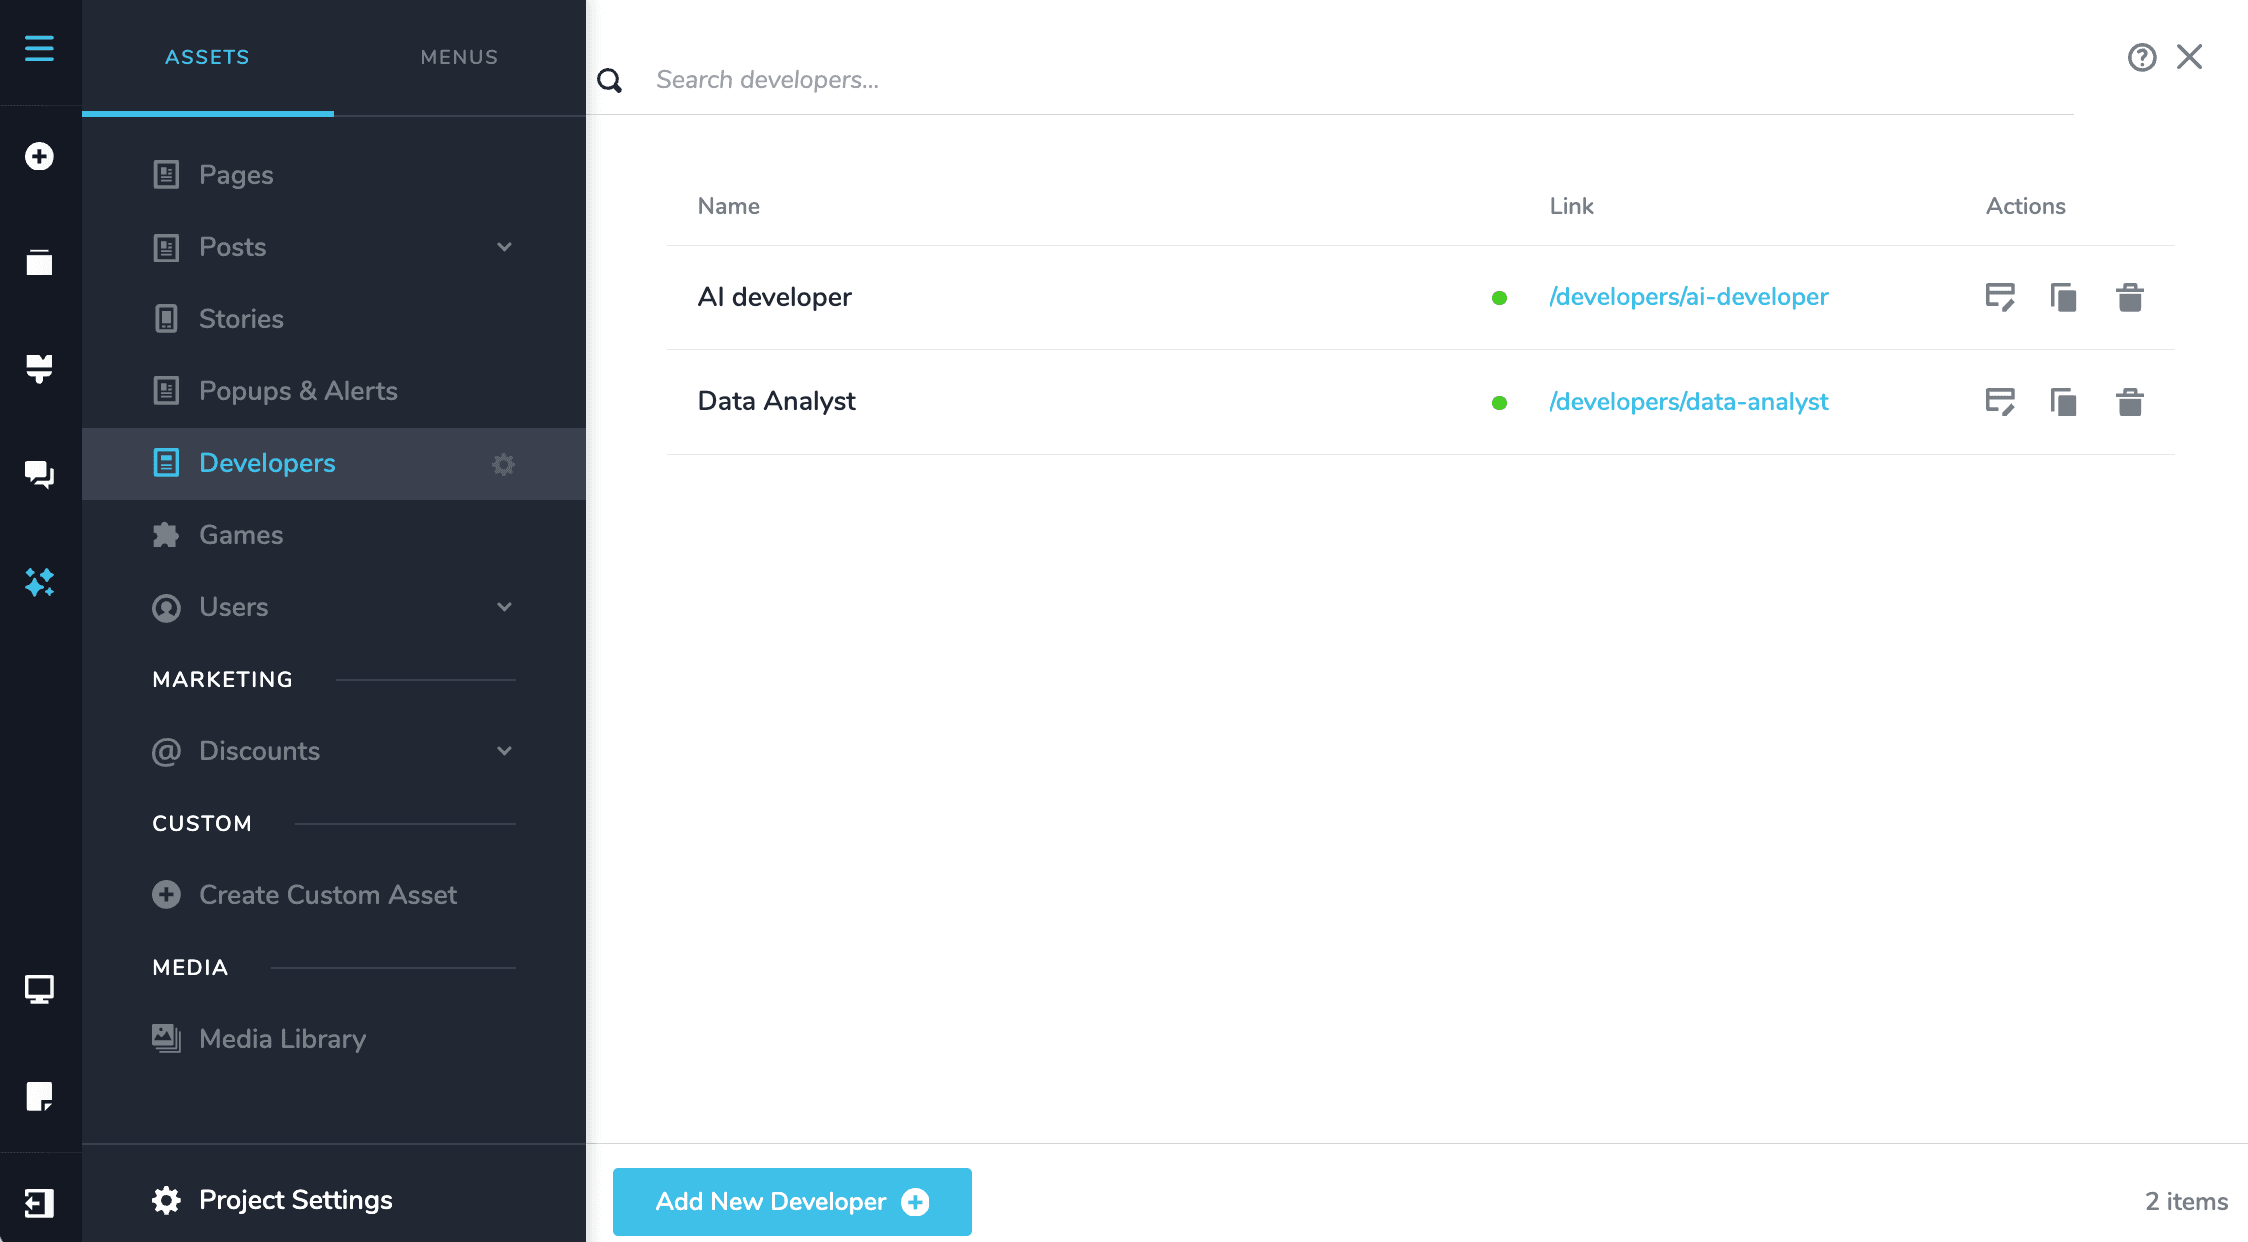
Do this before linking anything. It gives you something to pick from when you test the link.
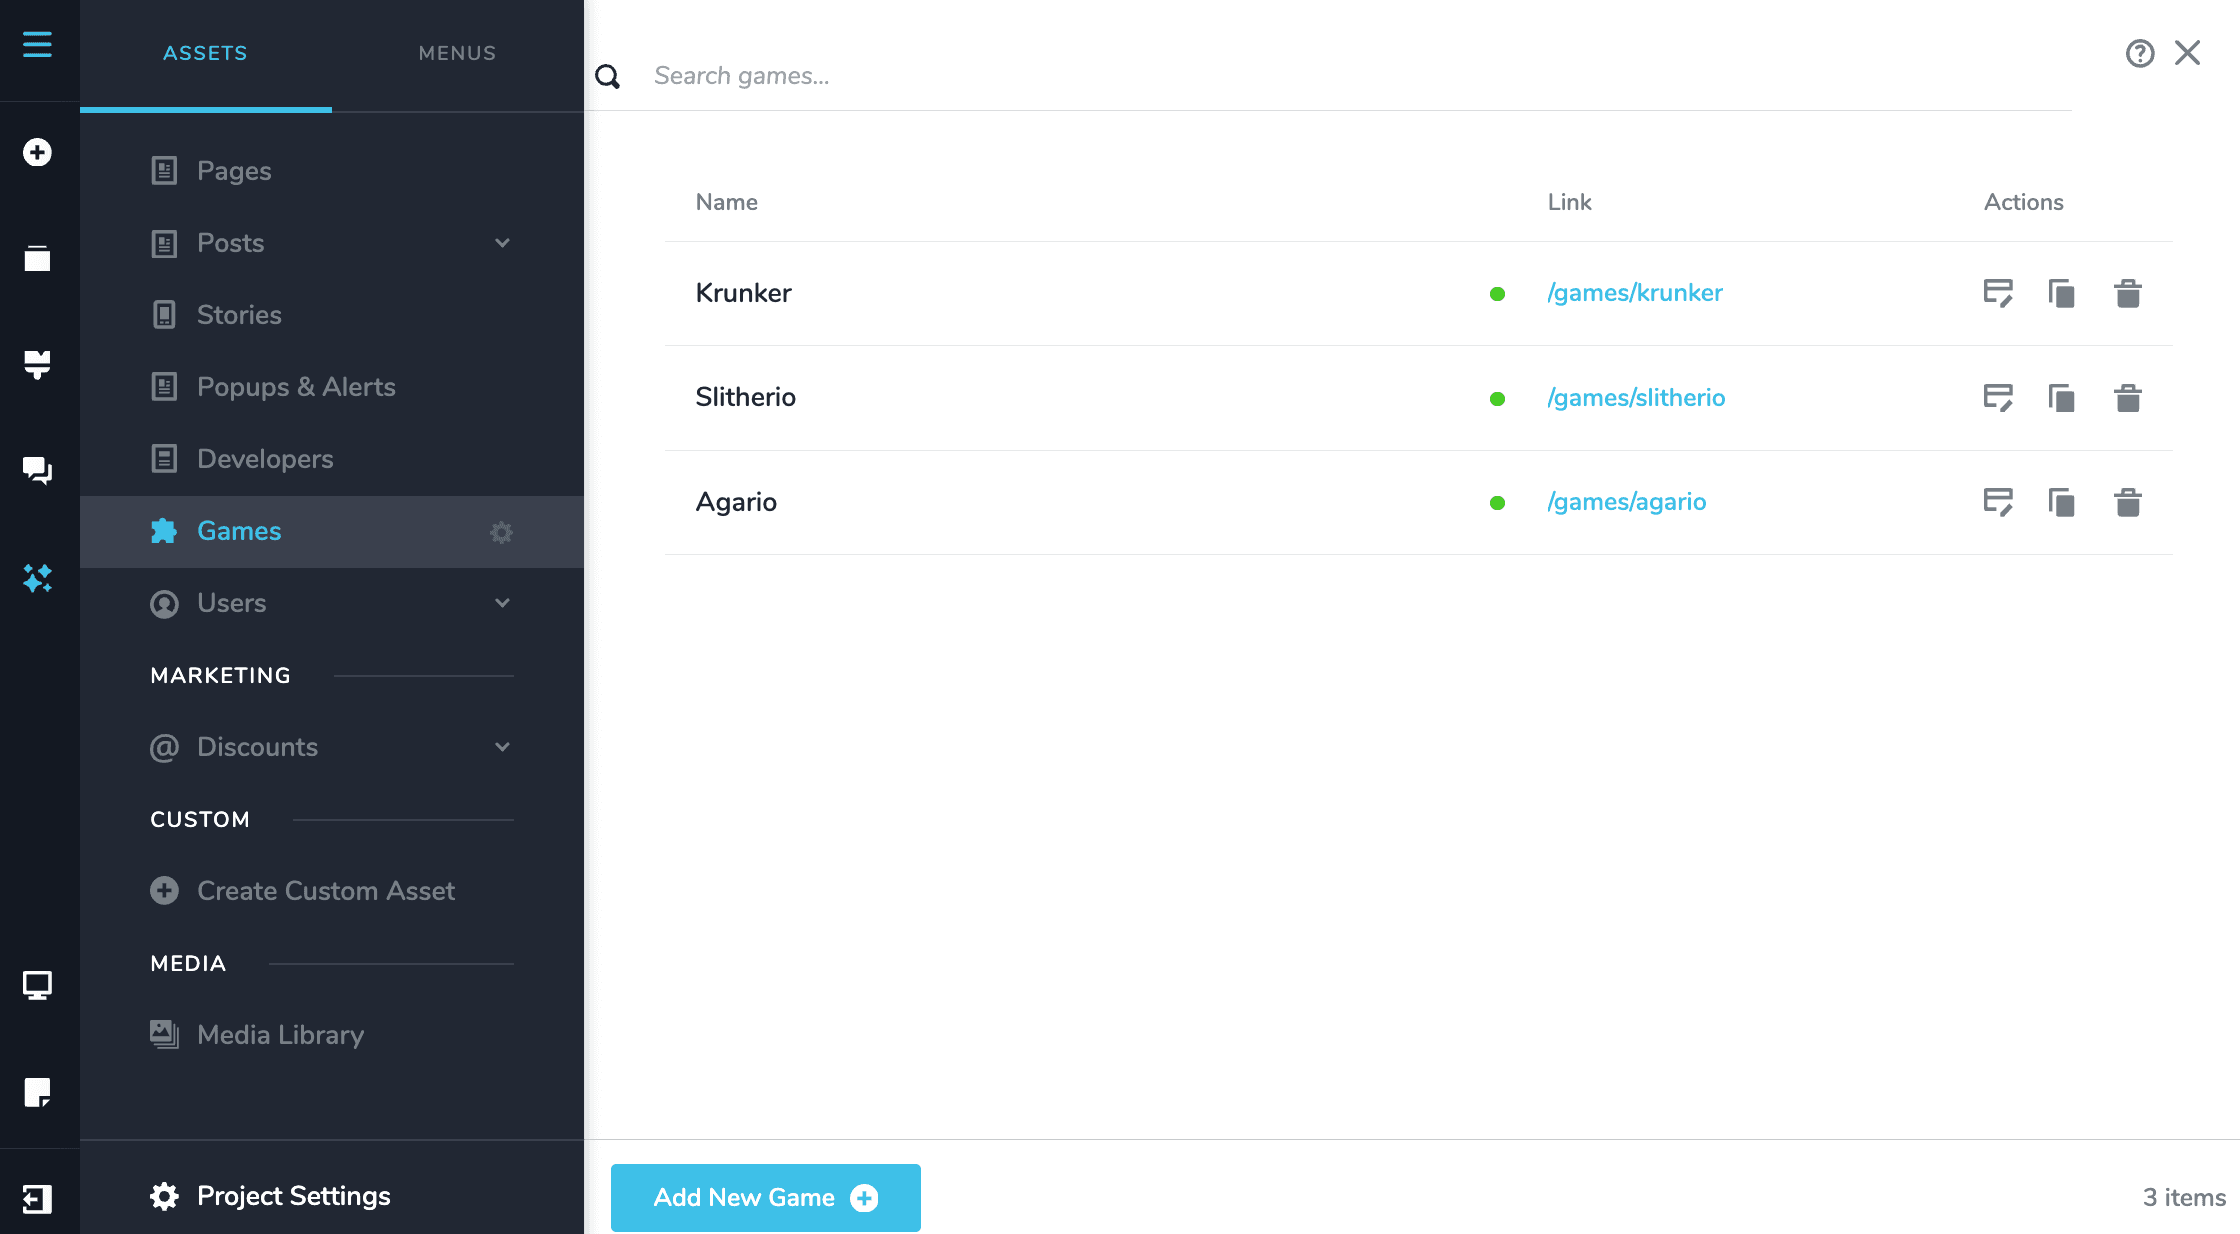
Here a second asset, Games, has been filled in the same way.
Part 2 — link one to one, with Reference
Use Reference when an entry can only ever have one. In this example each Game belongs to a single ITSolution.
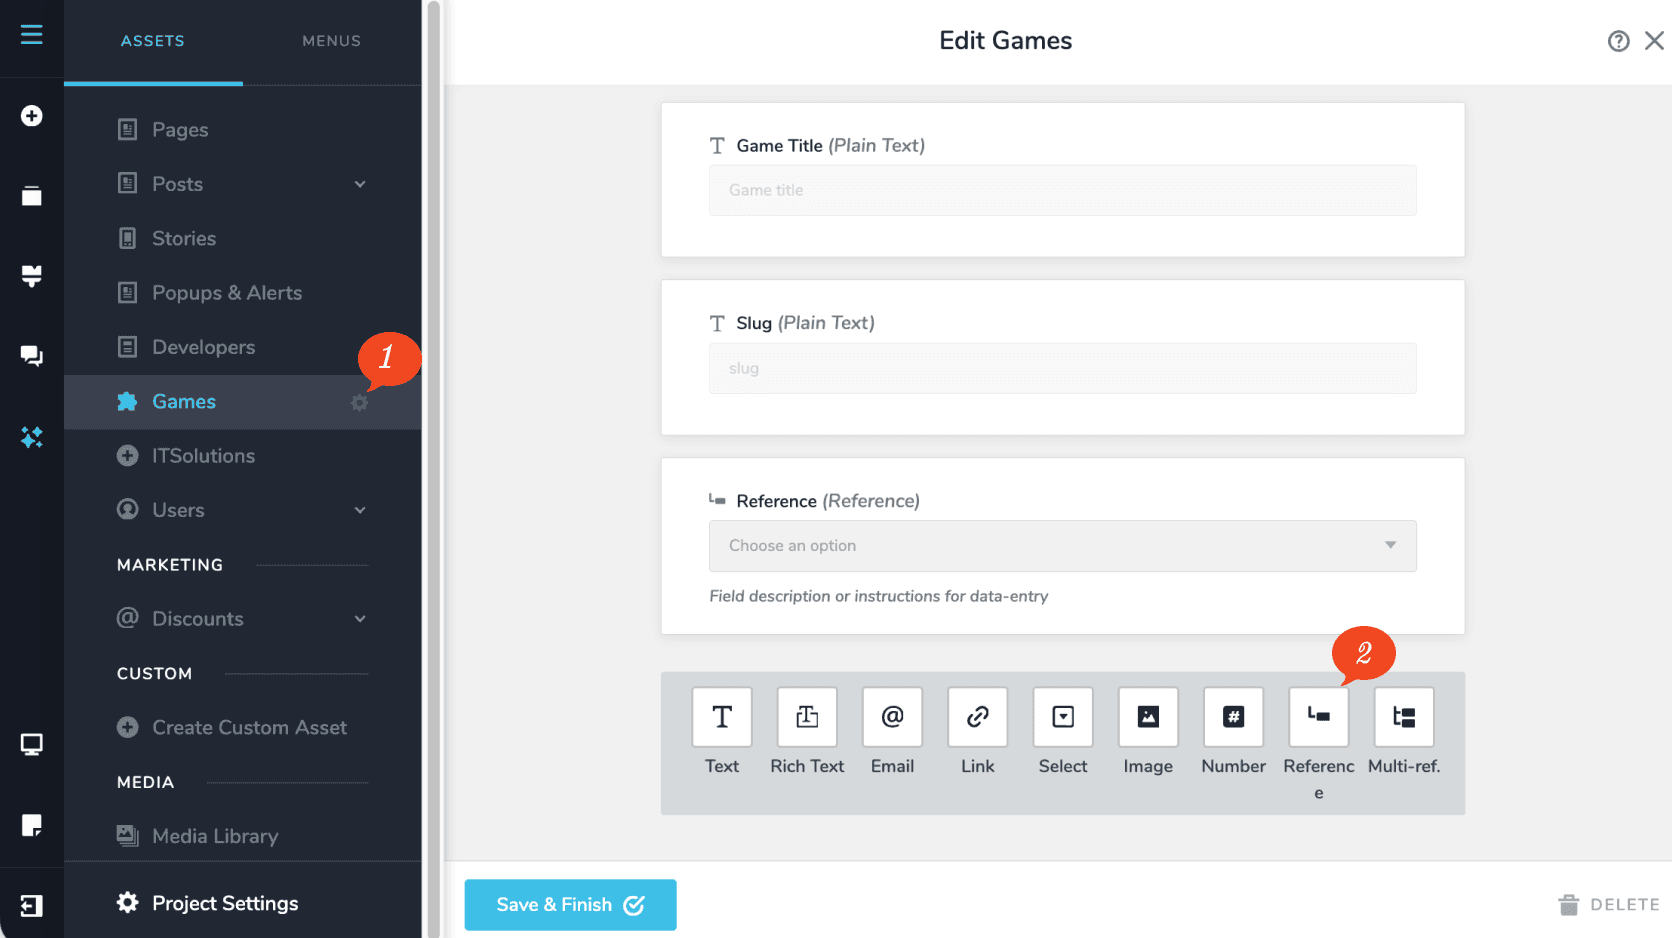
Open the asset for editing
Click the gear icon next to Games in the sidebar. The edit screen shows the asset’s fields, with the field types along the bottom.
Click Reference to add the field.
Point the field at an asset
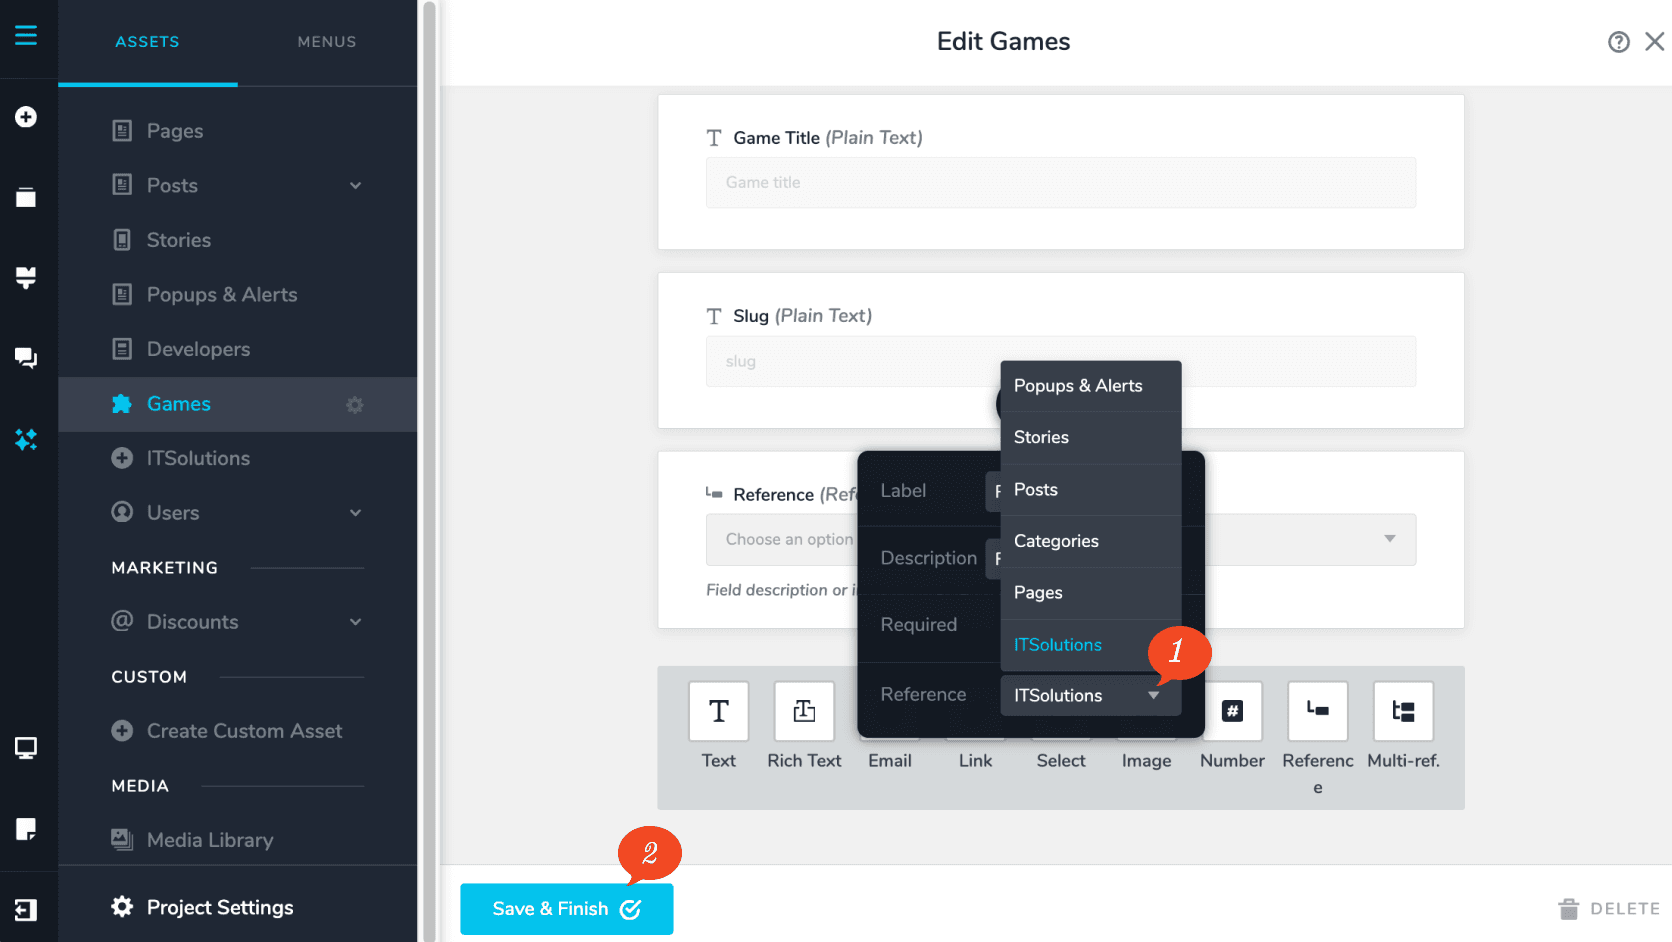
Select the field you just added to open its settings — Label, Description, Required and Reference.
In the Reference dropdown, choose the asset to link to. Here it is ITSolutions.
Click Save & Finish. Nothing is kept until you do.
Check it worked
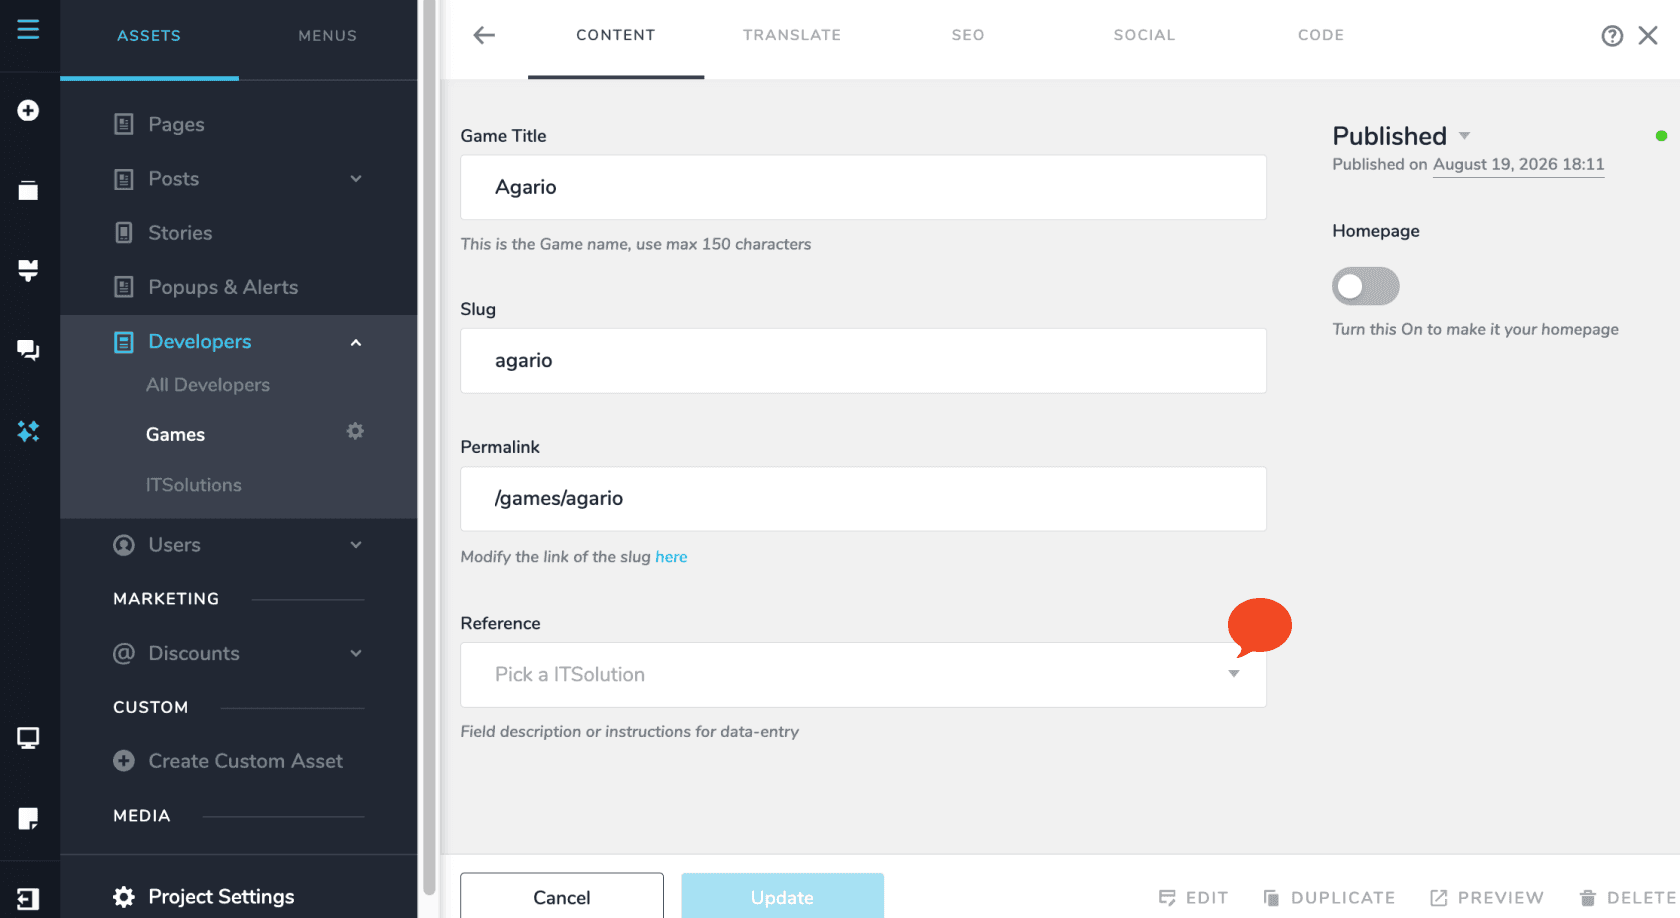
Open one of your Games. The Reference field now appears on the entry, ready to pick from — here it reads Pick a ITSolution.
Part 3 — link one to many, with Multi Reference
Use Multi Reference when an entry can have several. In this example each Developer has made more than one Game.
Add the field
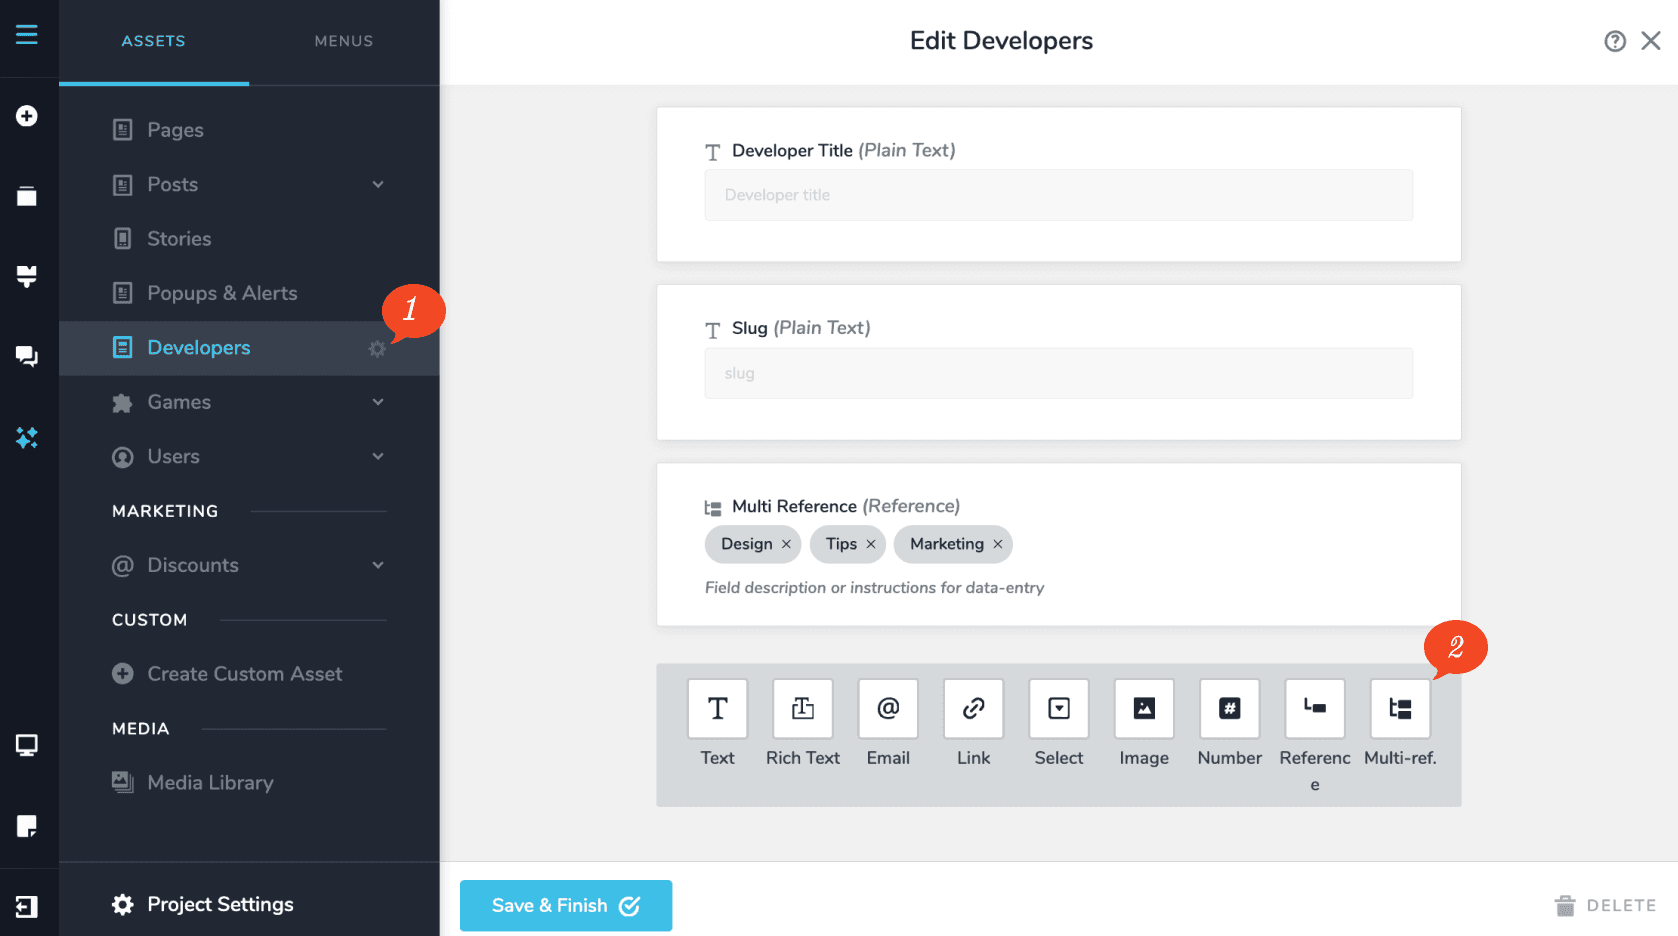
Click the gear icon next to Developers, then click Multi-ref. at the bottom of the edit screen.
Point it at an asset
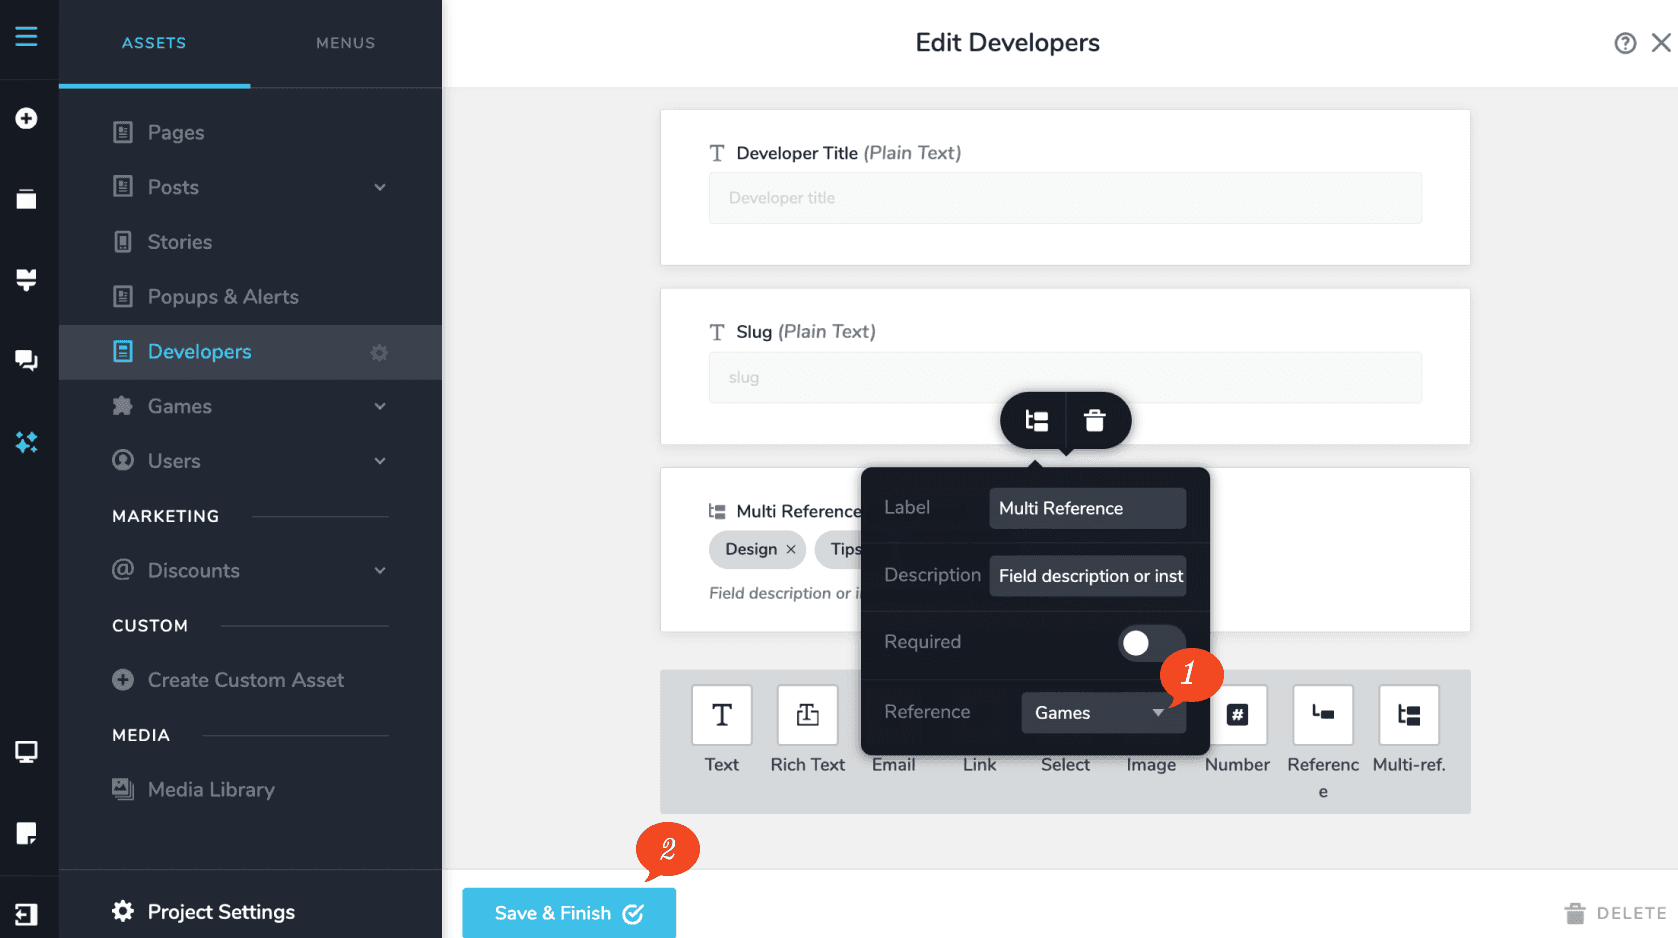
Open the field’s settings and choose the asset in the Reference dropdown — here Games.
Click Save & Finish.
Check it worked
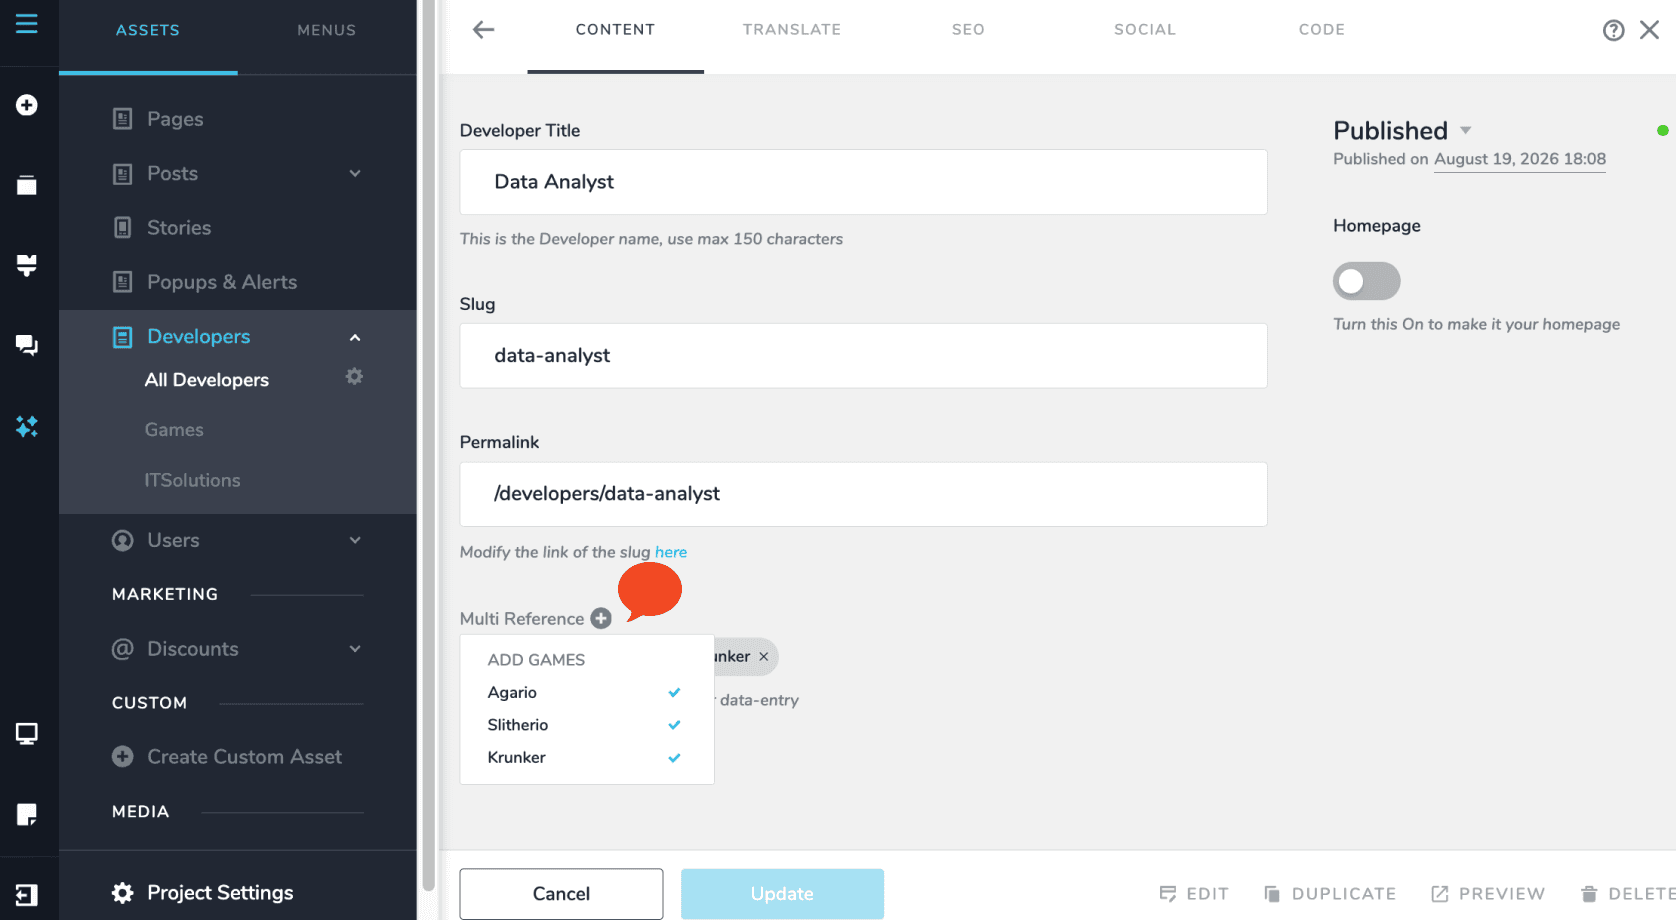
Open one of your Developers. The Multi Reference field now lets you tick as many entries as you like — here Agario, Slitherio and Krunker are all selected for the Data Analyst.
Choose between the two by asking one question: can this entry ever have more than one? A game has one supplier but a developer has made several games. Get it wrong and you will be rebuilding the field later.
What this unlocks
Linking is not the goal in itself. It gives your content a structure the builder can then build pages from automatically.
Once Developers are linked to Games, you can make one Developer page that lists every game by that developer. You build it once and it works for every developer you ever add.
See Dynamic elements and Create a blogging page, which explains how templates are assembled.