Membership Blocks
Membership Blocks allow you to control which users can see specific content based on their assigned roles. By restricting blocks to certain member types, you can create personalized experiences, protect premium content, and manage access without duplicating pages. This makes it easier to deliver targeted content while keeping your site organized and secure.
The setting sits on the block, not on the page. That means one single page can hold content for everybody, content only for signed-in people, and content only for paying members, all at the same time. Each visitor sees the parts meant for them and never knows the rest is there.
Think of it like a hotel. Everyone walks through the same lobby, but the key card in your pocket decides which floors the lift will take you to.
Before you can restrict a block you need at least one role to restrict it to. See Users & roles.
Restricting a block
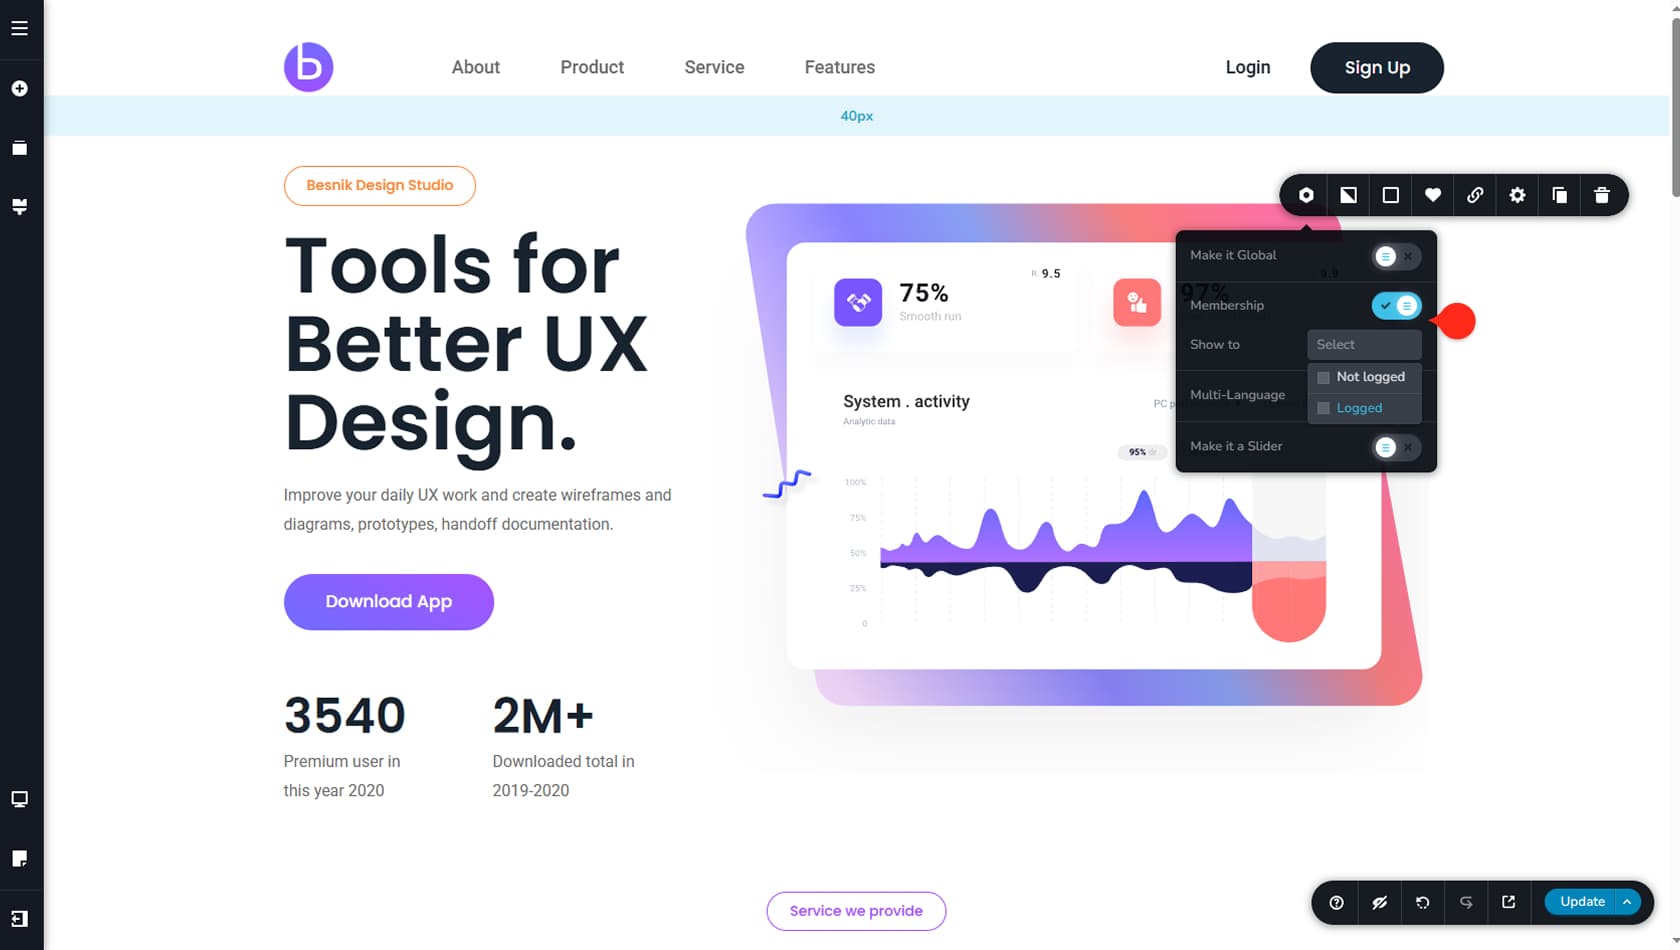
By navigating to the upper-right icon of your block, click on it to open the toolbar. From here, navigate to the left-most icon and open its options panel. By toggling Membership, you’ll see an option to Show it only to specific user roles that you’ve previously created by checking the appropriate box.
Example: You can set a block to only be visible when the user is logged in.
Only the roles ticked in the Show to field will see that block. Everyone else gets the page without it.
The roles you can choose from
You can create as many roles as you need. The two used most often are Logged, for people who are signed in, and Not Logged, for people who are not.
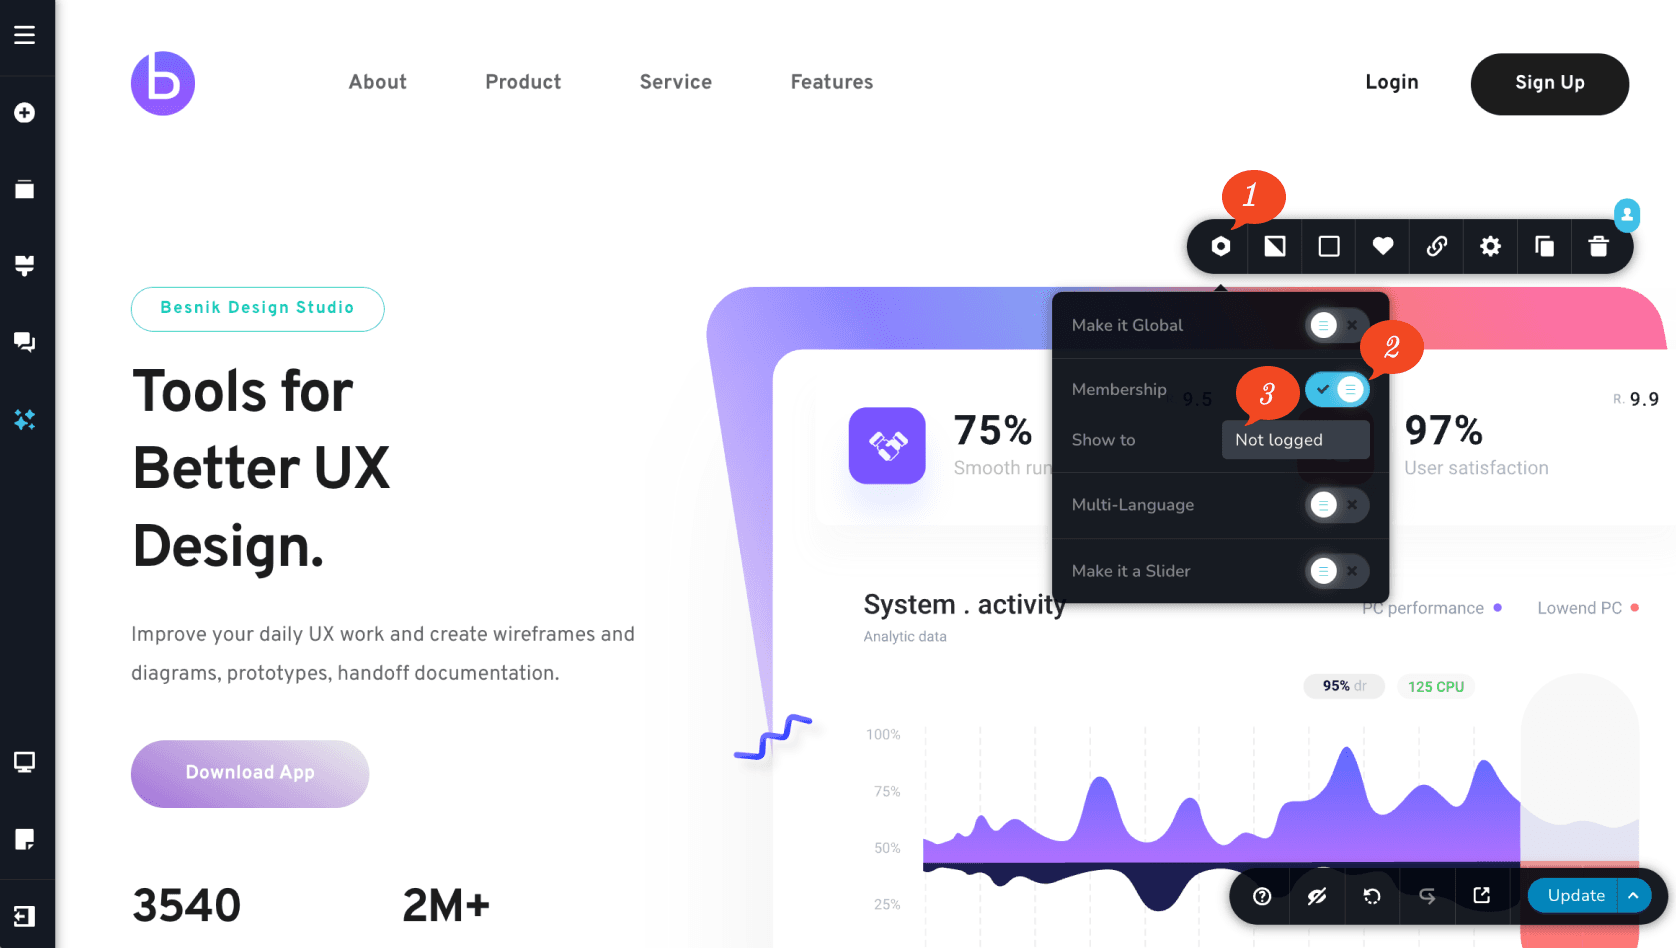
A real example. Put a “Join our members club” banner in a block set to Not Logged, and a “Welcome back, here is your timetable” block set to Logged, one directly above the other. A visitor sees the invitation to join. Ana, who has an account and is signed in, sees her timetable instead. Same page, same web address, two different experiences.
Checking your work with View Page As
Restricted blocks are the one thing you cannot check by simply looking at your page, because as the person building it you can see everything. The View page as option solves this.
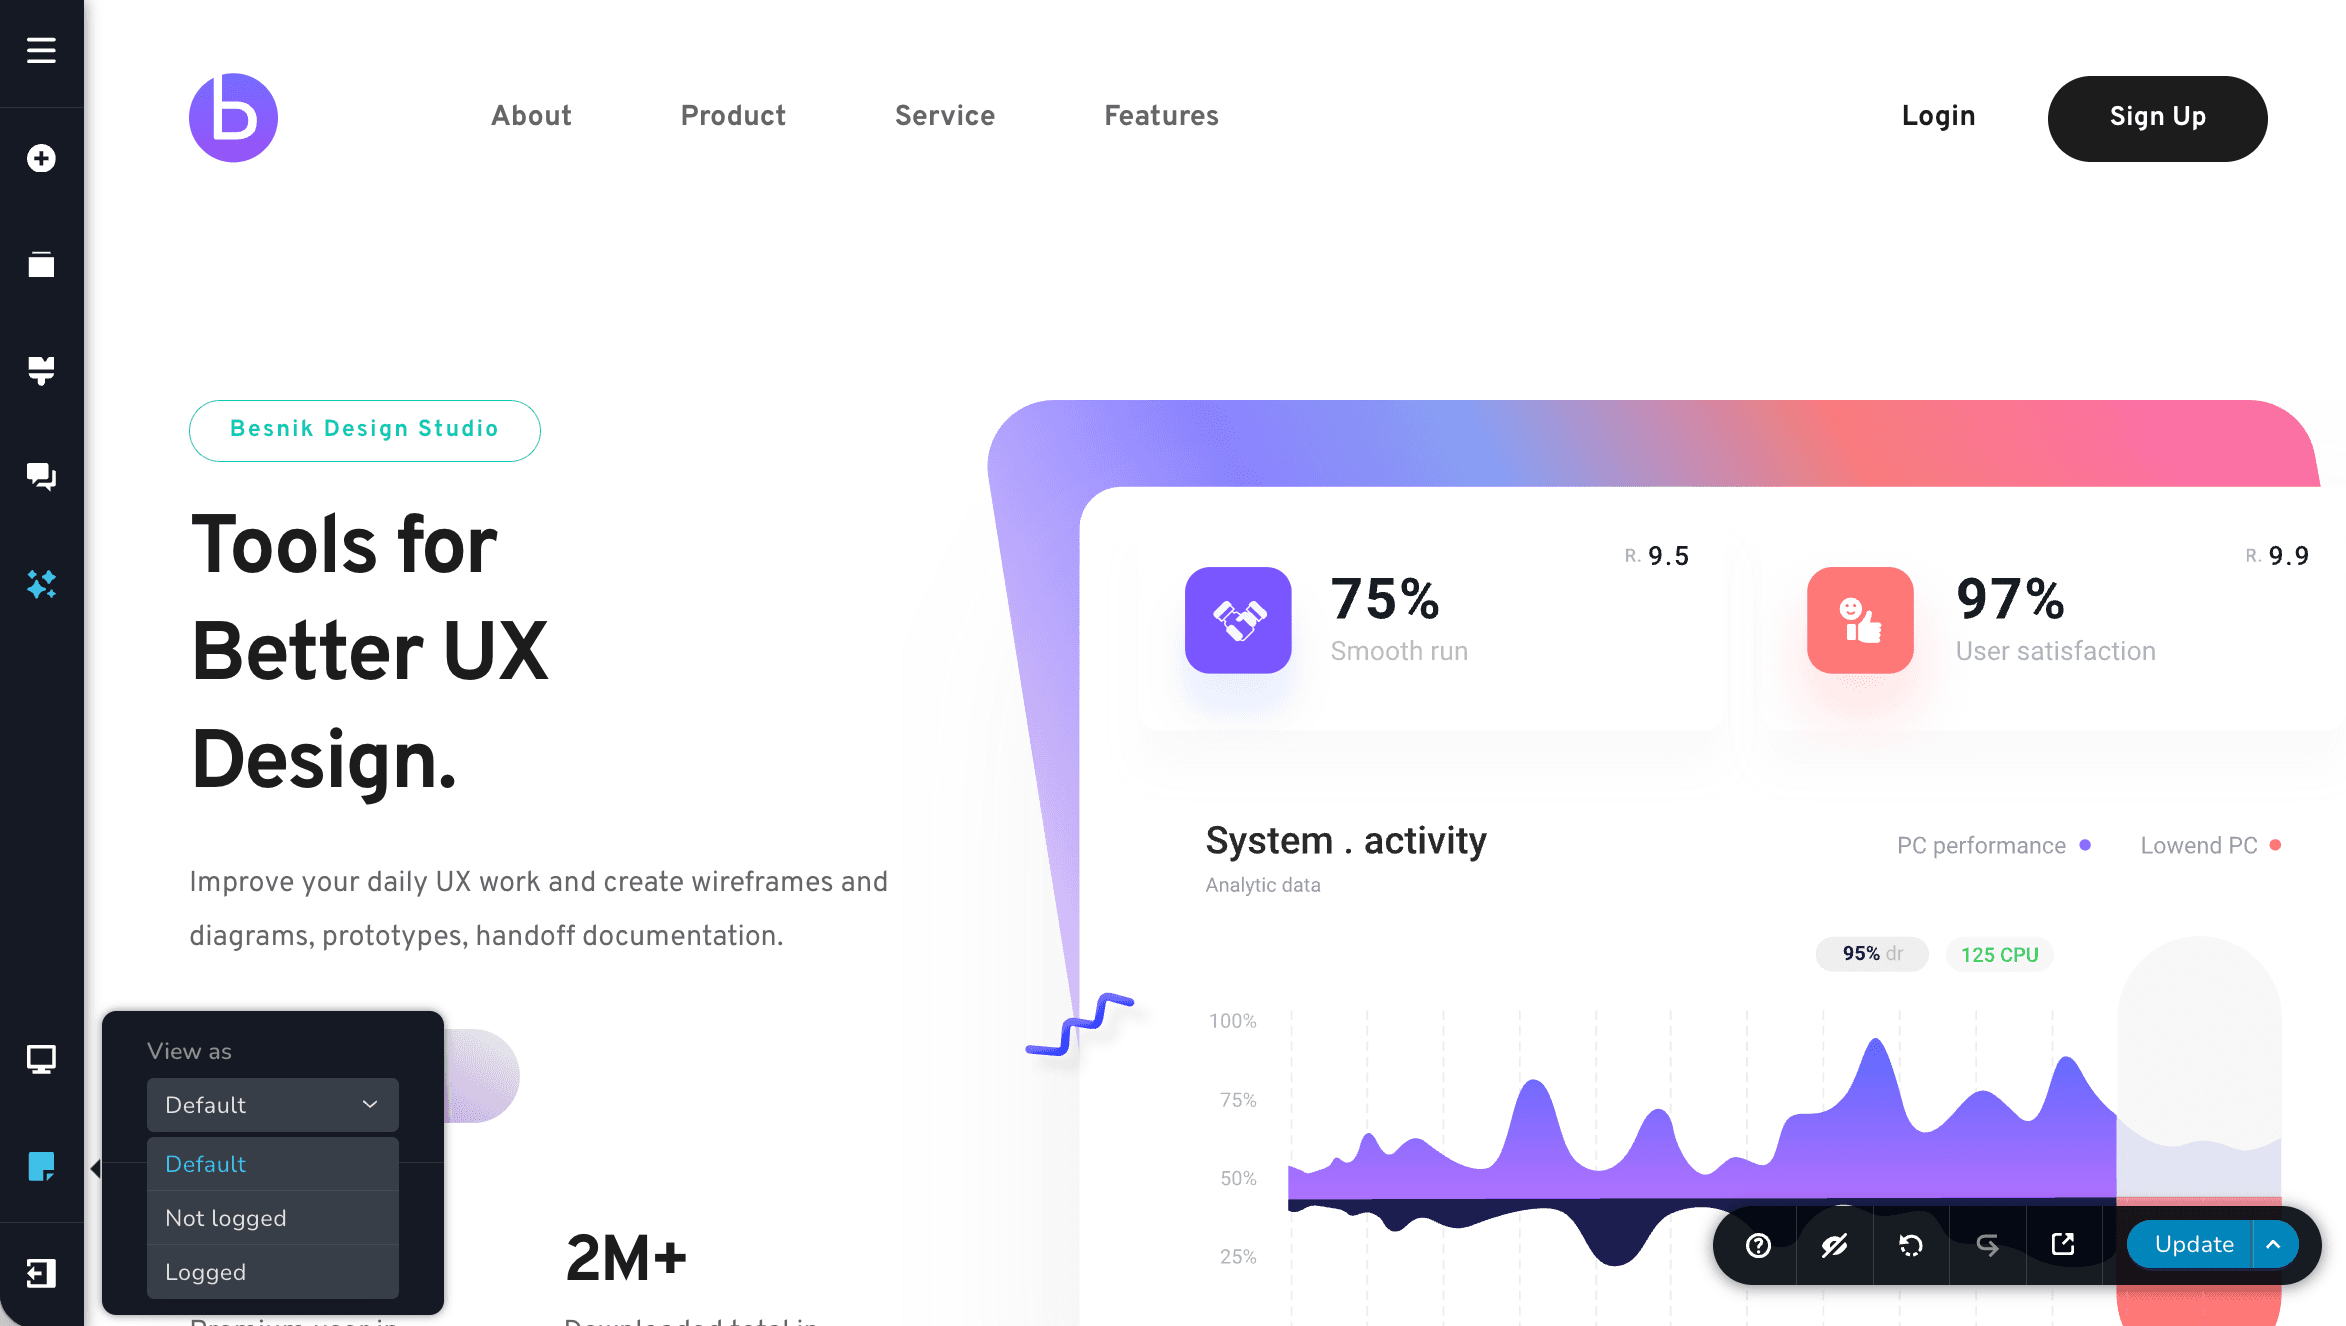
Inside the builder, set View page as to a role and the page filters itself down to show exactly what someone with that role would see. Set it back to Default to see every block again, whatever its membership settings.
If a role you have just created is missing from the membership options on a block, save your page and then refresh the browser. The list of roles is loaded when the page is saved.
What membership blocks are good for
- A members-only area — a timetable, a price list, or downloads reserved for people who pay
- A different welcome for returning visitors — an invitation for newcomers, a personal greeting for those signed in
- Content by group — one page serving Students and Tutors, each seeing their own half
- Hiding the sign-up form from people who already signed up — set it to Not Logged and it removes itself once they have an account