Global Blocks
Global blocks help you keep repeating sections consistent across a site by syncing the same block wherever it is used. Instead of updating the same layout multiple times on different pages, you edit it once and the change is applied everywhere that global block appears. This is especially useful for elements like headers and footers, where consistency matters most and small updates need to roll out instantly across the whole website but there are many other uses for global blocks like contact forms or team members. Global blocks also reduce mistakes, speed up site-wide edits, and make long-term maintenance much easier, especially as the number of pages grows.
In this article, you will learn how to create a global block, where to find it, and how to control where it appears by including it on specific pages or excluding it from others.
How to Set Up a Global Block
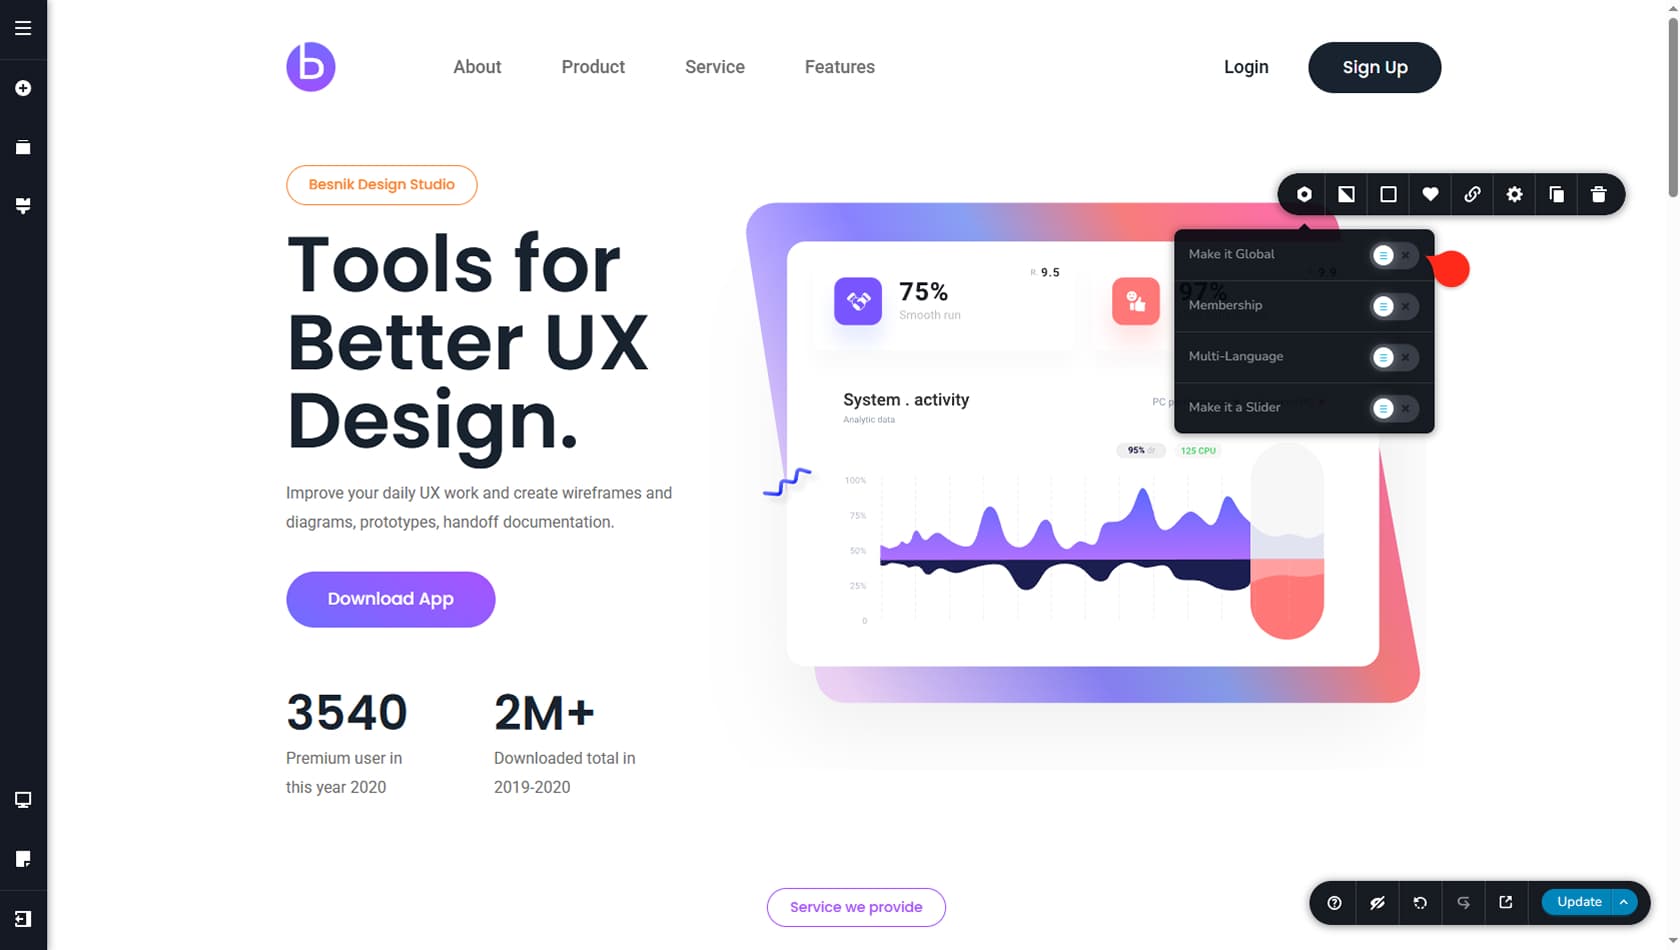
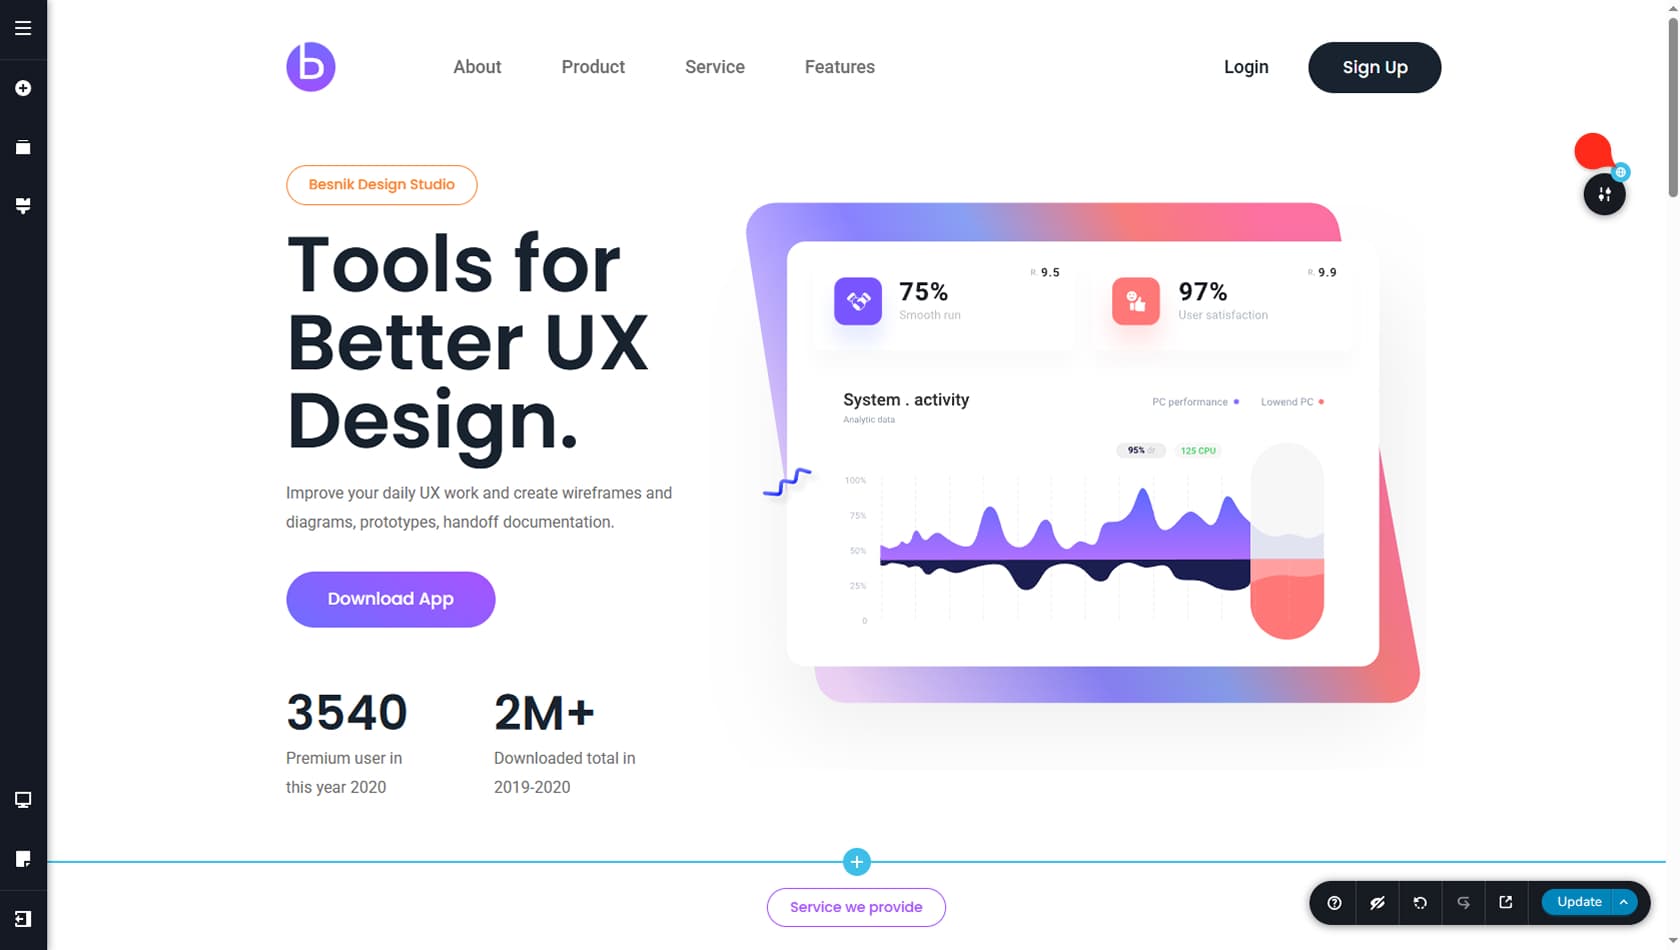
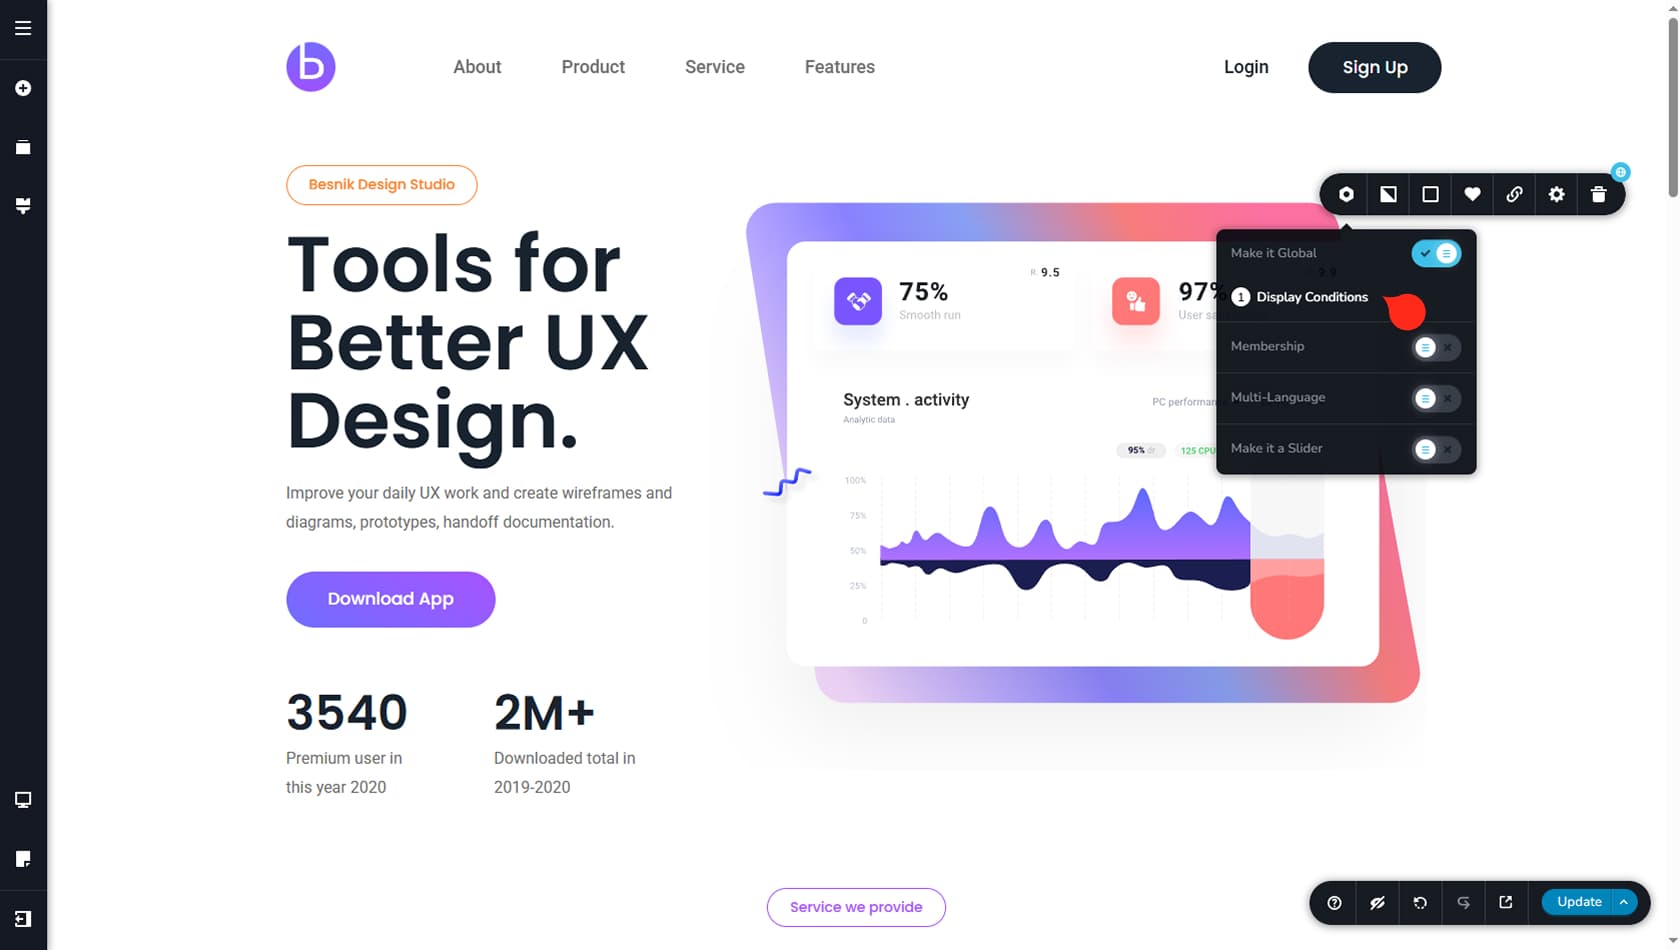
Setting up a global block is quick. Open the panel in the top-right corner of the block, click the first icon labeled Block, then enable the Make it Global toggle. After you configure the Conditions settings, a small blue globe icon will appear in the top-right of the block toolbar to show it is now global.
Display Conditions
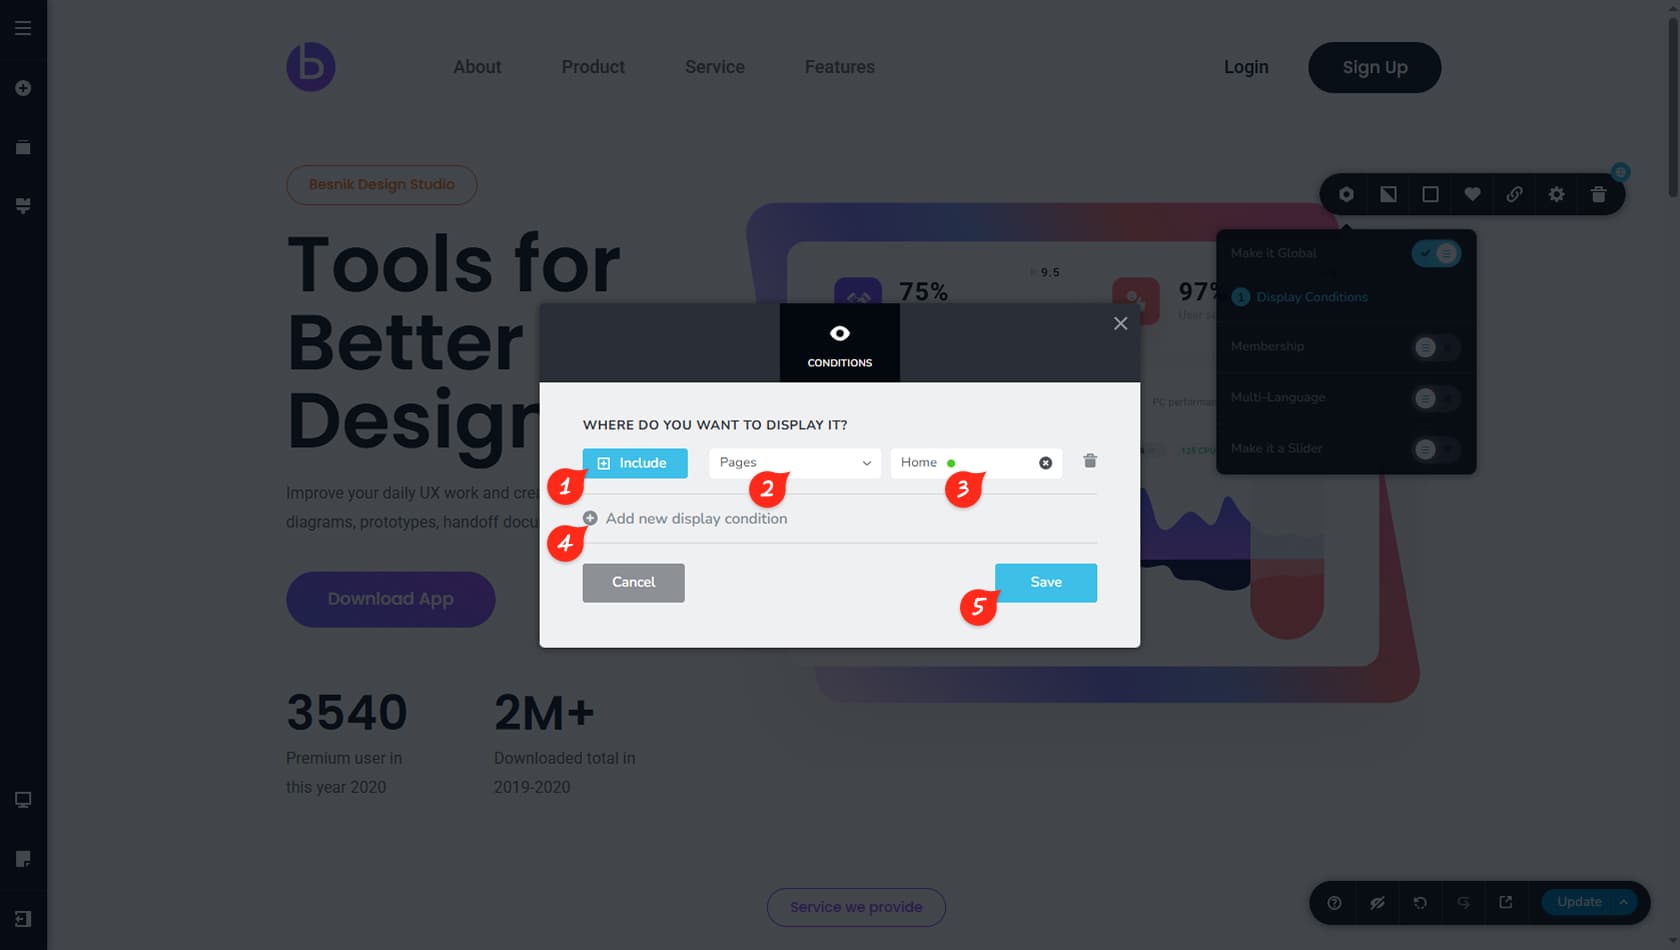
After you make a block global, you will be prompted to set its conditions. These rules control where the block is shown, whether that means a single page, multiple pages, all pages, or everywhere except specific pages.
Exclude/include
Here, you choose whether the block should be included on selected items or excluded from them.
Asset Type
Next, select the asset type the block applies to. Conditions are not limited to pages. You can target posts, stories, categories, or select All to cover everything.
If the block should appear on most pages but not on a few, set the asset type to All, then add an additional condition to exclude the specific pages where it should not display.
Asset Name
Then, choose the specific item by name, or apply the rule to all items within the selected asset type.
Add New Display Conditions
Finally, you can add another condition to further refine the display rules by including more targets or excluding additional ones.
Save
Make sure you save your conditions for them to apply.
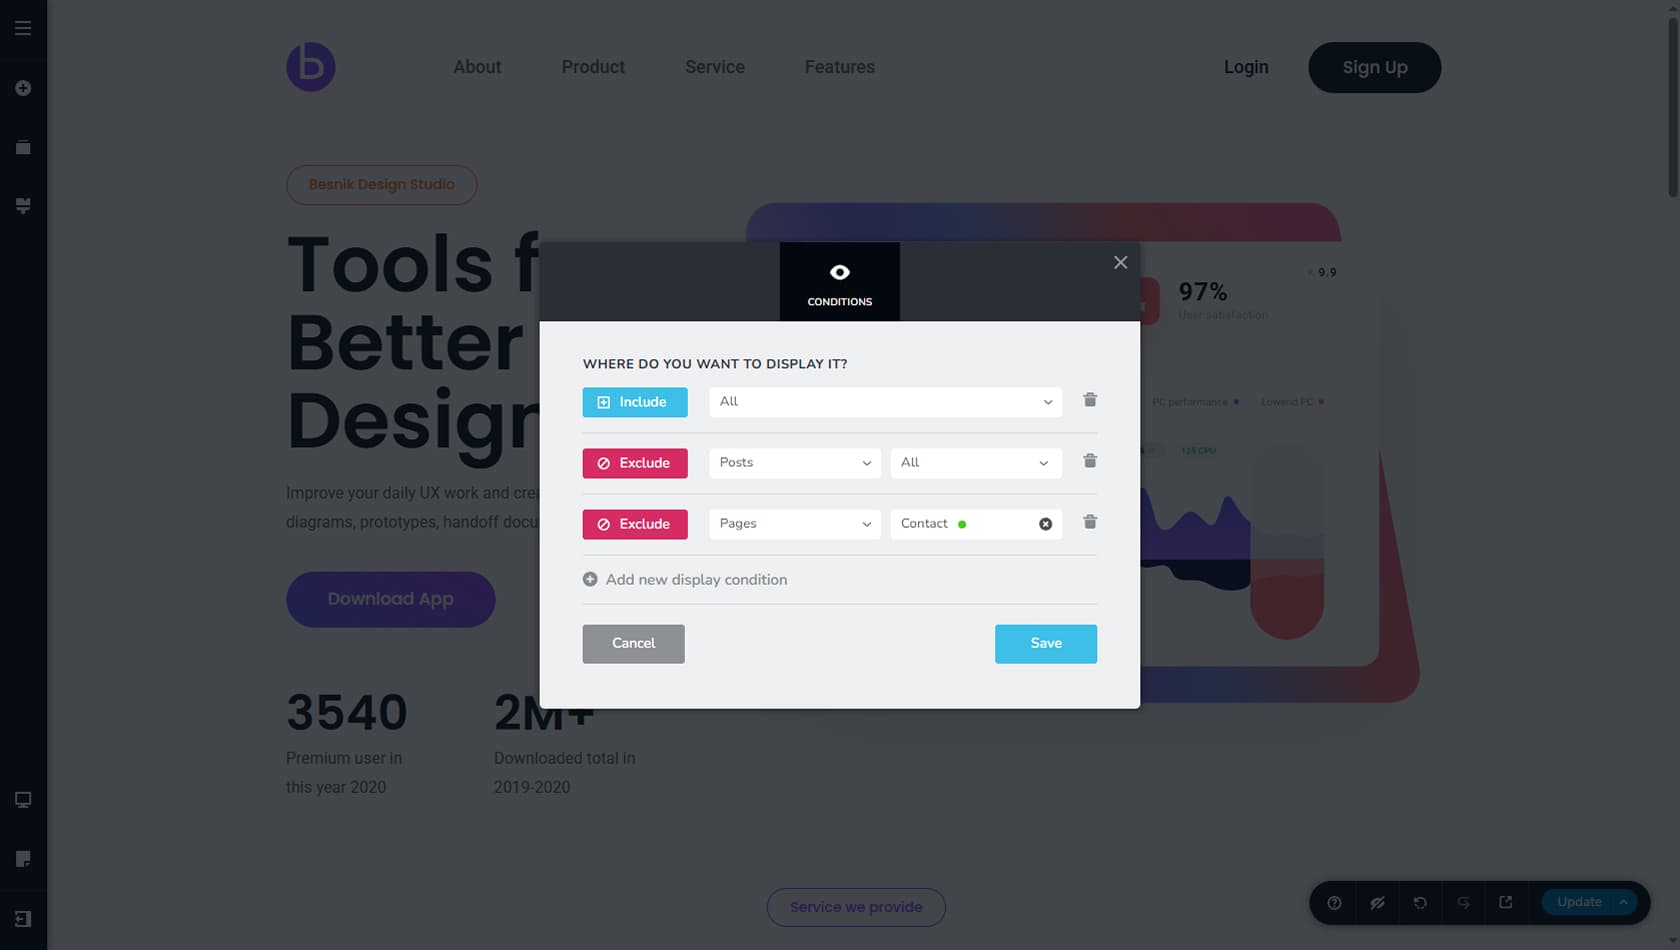
Here is a simple example of how global block conditions might be set up. In this case, the block is first enabled across all page types, then excluded from all blog posts and from the Contact page specifically. Finally, if you want to change the conditions of an already-global block, you can find this option in the same location where you switched a block to global in the first place.
The Saved Global Blocks Tab
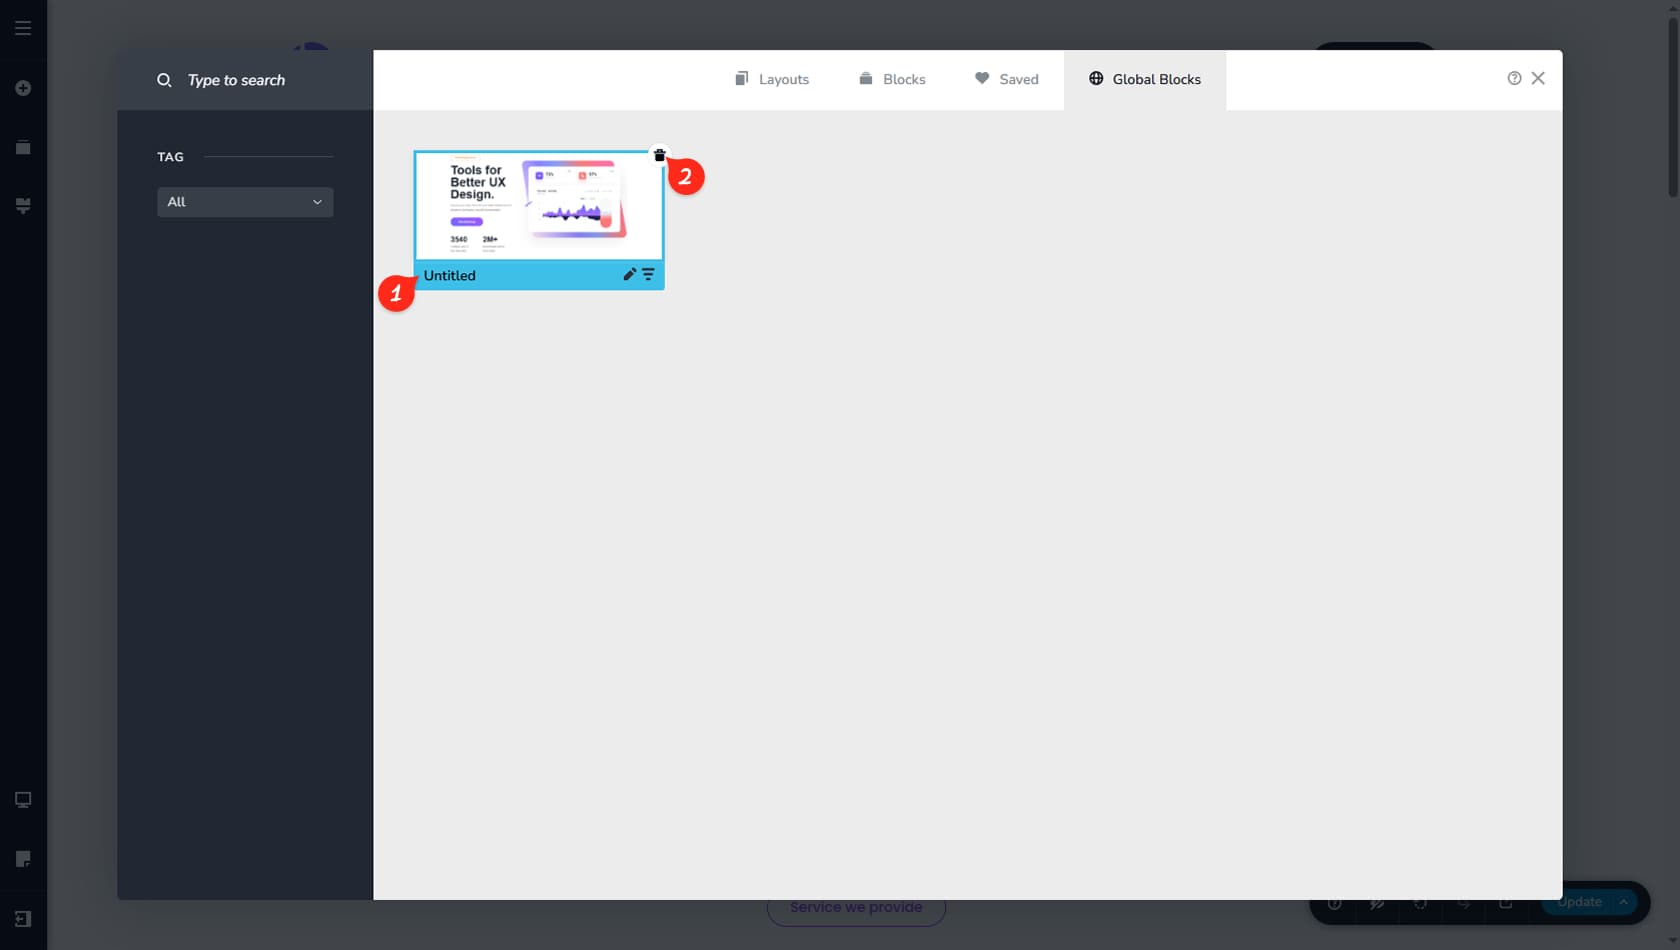
You can access all global blocks from the Global Blocks tab in the same panel where you normally browse and add blocks.
Rename Global Block
You can rename a global block to make it easier to recognize later.
If you are using translations, rename global blocks to reflect the language version. This helps prevent a block in one language from being shown on a page in another language.
Delete Global Block
You can delete a global block, which removes it from every place it is used across the project.
Deleting a global block removes all instances of it across the site, which can result in losing that section entirely. To avoid this, consider adjusting its conditions first, or disable the Make it Global option on pages where you want to keep the content as a regular block. It also helps to save the block before making major changes, so you always have a backup. More details are available in the Saved Blocks Layouts article.