Blogging
Blogging plays a key role in keeping your project active, relevant, and engaging over time. By regularly publishing articles, updates, or insights, you create opportunities to inform your audience, improve visibility in search engines, and build authority within your niche. A well-structured blog not only attracts new visitors but also encourages returning traffic by offering fresh and meaningful content.
Dynamic content is what makes blogging efficient and scalable. Instead of manually designing each blog page, content is managed in the CMS and automatically displayed on the front end using tools like the Posts widget or dynamic elements. This connection between the CMS and your layout ensures that new posts are instantly reflected across listings, archives, and featured sections, while respecting the display rules you imposed.
How to Set Up a Blog
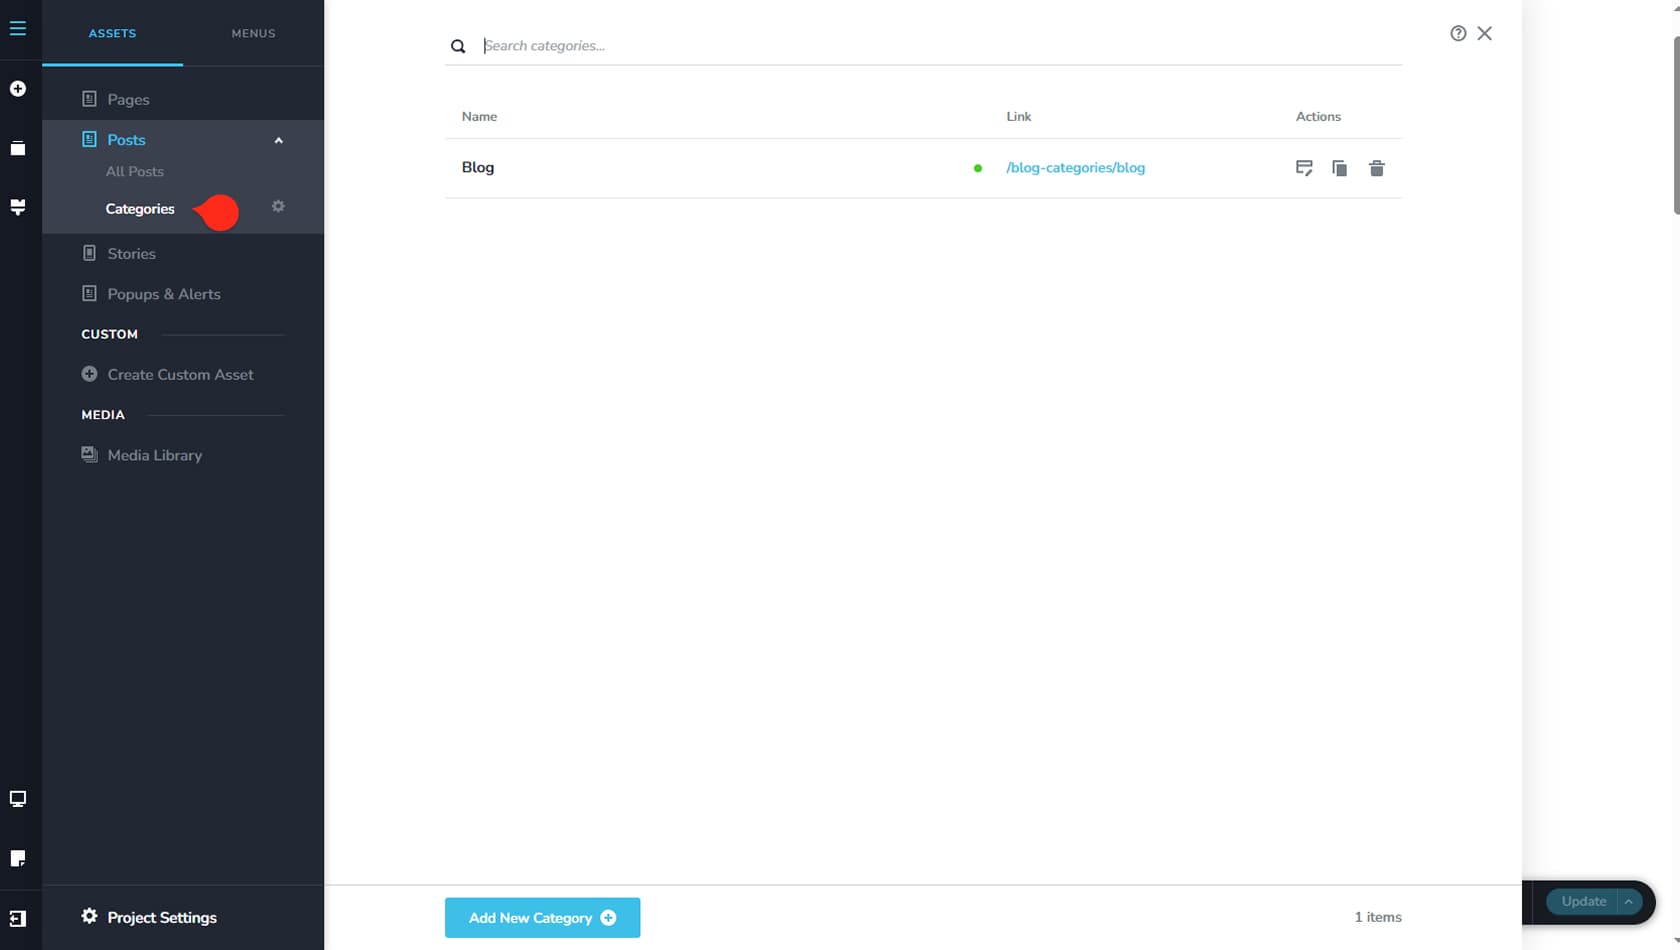
The first step in setting up a blog is to make sure you have a category assigned for your posts. You can create a new category or use an existing one. For detailed instructions, refer to the How to Build a Page article, as the process follows the same steps.
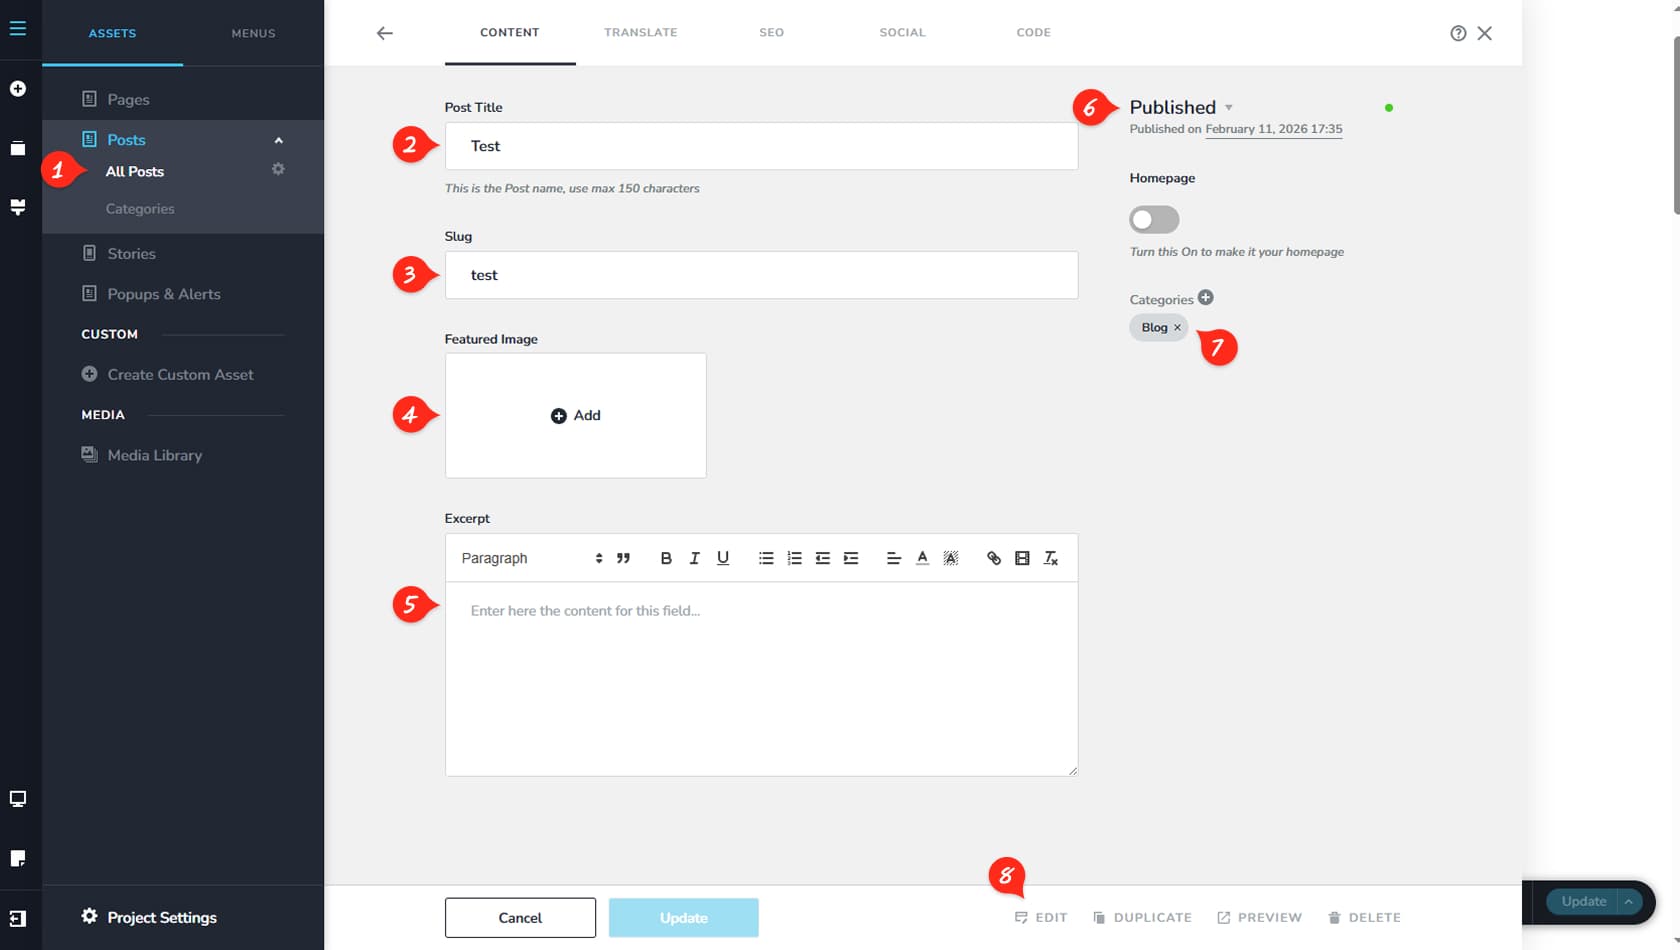
Create Post
After setting up a Category, navigate to the “All Posts” options and here you’ll see all your available posts. From here, create a new post and edit it.
Post Title
Once you create a post, navigate to it and here you can edit its Post Title.
Post Slug
From here, you can add a relevant slug to help with SEO and indexing.
Featured Image
From here, you can add an image to that post.
Post Excerpt
From here you can add an excerpt for that post.
Publish Post
From here, you can publish it, set it on draft or password-protect it.
Post Category
From here you can select the Category you previously set up.
Edit Post
Finally, click on Edit to edit the blog post as you would any other page.
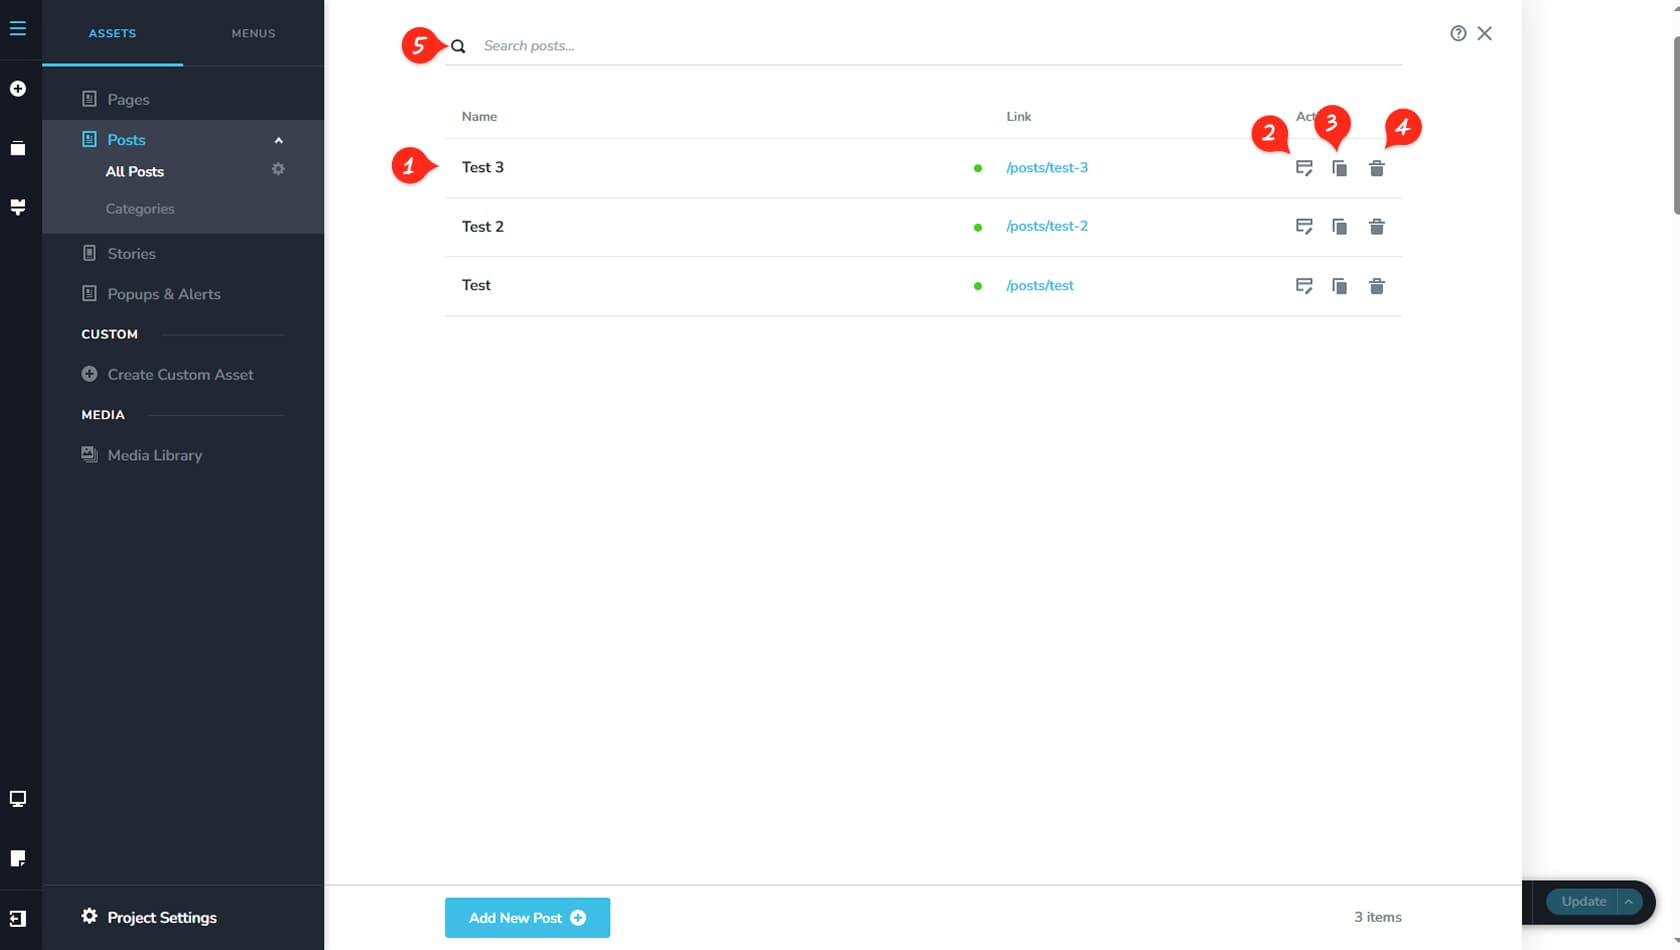
Posts List
After creating a blog post, it will appear in the “All Posts” panel.
Edit Post
You can quickly edit any blog post from this option.
Duplicate Post
This control allows you to duplicate a post.
We strongly recommend using the duplicate option after designing your first post in the builder. This preserves the layout, so instead of starting from scratch, you only need to update the text and images within the existing design.
Delete Post
Here you can delete a blog post.
Search Posts
If you have many posts and navigating becomes difficult, use the search function to quickly locate the one you need.
How to Display the Posts on Front-end
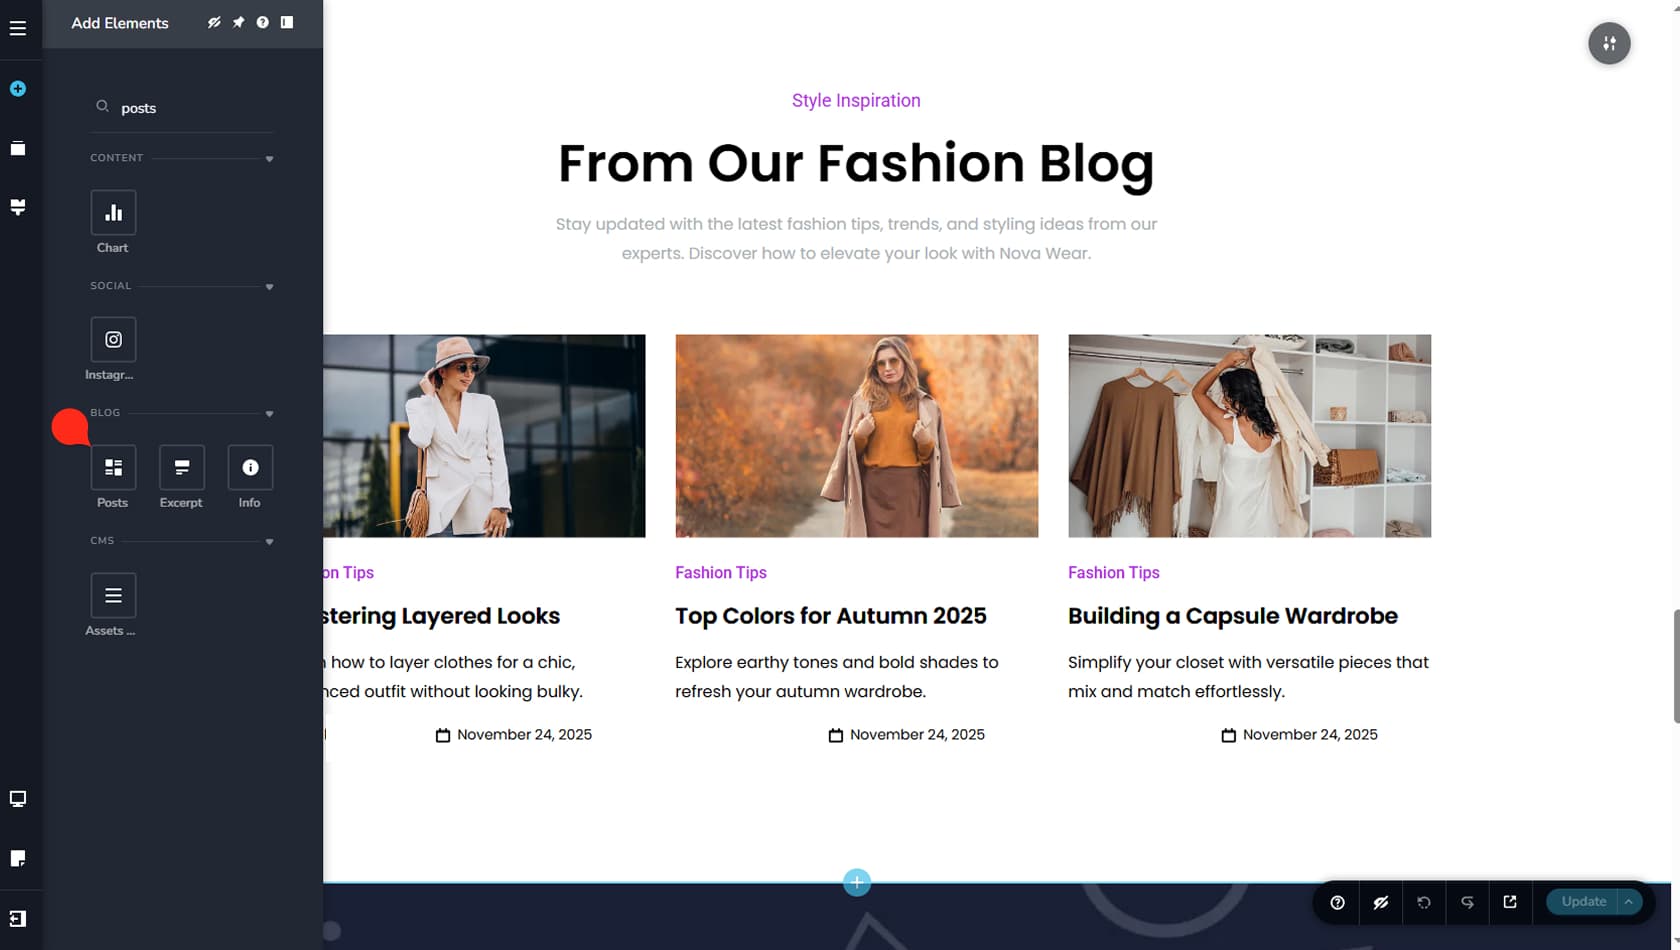
Once your blog is configured in the CMS, go to the page where you want the posts to appear. Open the Widgets panel, search for the “Posts” widget, and drag and drop it into the desired location on your page.
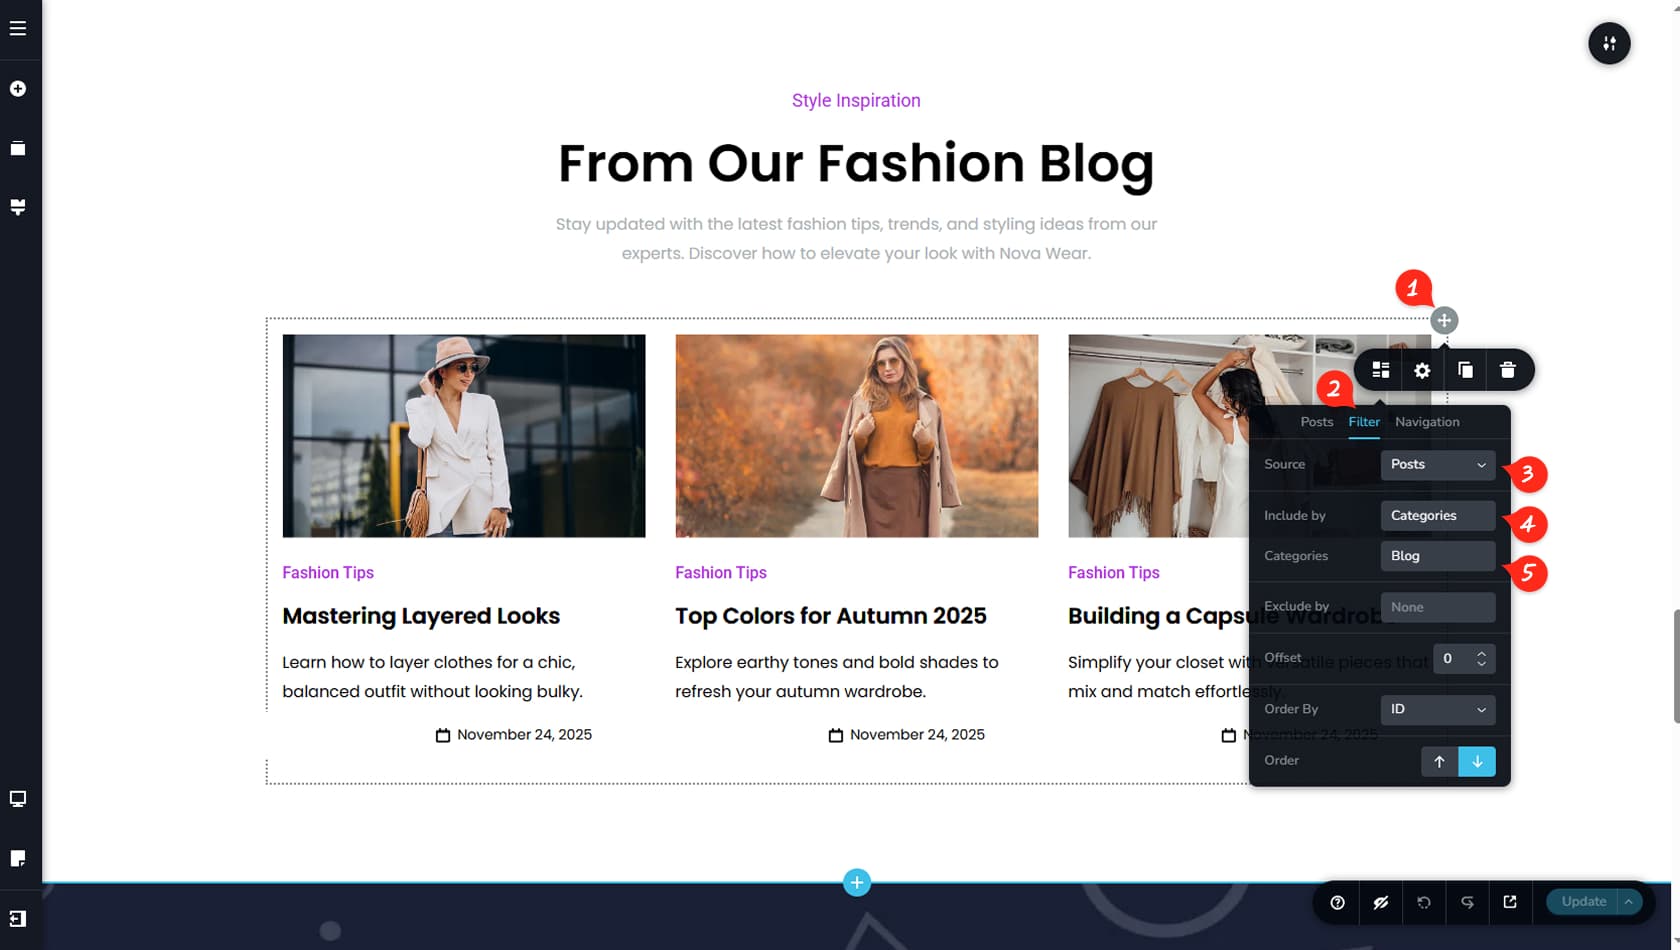
Posts Options
After placing the Posts widget, click the icon in the top-right corner to open its settings.
Filter
Then select the left-most icon and navigate to the Filter tab in the widget panel.
Posts Source
You will see several options here. Make sure to set the source to Posts so the widget displays only blog post assets. While other asset types such as Pages or Stories can also be selected, this setup focuses specifically on blogging content.
Category
Here you can configure the category filter so the widget dynamically pulls content from the assigned category rather than from manual selections.
Blog
Finally, select the Blog category that was previously created.
We’ve only covered a part of the widget’s features here. For more details, see the Posts widget article.
Posts Listing Design
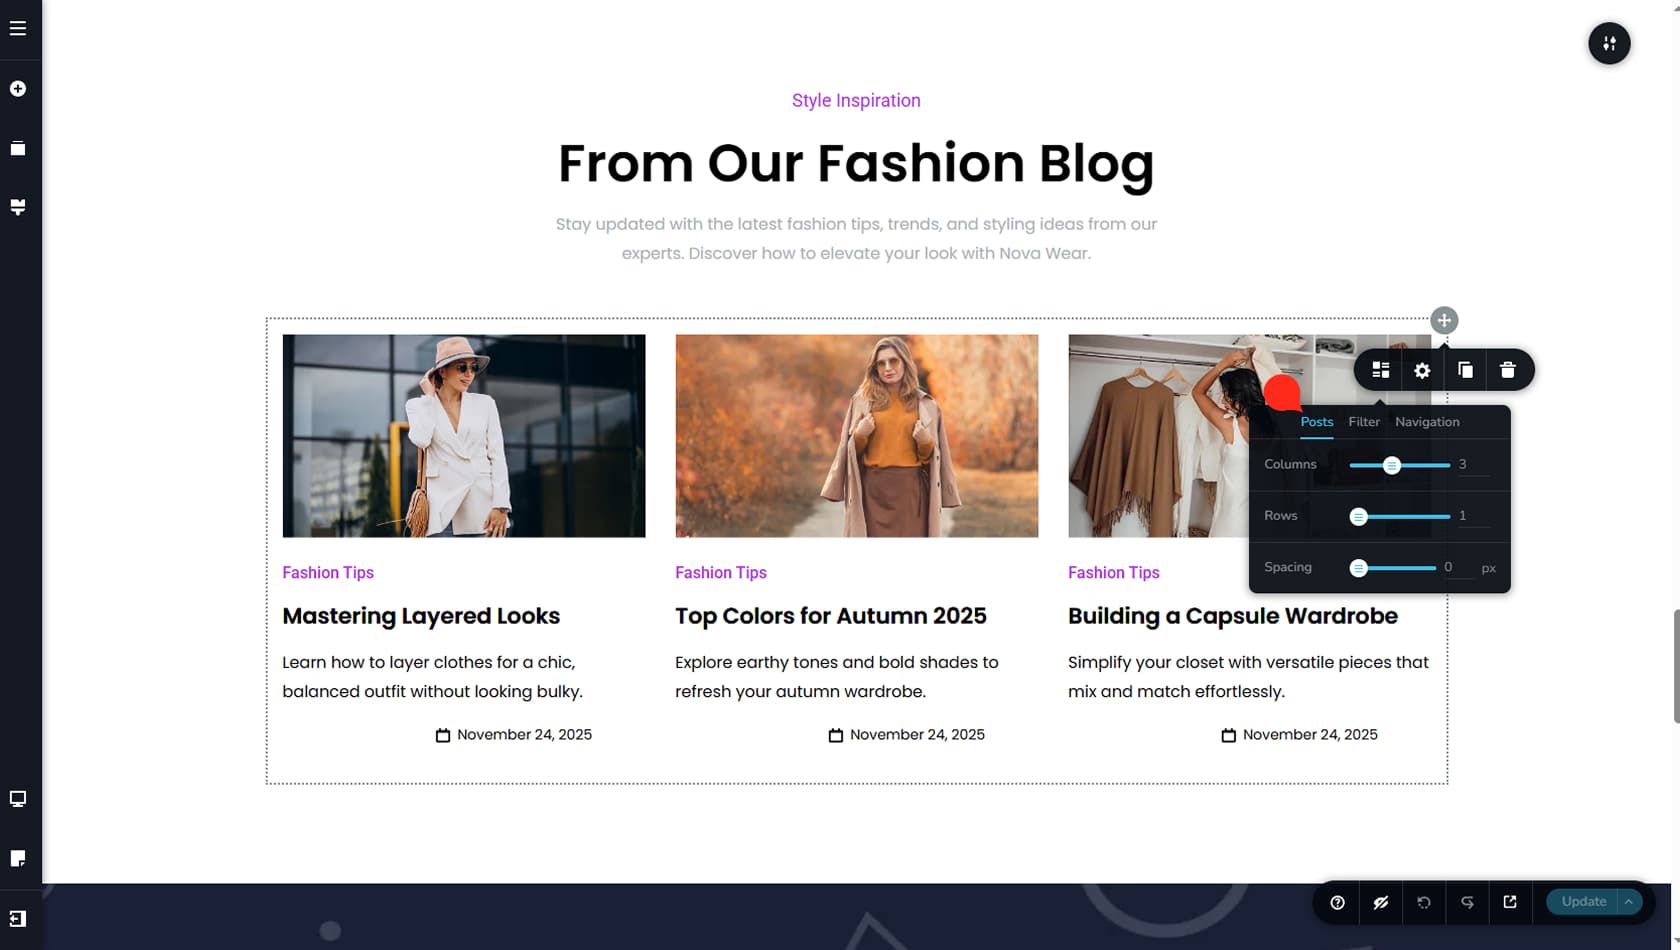
After configuring the filter and defining what content should appear on the front end, you can adjust the layout settings. Navigate to the Posts tab, located to the left of the Filter tab. Here you can set the number of columns, rows, and the spacing between them. You will also find the Navigation tab, which allows you to enable pagination if the total number of posts exceeds the amount displayed in the widget.
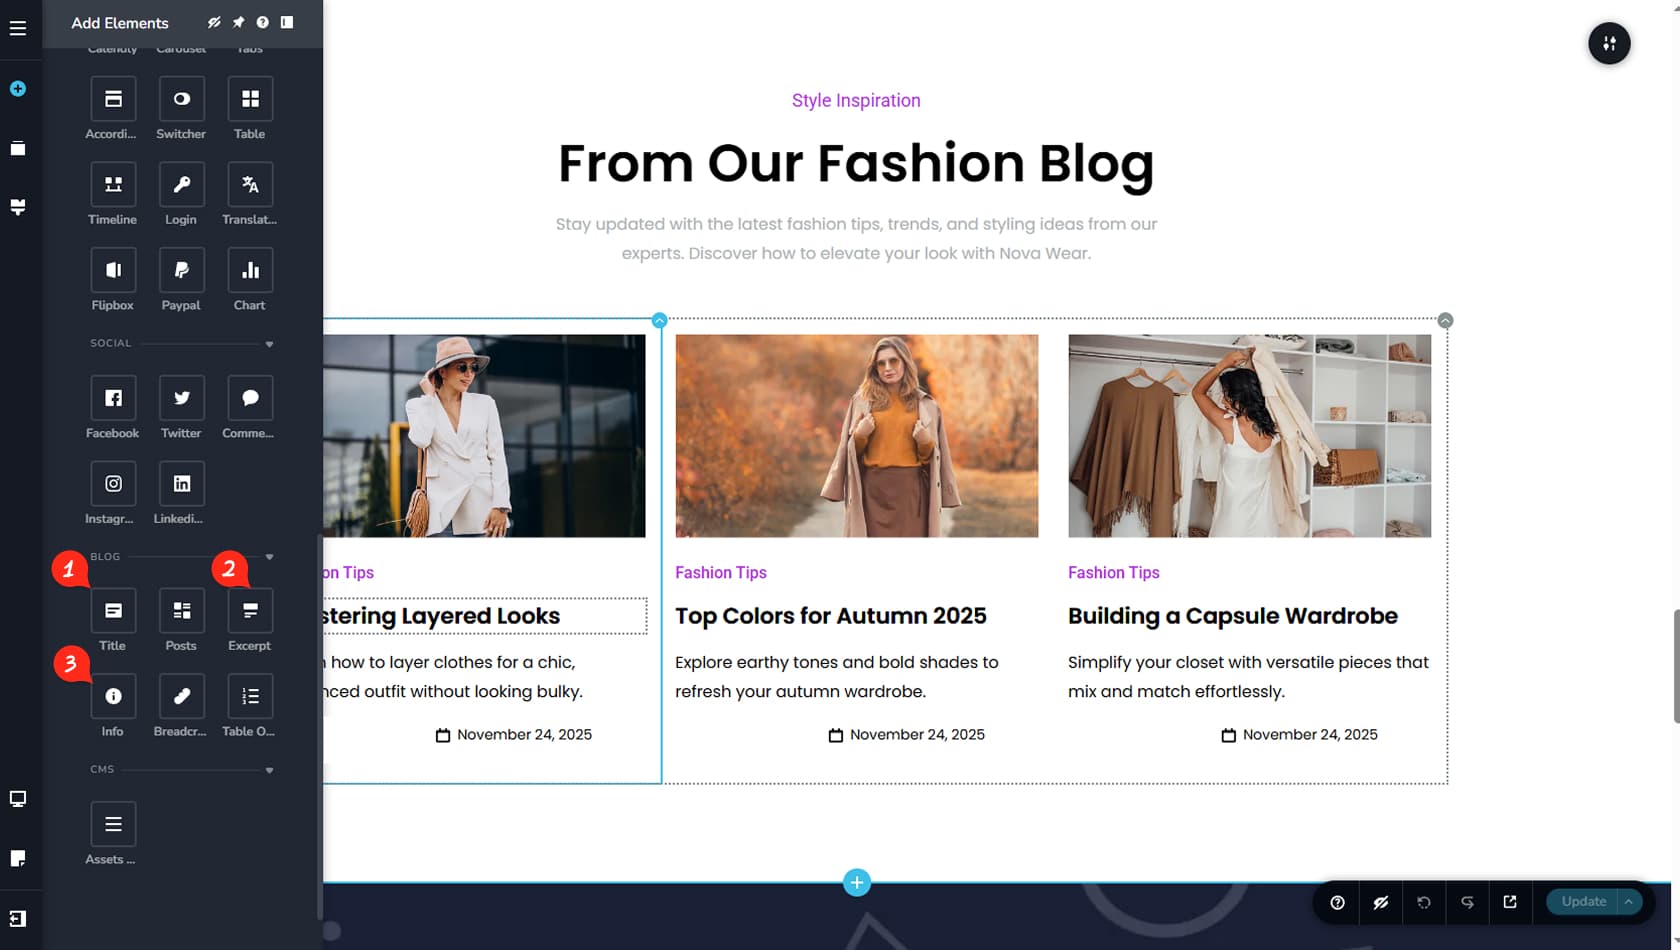
Now that the number of columns and rows is defined, the next step is to populate them with dynamic elements. You will notice dedicated blog widgets designed specifically for dynamic listings. Another important detail is that when you drag a widget into one of the post columns, it is automatically applied to all columns, ensuring consistency across the entire layout. This synchronized behavior simplifies editing, as changes made to one item are reflected across the listing, eliminating the need to modify each post individually.
Title
The first element is the Title. Like any other widget, you can drag it into the column and customize its typography and colors just as you would with a standard Text widget. However, the content itself is pulled dynamically from the CMS and will always reflect the post’s actual title.
Excerpt
The same applies to the Excerpt. Once added, it automatically displays the excerpt assigned to that post. You can style it like a regular Text widget, adjusting typography and colors as needed.
Info
Finally, you can add the Info widget to display metadata such as the author’s name, publication date, or time. This widget also allows full styling control over typography, colors, orientation, and spacing.
Other Dynamic Elements
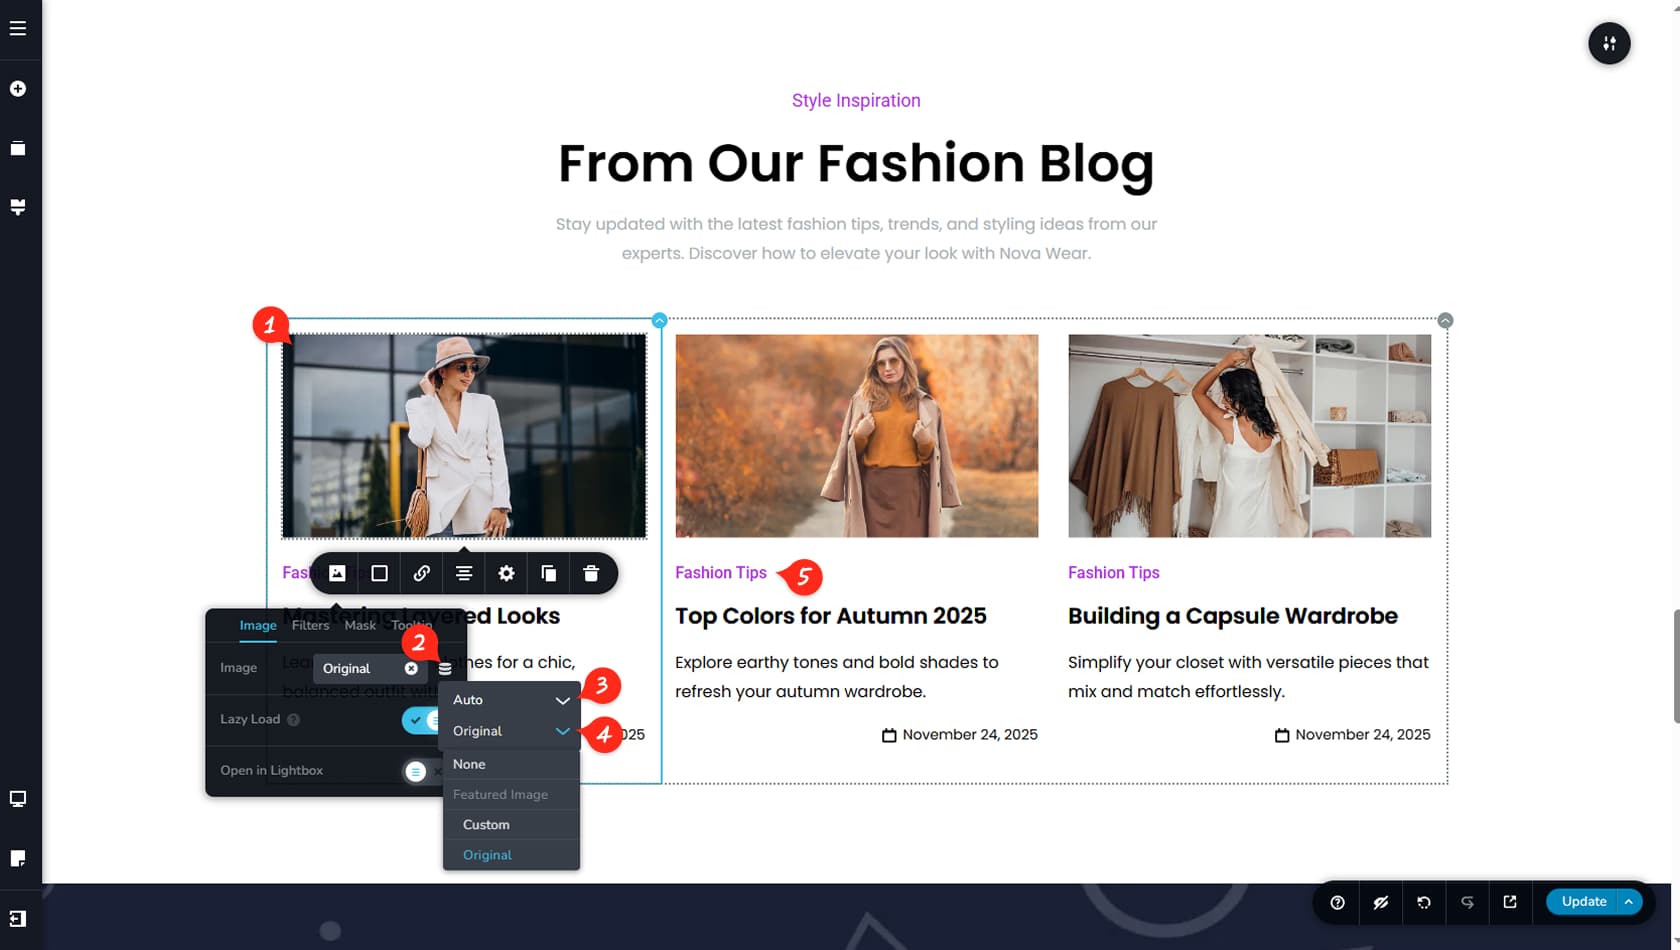
Featured Images
Many widgets support dynamic settings, but for posts, images are among the most important. After assigning a featured image in the CMS, you can display it dynamically by dragging and dropping an Image widget into the post column.
Dynamic Source
Once the image widget is added, click the first icon on the left side of the toolbar to open the Image panel. In the Source tab, instead of selecting an image from the Media Library, click the dynamic icon on the right side, represented by three stacked cylinders. This icon is essential for working with dynamic content. Both the Text and Image widgets include this dynamic option.
Automatic
Select the Auto option to automatically pull the featured image from the CMS rather than choosing one manually. The posts listing will now display each post’s assigned featured image.
Custom / Original
You can then choose between Custom and Original sizing. Custom allows you to control the image height, while Original preserves the original aspect ratio.
Non-Dynamic Content in Posts
Any text or image not connected dynamically to the CMS will appear identically across all items in the posts listing.
You can find more details about Dynamic elements in the Dynamic Elements article.
Blog Archive
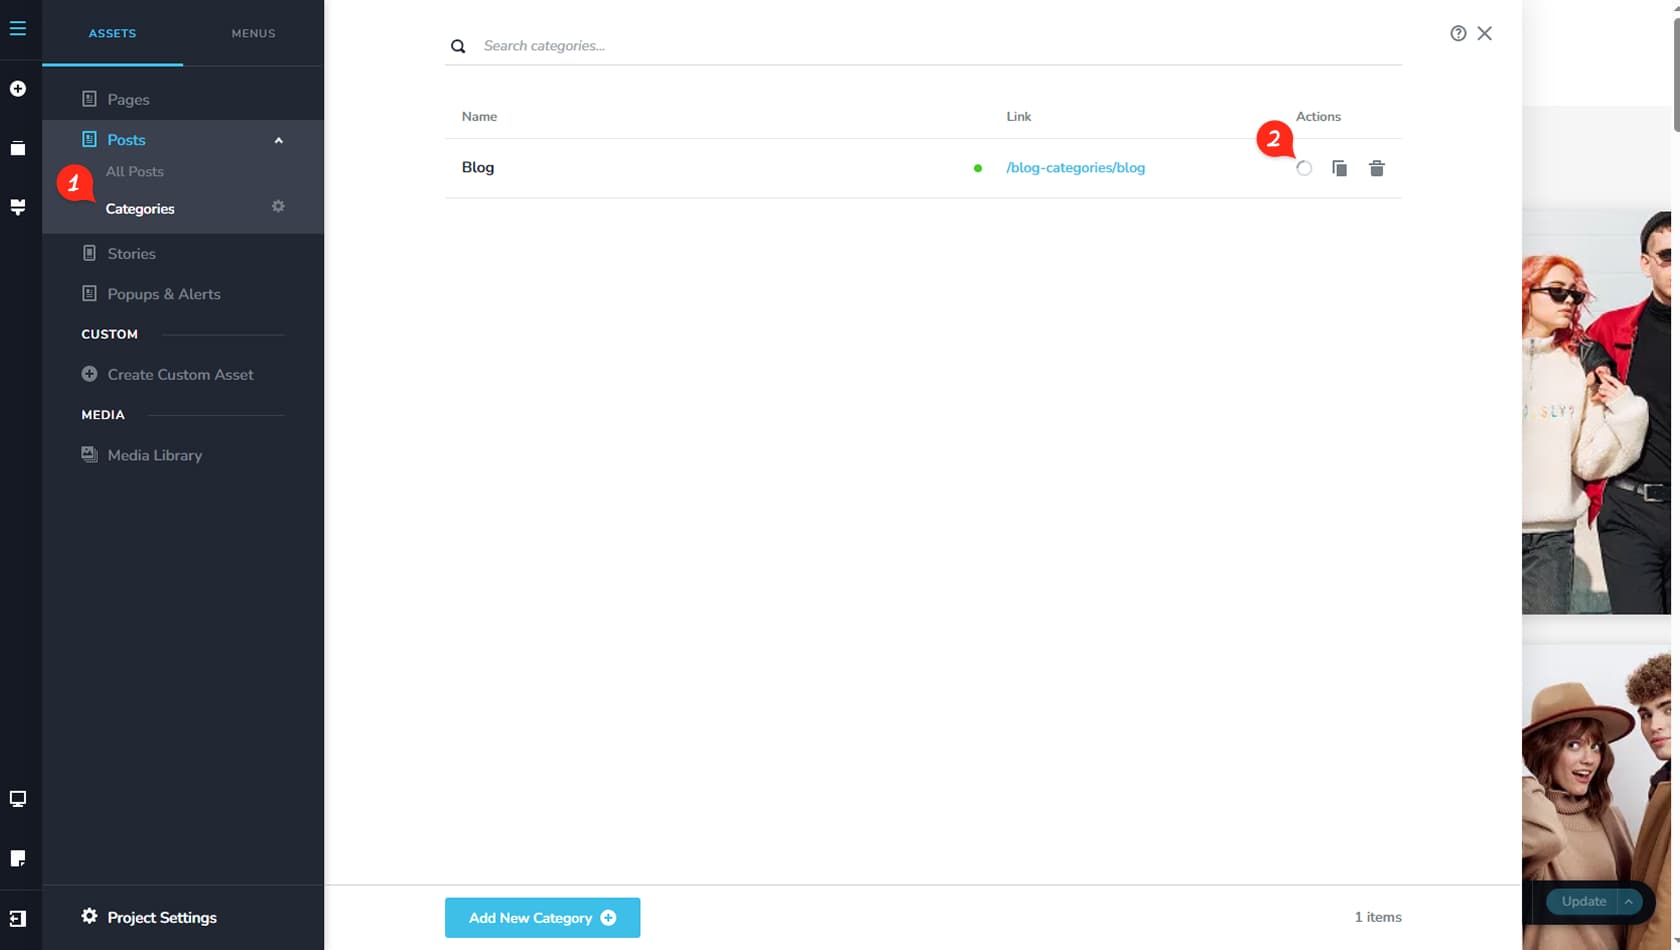
Categories
The same process applies when creating a blog archive. Begin by navigating to the Categories section within your Posts assets.
Edit Category
Then edit the category page just as you would edit any other page in the builder.
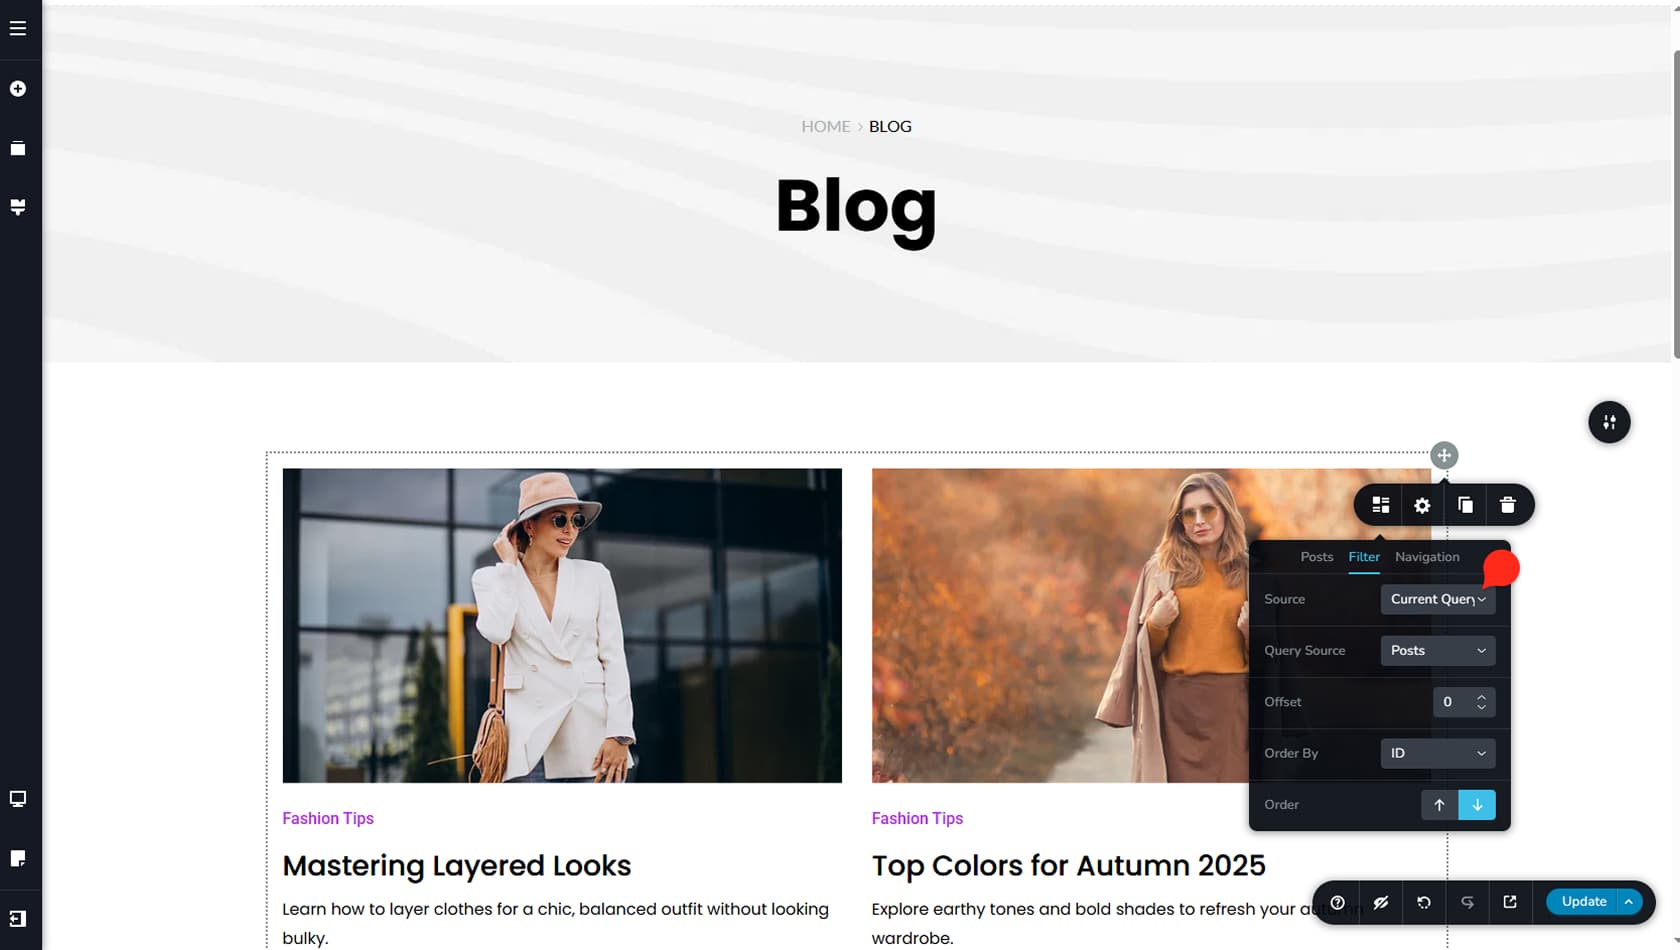
Finally, you can edit the Blog category in the builder like any other page. By selecting “Current Query” as the Filter source in your Posts widget, you ensure that the dynamic listing displays only the posts assigned to that specific category.
Edit Post
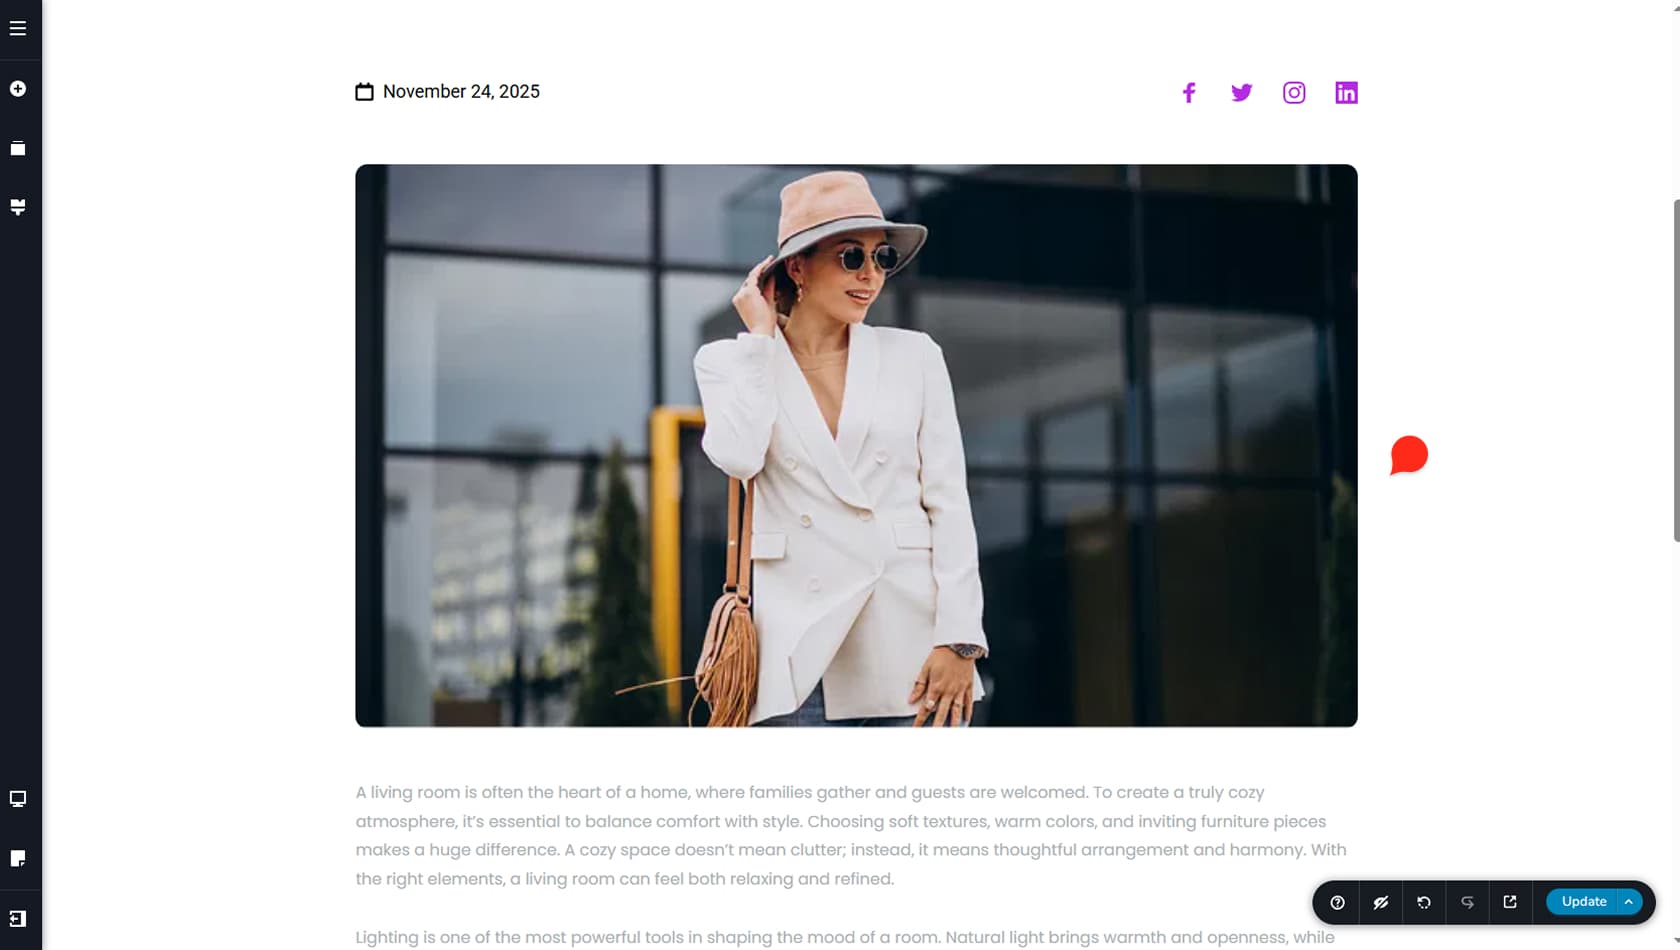
Editing a post is no different than editing any other page of your project. You can drag and drop any widget that you wish inside the post or even display a listing of posts inside it. By duplicating and editing the new post, you ensure the layout stays the same and you only need to change imagery and texts.