Create a blogging page
A blog is really two different things, and mixing them up is what makes people stuck:
- The blog page — one page listing all your articles, newest first. You build this once.
- The post pages — one page per article. You never build these. They appear automatically when you write a post.
This guide takes you through the three steps that get a working blog live. Two further sections after that cover designing what a single post looks like, and filling it in automatically.
Blog posts, categories, and ordinary pages are all treated the same way — as assets you edit with the normal builder. To change a category, you open it and edit it exactly like a page. There is no separate blog editor to learn.
Building it
Create your blog categories
Start here, before writing anything.
- Open the CMS section of your project
- Go to Categories
- Create the categories you need
- Give each category a clear name and slug
- Save changes
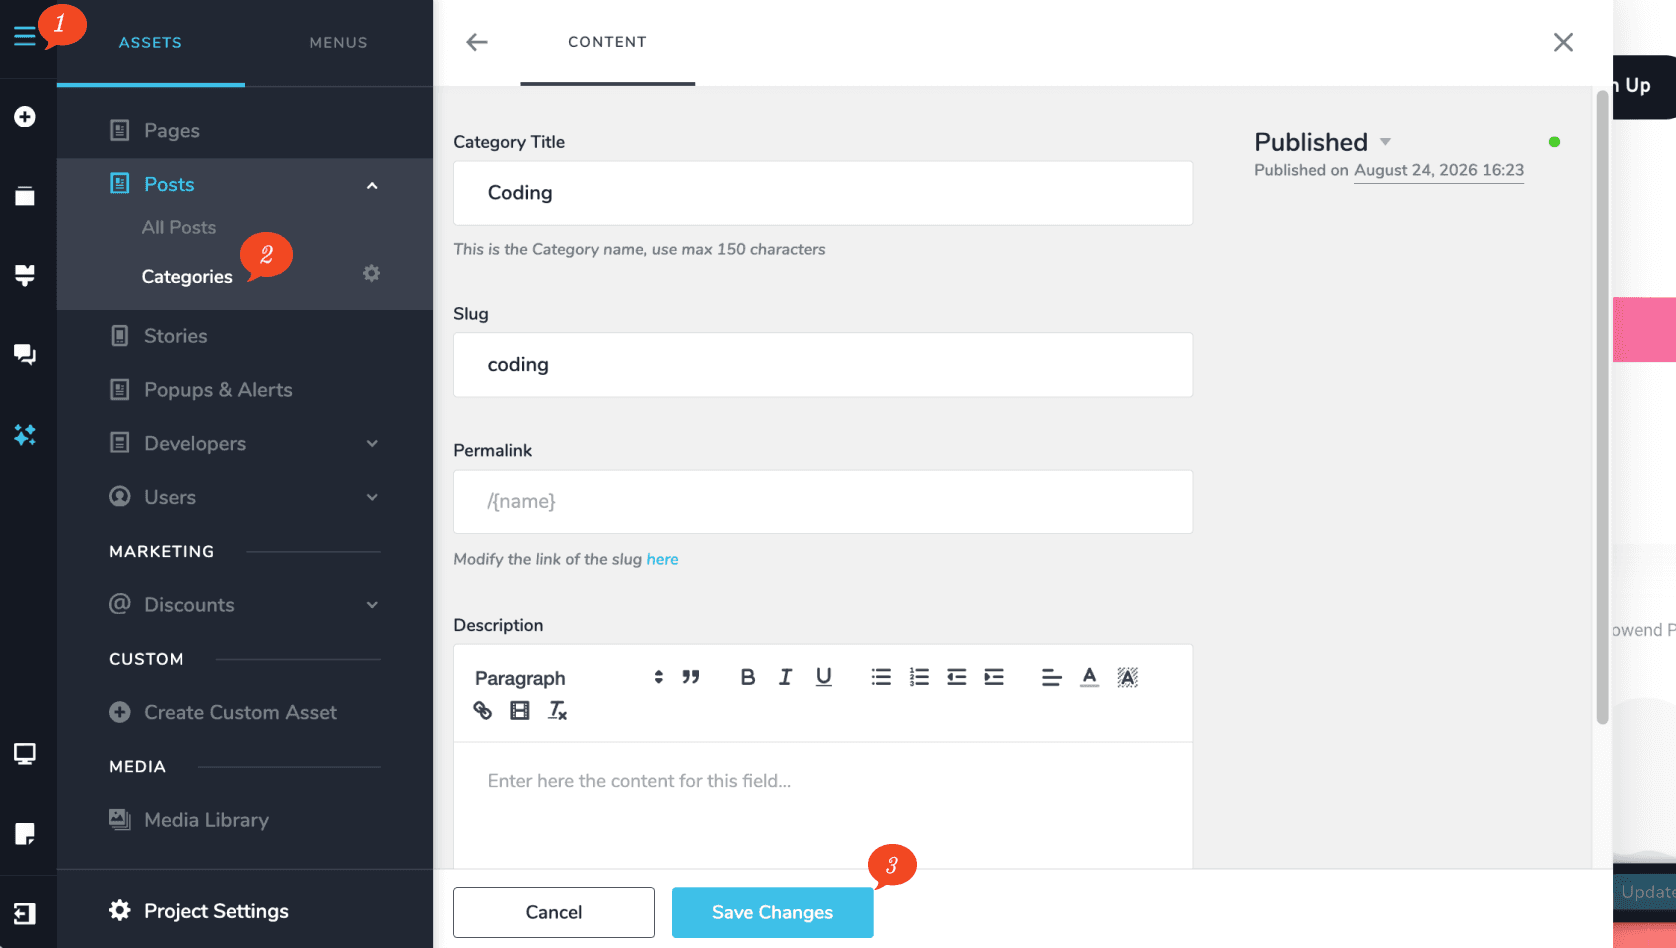
This matters because categories are later used to organise and filter your posts. Setting them up first saves tagging everything by hand afterwards.
Create a blog post
Each post is made up of the following:
| Field | What it is for |
|---|---|
| Title | The headline of your article |
| Slug | The short name used in its web address |
| Permalink | The full web address of the article |
| Featured Image | The picture shown beside it in listings |
| Excerpt | The couple of lines shown under the headline in listings |
| Category | The group it belongs to |
| Content | The article itself |
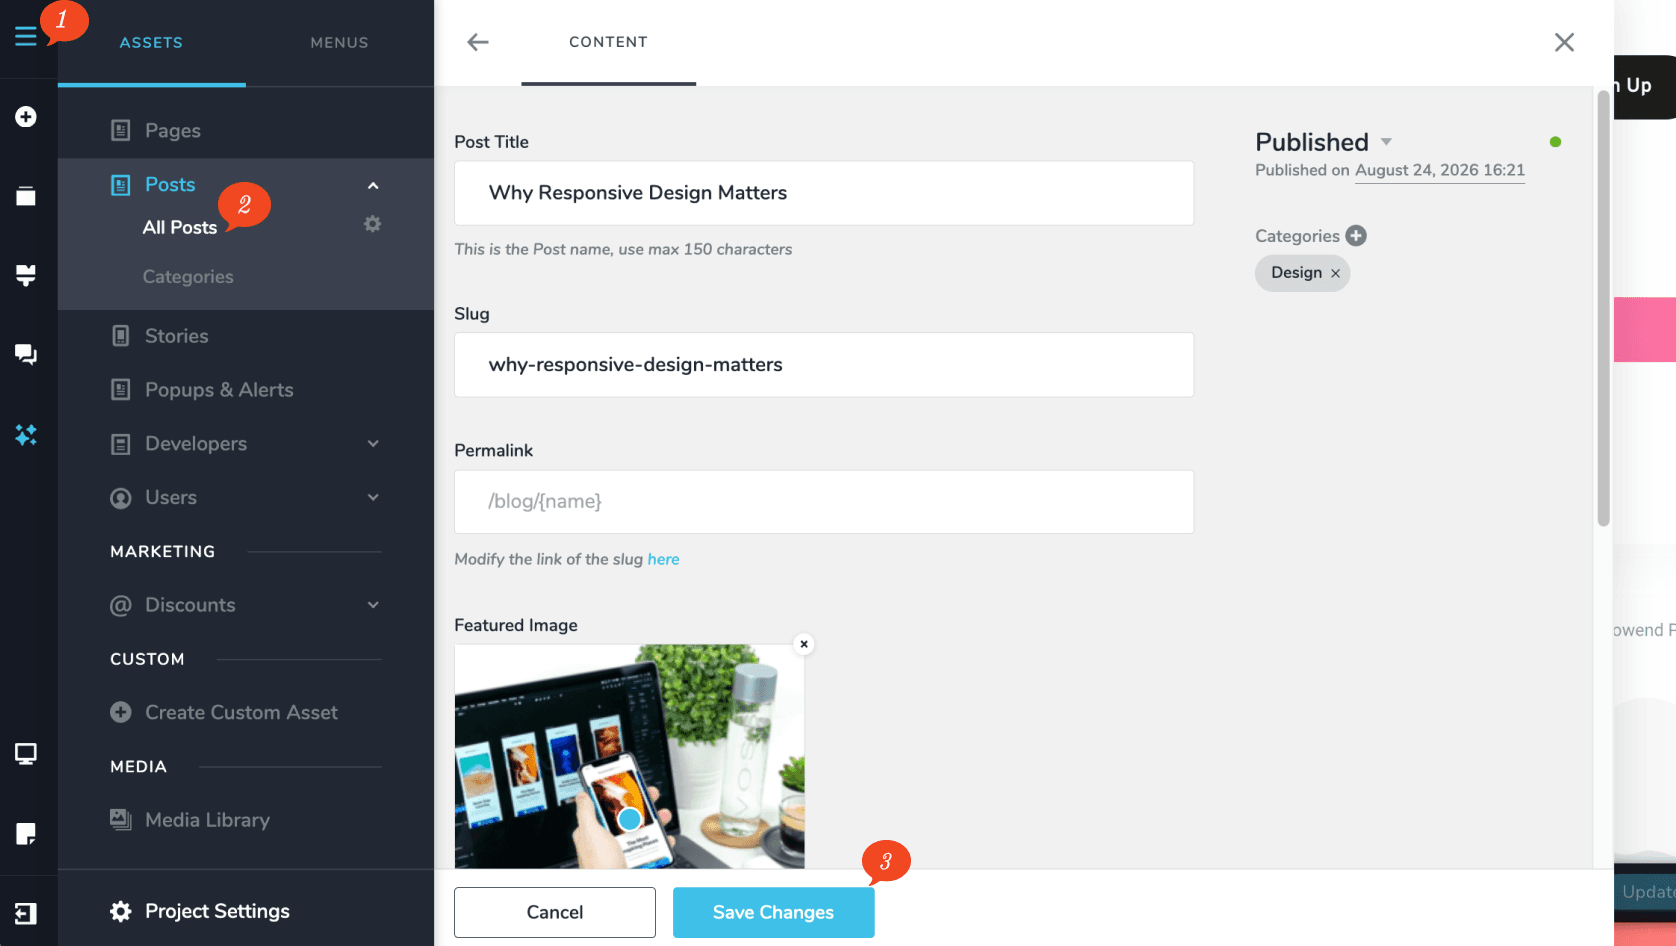
Make sure each post has a title, slug, permalink, featured image and category before publishing it.
Write the excerpt properly rather than leaving it empty — it is the only thing standing between your headline and a visitor deciding to click.
See Set up permalinks for SEO ranking for controlling how the addresses are built.
Create the Blog page
- Create a new page, or edit an existing one, called Blog
- Add your desired layout
- Add the Posts element
- Customise the layout and styling
- Configure how the posts should be displayed
- Publish the page
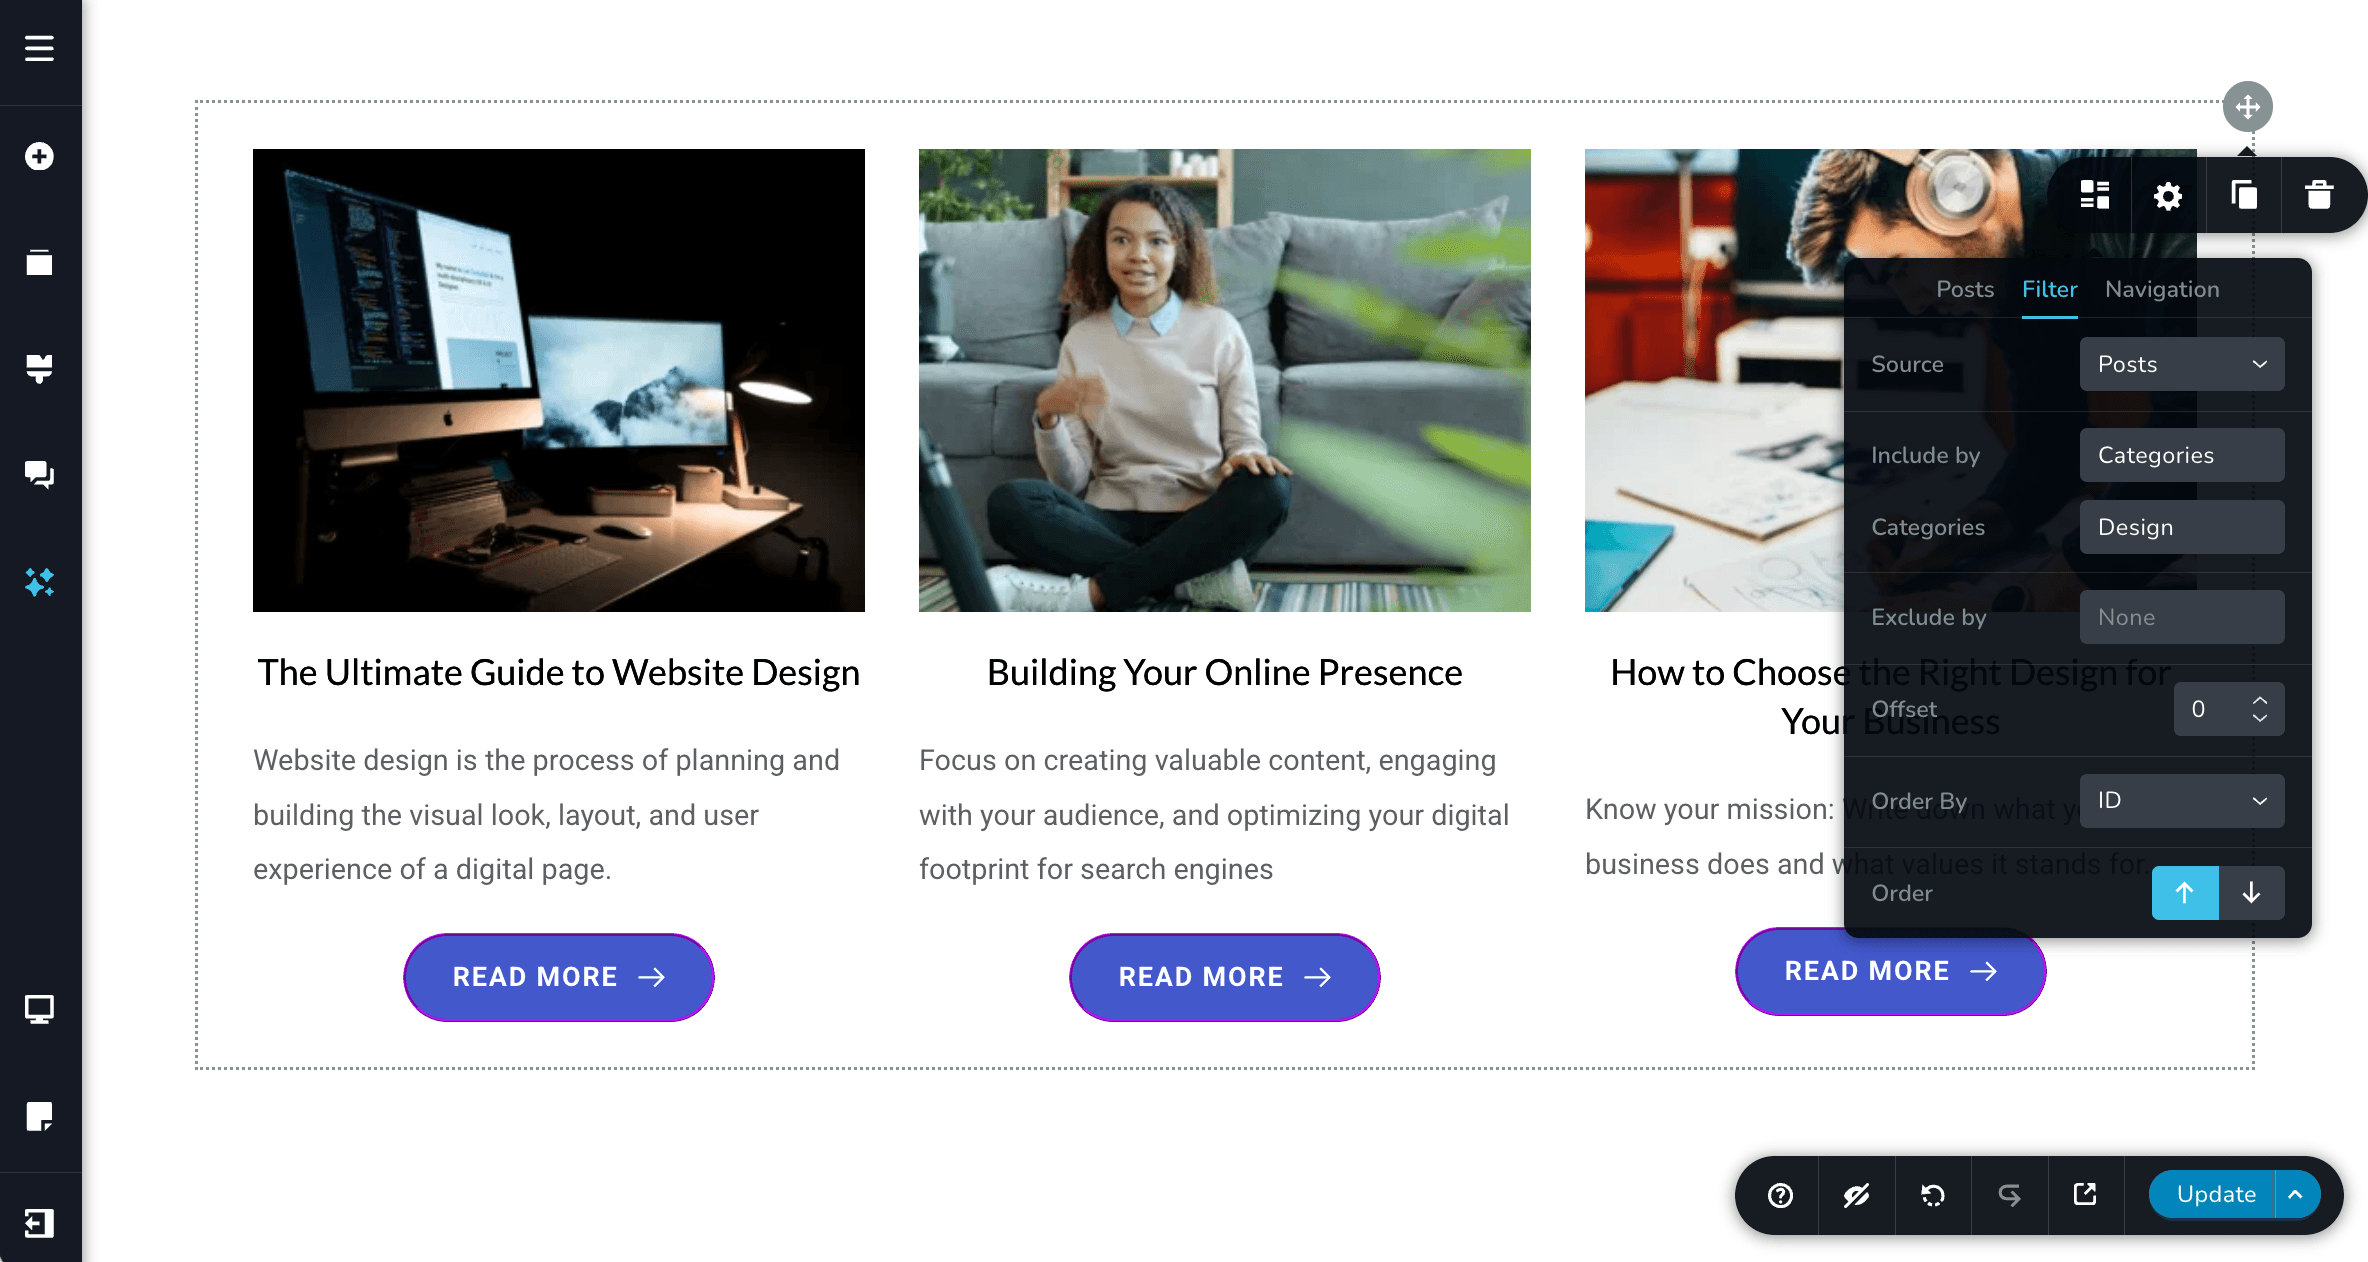
See Posts for everything the element can do.
At this point your blogging page is complete. Visitors can reach your blog and click through to an article.
The two sections below are optional extras — they control what a single article looks like, and how to build that layout once instead of for every post.
Design the individual blog post
Your blog page and your post pages show different things.
The blog page lists articles, each one showing roughly:
Dynamic Image
Post Title
Excerpt
Post Link (Read More)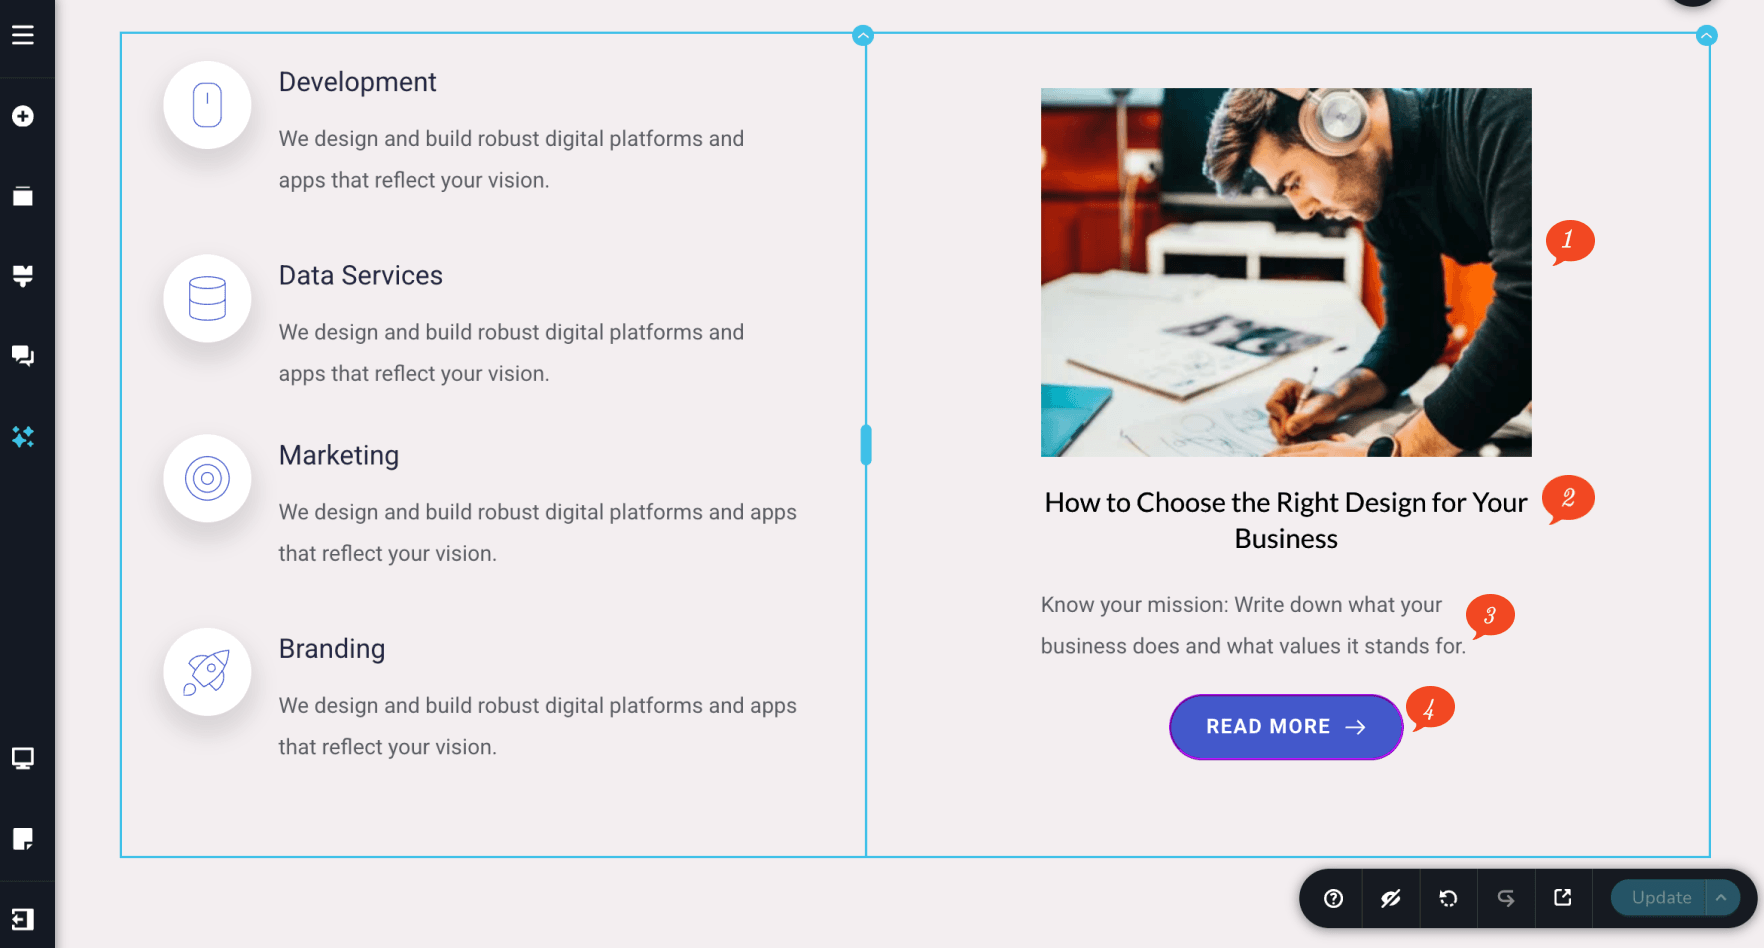
Clicking one opens the single post, which shows:
Category Type
Author Title
Published Date
Featured Image
Description
Post Content
Related Posts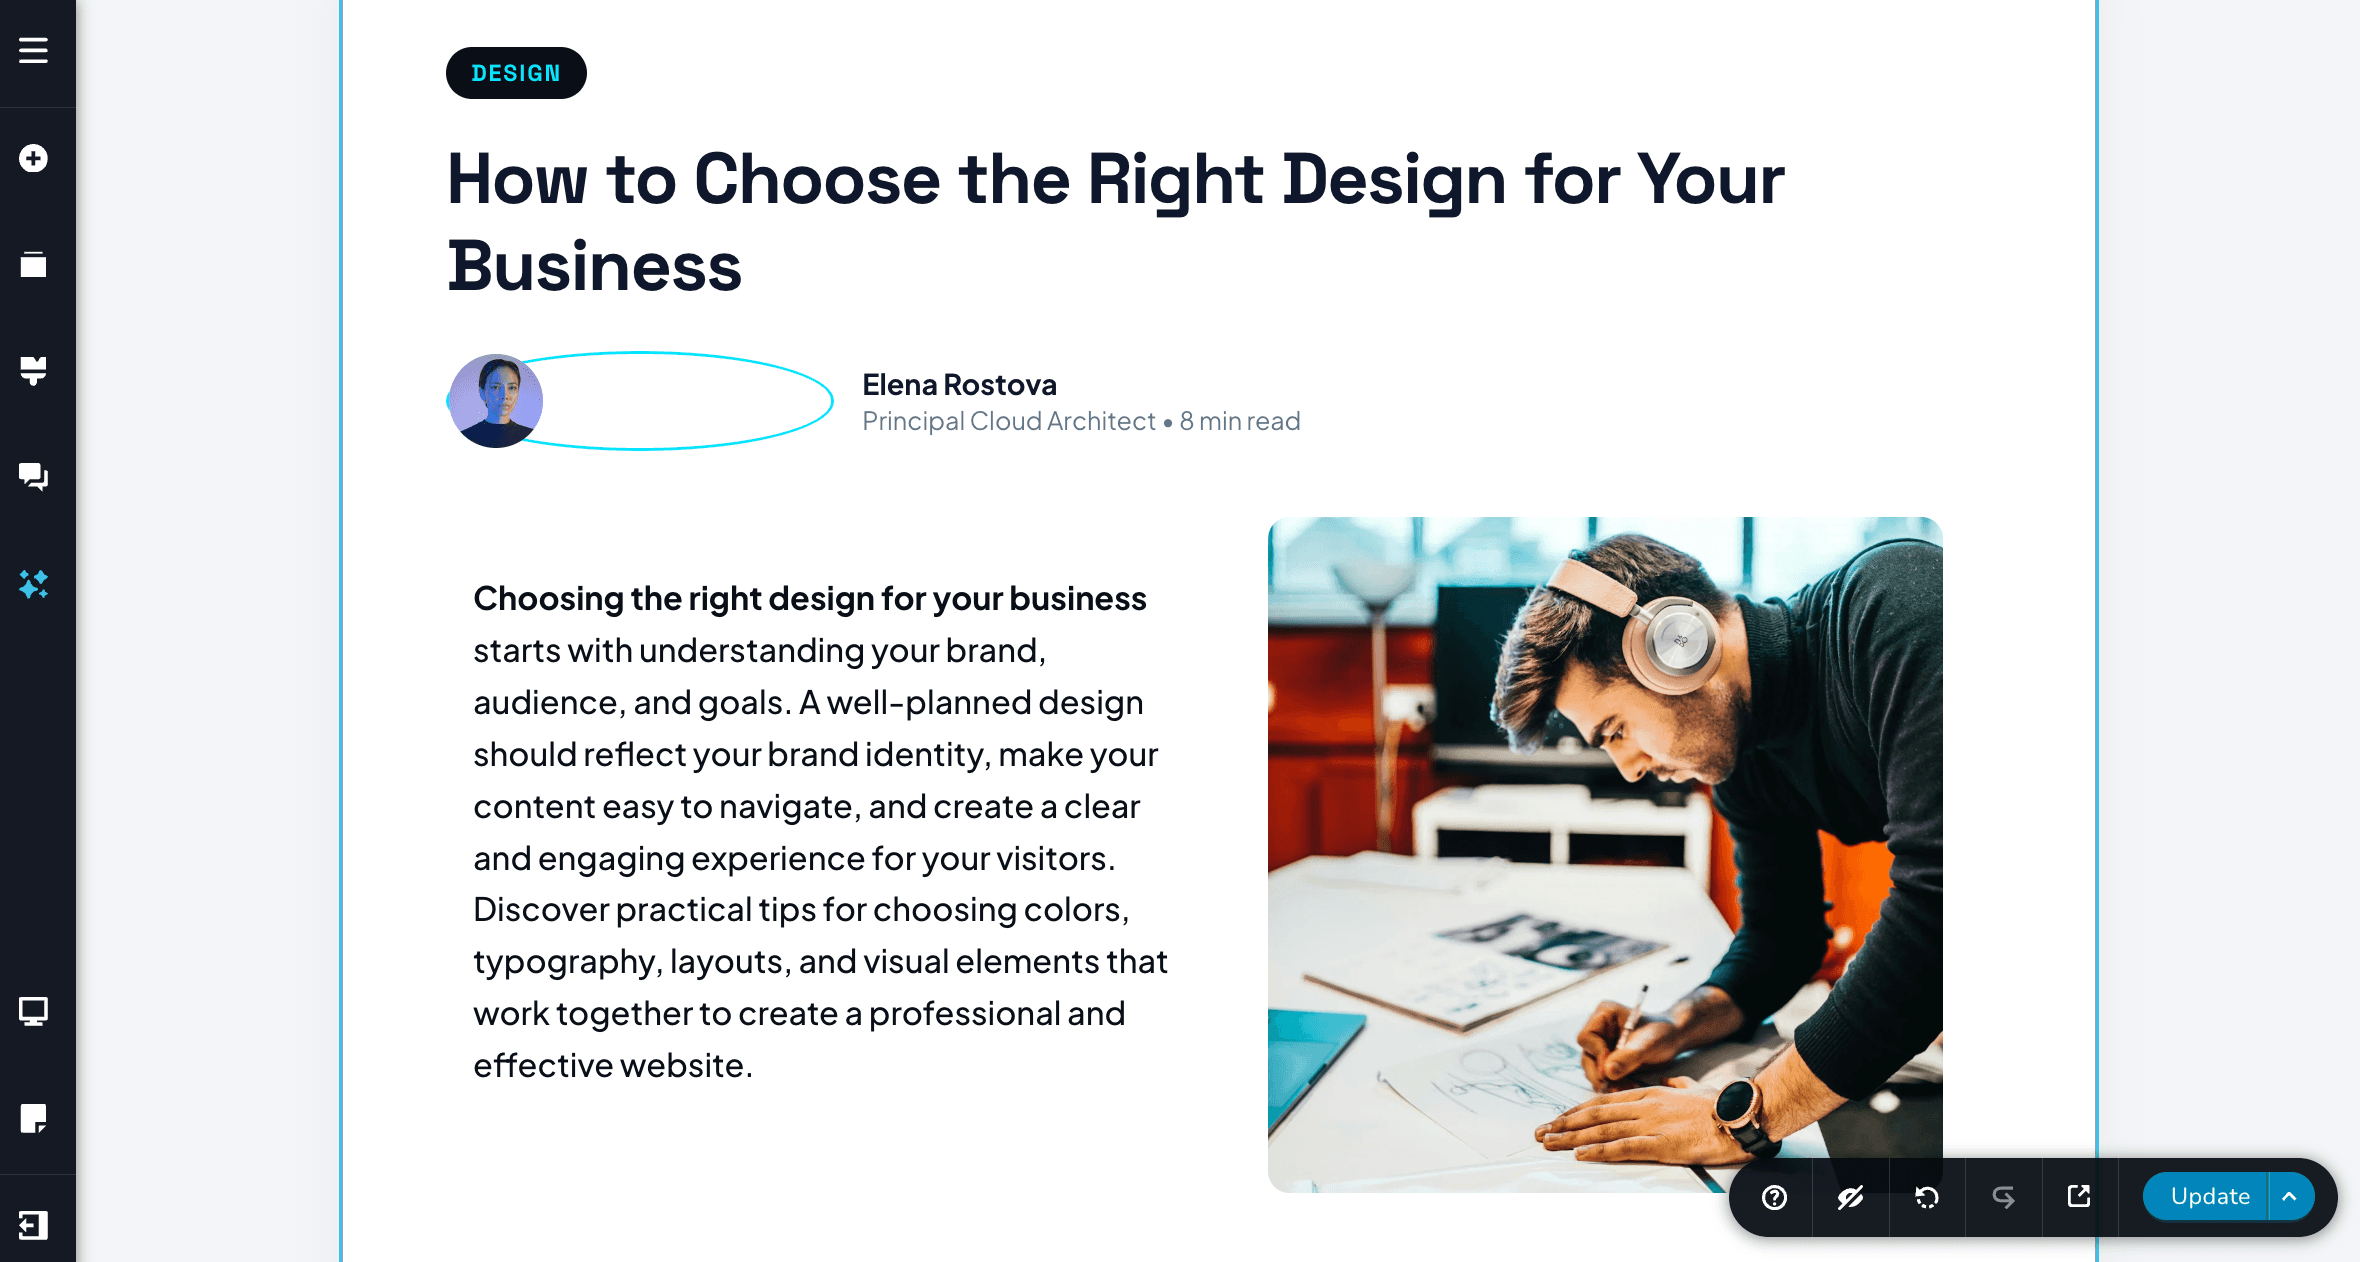
The listing exists to make people click. The single post is where they actually read.
Add dynamic content
This is the part that makes a blog worth having, rather than a set of pages built by hand.
Instead of typing the title, the image and the text into every post layout, you use dynamic elements — placeholders that fill themselves with whatever post is being viewed.
| Element | What it displays |
|---|---|
| Dynamic Title | The current post’s title |
| Dynamic Image | The featured image |
| Dynamic Excerpt | The post excerpt |
| Dynamic content | Information from the current post |
Every element has a dynamic icon in its settings — the small stacked-discs symbol. Clicking it swaps the element from showing fixed text to pulling content from the post itself.
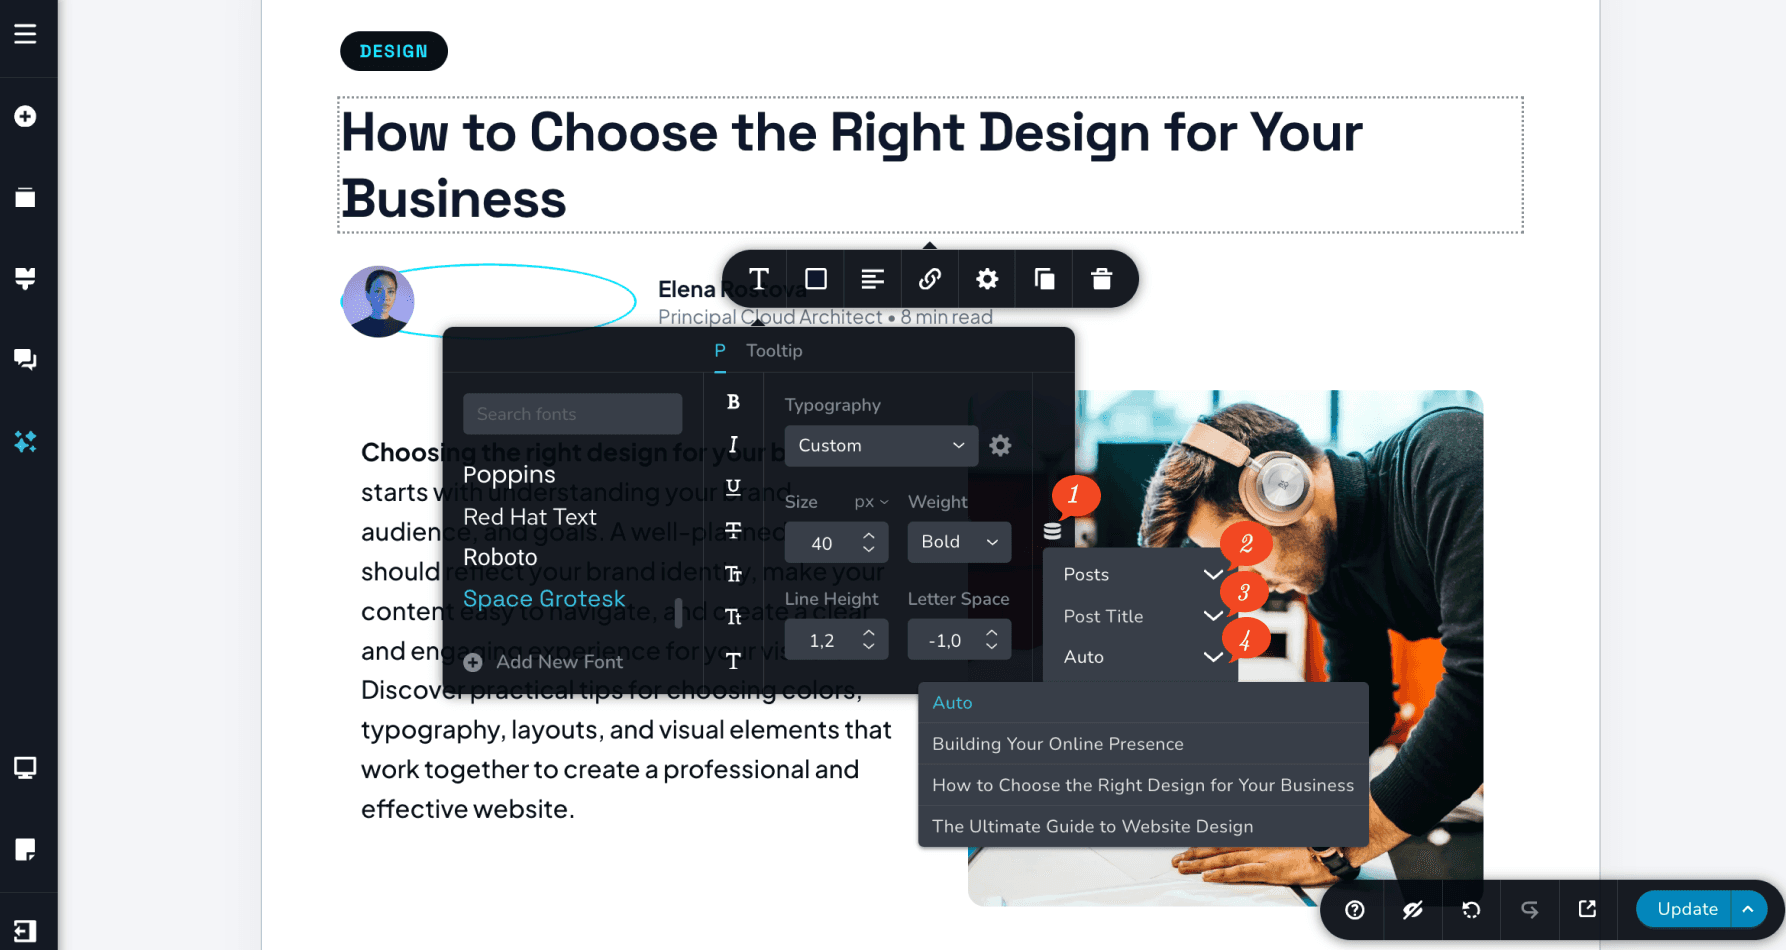
It opens three dropdowns, which you work through in order:
| Dropdown | What you choose | |
|---|---|---|
| 2 | Source | Where the content comes from, such as Posts |
| 3 | Field | Which part of it, such as Post Title |
| 4 | Which post | Leave it on Auto so the element follows whichever post is being viewed |
Leaving the third dropdown on Auto is the important one. Pick a named post instead and the element shows that same post forever, on every page.
See Dynamic elements.
Create a reusable post template
Instead of designing every blog post individually, you can create one reusable post layout and apply it to many posts, using three things together:
- Dynamic content — so the layout fills itself with each post’s own material
- A global block — so one edit reaches every post at once
- Display conditions — the rule saying which posts it applies to
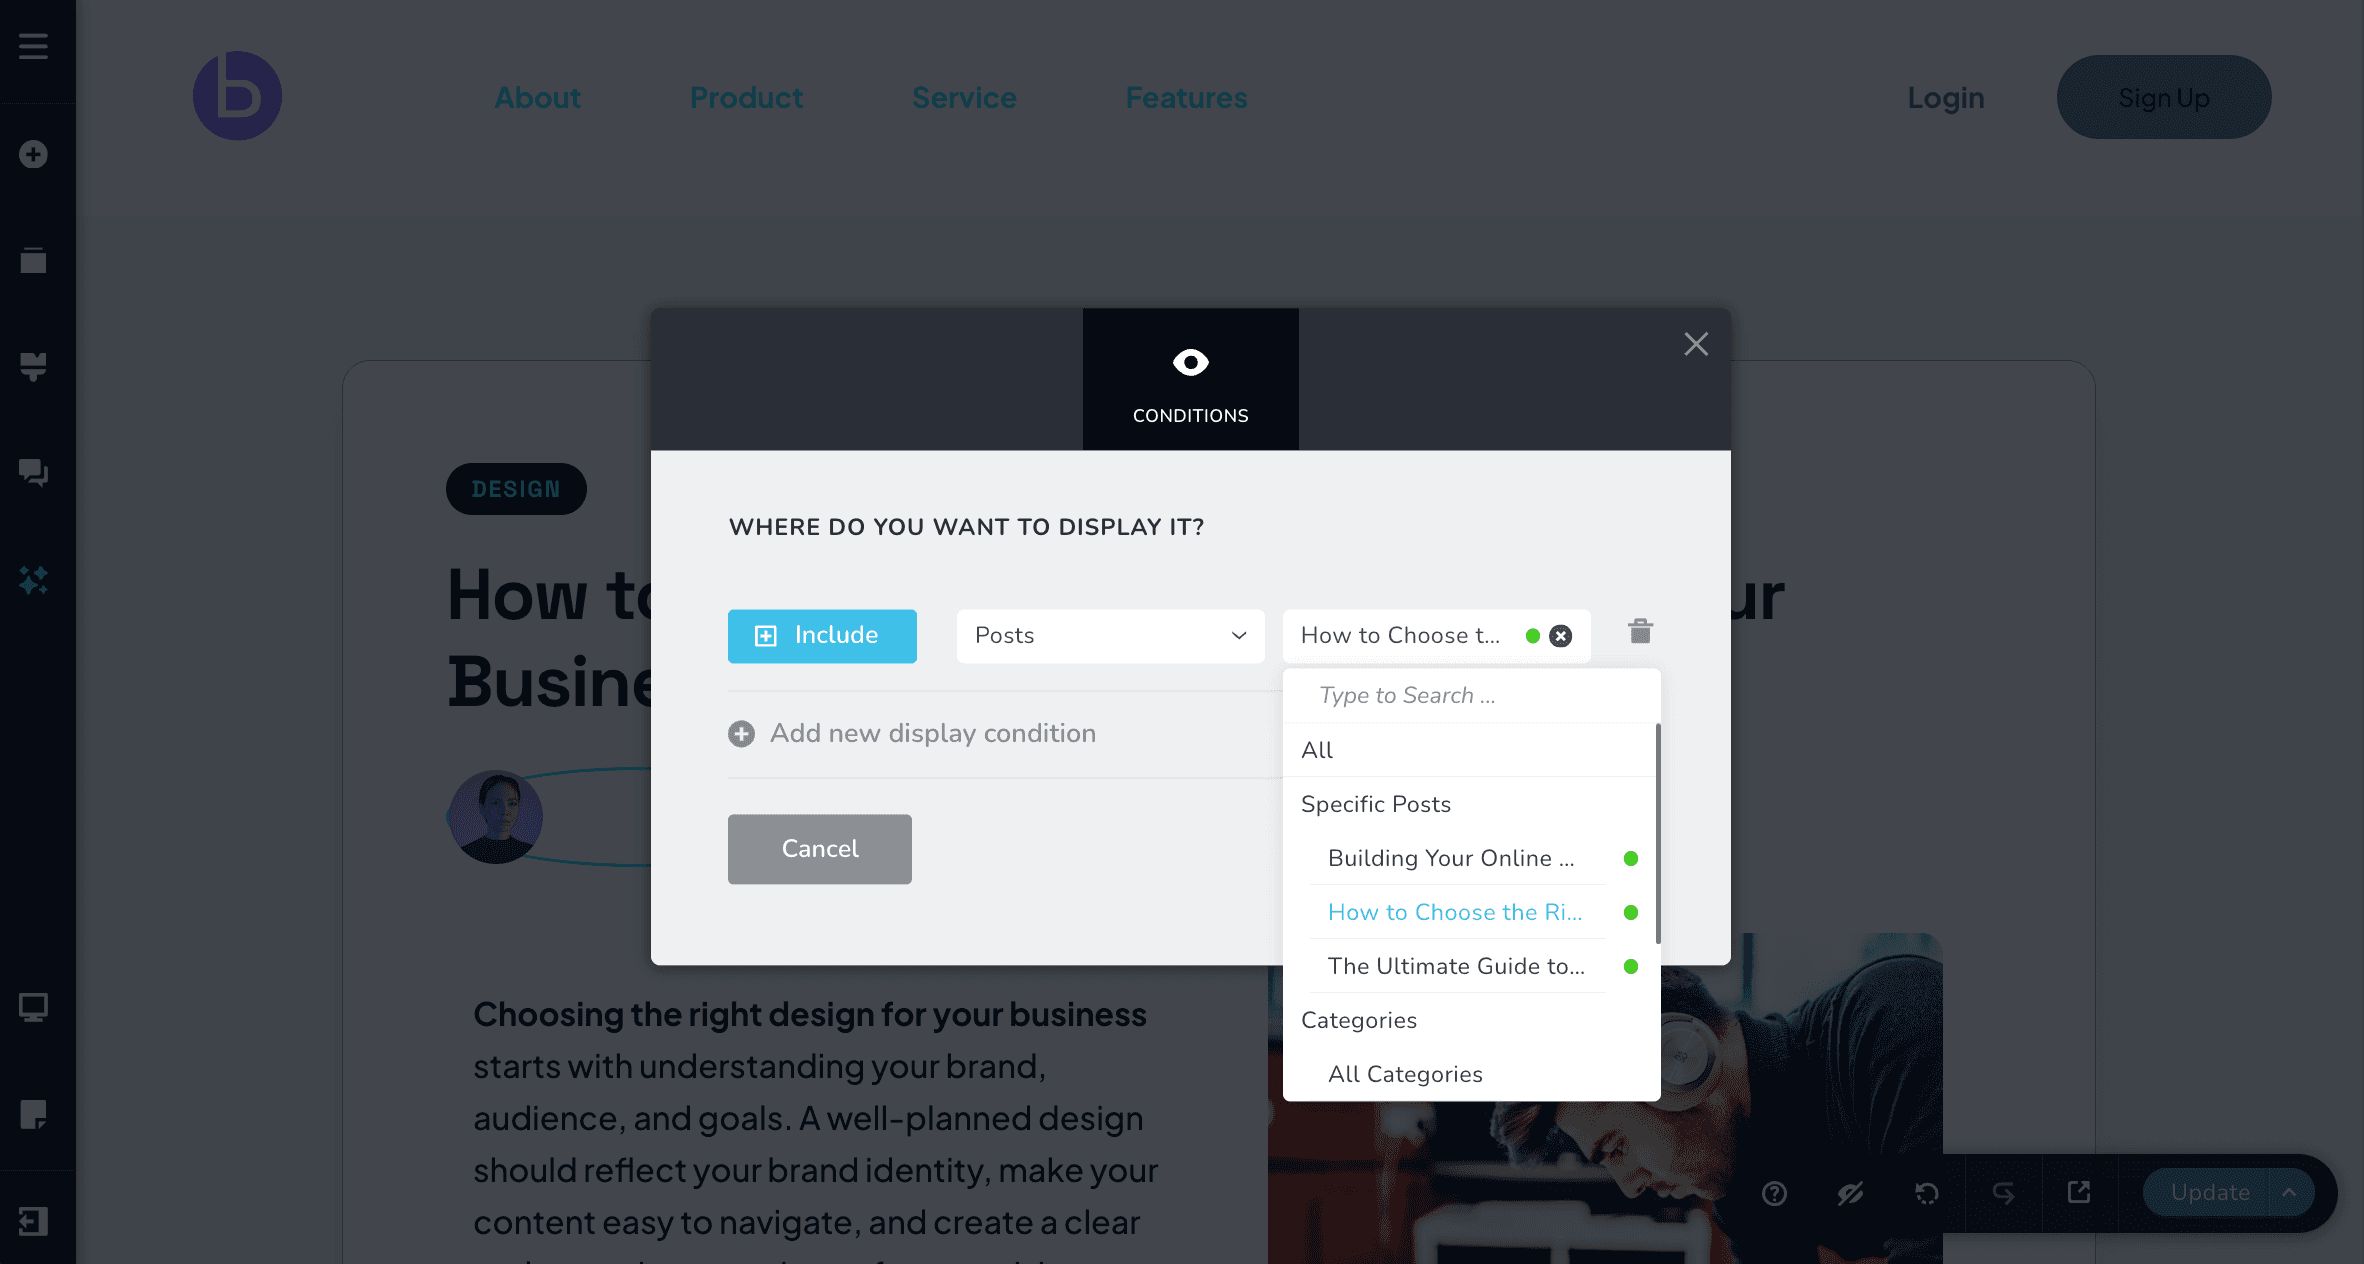
This is the recommended approach for dynamic templates. Build the layout once, and every article you ever publish arrives already designed.
See Post templates and Global blocks.